Asante Technologies Voyager II User Manual
Page 74
The Add Event setting page and the Add Schedule setting page are basically the same except
that the Add Schedule setting page does not have the option “Trigger by” to indicate the
sources of the trigger event.
Click Save to save and activate your settings when you complete setting.
Delete: delete the event cluster setting.
Modify: modify the event cluster setting.
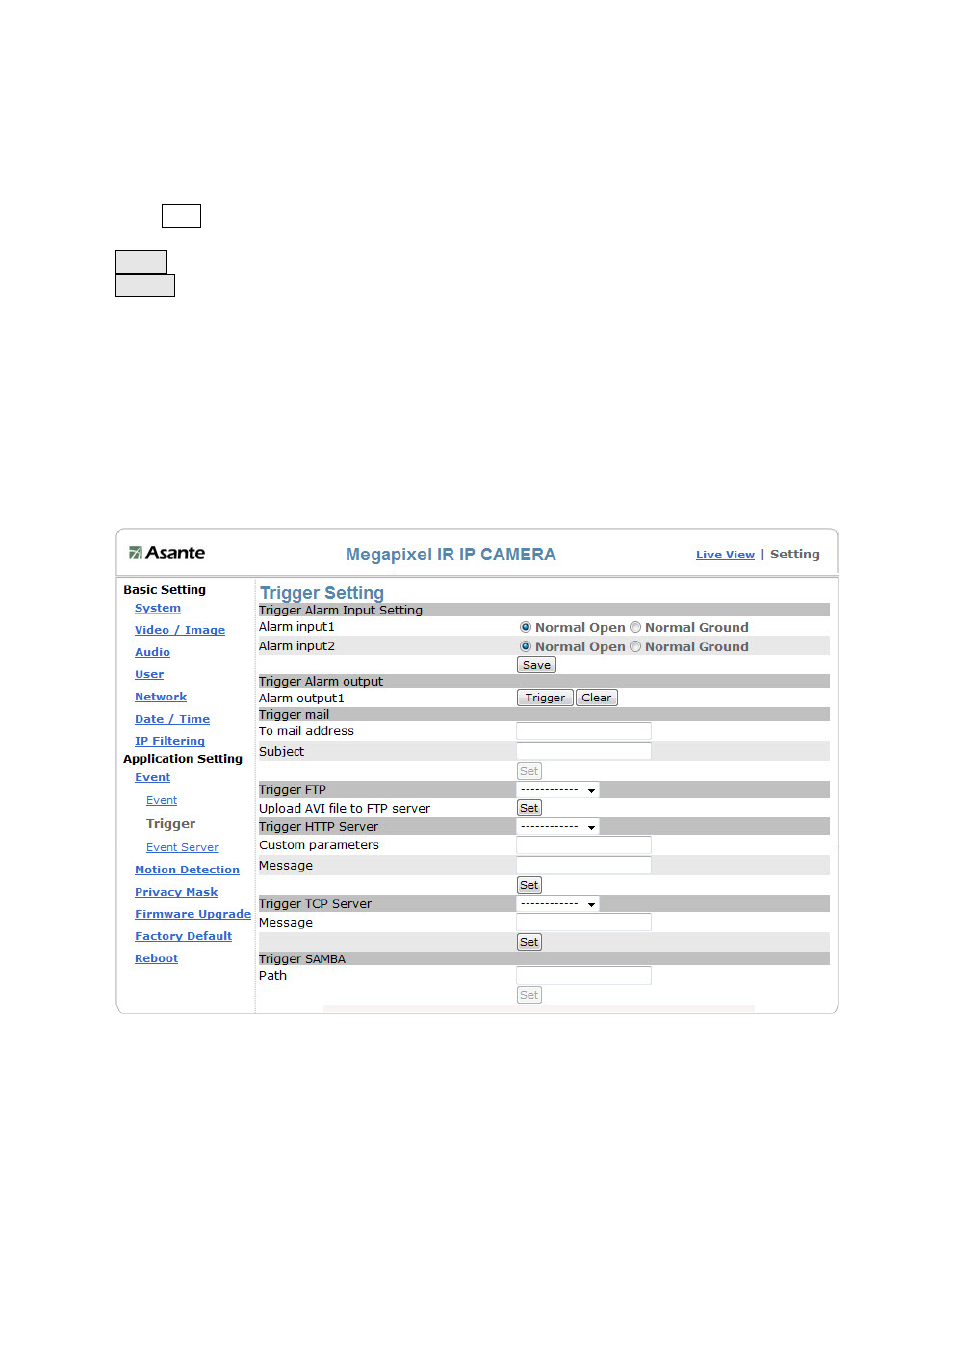
Application Setting > Event > Trigger (manual test of trigger response)
Whenever the camera detects abnormal events during the scheduled time, it will
automatically respond by performing trigger response. There are 2 types of trigger responses:
alarm sending and emailing the alarm or recorded image to the specified server. To use this
function, enter the server information by accessing Application Setting > Event > Event
Server. You may perform manual test as specified in this section once you complete the
setting to ensure that all functions are working properly.
Trigger setting
The default status of the digital input pin is set as “Normal Open”, but users can change it to
“Normal Ground” by setting the page “Setting > Application > Event > Trigger”:
1. When alarm input is set to be “Normal Open”, then the external device connected to
alarm input pin should be in open status. So when the external device is triggered to close
status, the alarm input pin will be triggered.
2. On the contrary, when alarm input pin is set to be “Normal Grounded” then the external
device connected to alarm input pin should be in close status. So when the external device
is triggered to open status, the alarm input pin will be triggered.
74