Assembly instructions for, D) (e) (f) (c), A) (b) – Holtkoetter 3502 User Manual
Page 2
e-mail: [email protected]
www.holtkoetter.com
ASSEMBLY INSTRUCTIONS FOR
Major lamp parts manufactured in Germany by Holtkötter Leuchten GmbH.
Bulbs manufactured in Germany by Osram GmbH. Final assembly by Holtkötter in South Saint Paul, MN.
Holtkötter
®
and Holtkötter Leuchten
®
are registered trademarks of Holtkötter. All Rights Reserved.
© Holtkötter
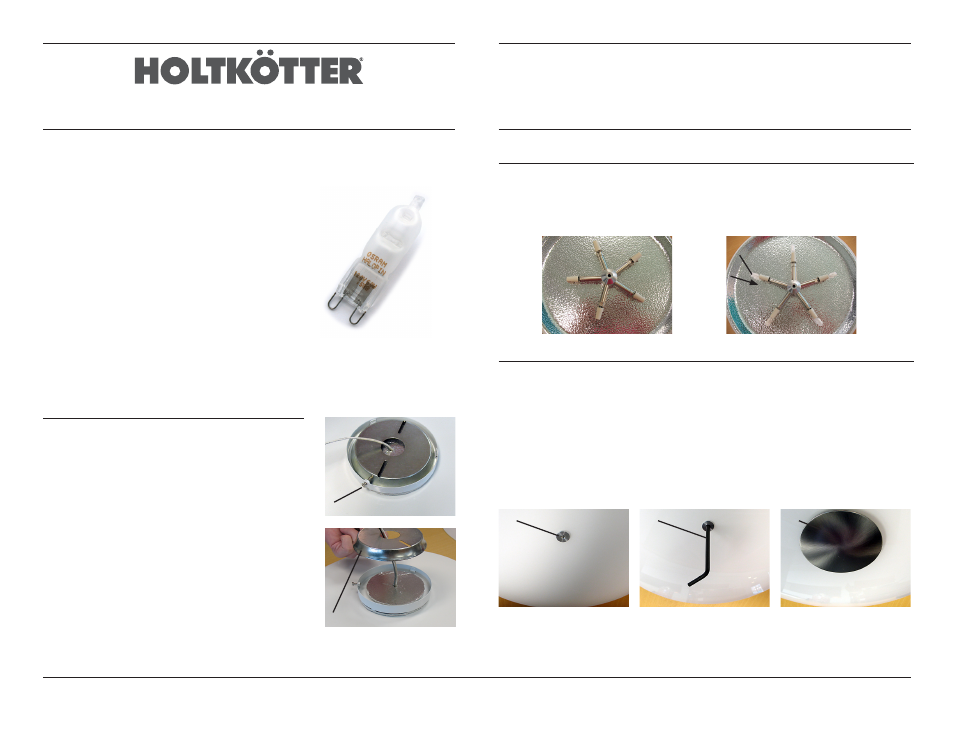
Install the Bulbs
1. Before reconnecting power to the box, install the bulbs.
2. Install each bulb (C), being careful not to touch the bulb envelop with bare hands.
Hold the bulb and push straight into the socket.
(Photos represent a sample of fixture 3505/5. The fixture you are installing may only have 2
(3502/2) or 3 (3503/3) bulbs.)
Install the Glass Shade
1. Install the glass shade on the fixture, centering the aluminum nut (D) on the fixture.
2. OPTIONAL: If desired, the glass can be lowered by installing the additional plastic
washers provided. Prior to installation, set one or two washers on the aluminum screw
inside the glass shade.
3. Using the 5mm hex key (E) provided, screw the glass shade onto the middle stem of
the fixture. Hand-tighten to secure the glass to the fixture. Do not overtighten.
4. Install the finished disc (F) by screwing it into place in the center of the aluminum nut
(D).
(D)
(E)
(F)
(C)
Please make sure that the following parts for ceiling fixture are enclosed:
1. Fixture including backplate
2. Glass shade
3. Bulb Kit including:
A. Finished Trim Ring (Solid or Dekor)
B.
Optional plastic washers (to lower the glass if desired)
C. 5mm Hex Key
D. Bulbs:
3502/2 - 120 Watts, total (2 ea x max. 60 Watt)
3503/3 - 180 Watts, total (3 ea x max. 60 Watt)
3505/5 - 300 Watts, total (5 ea x max. 60 Watt)
60 Watt Halopin by Osram
Order Code: 9250*060-HPNFR
Be sure to turn off the circuit breaker before installing this fixture.
It is recommended that this fixture be installed and hung by a licensed
electrician.
Mounting Instructions
1. Disconnect power to the outlet box before installation.
2. Loosen screw (A) to release the fixture from the
backplate (B).
3. Mount the backplate (B) to the outlet box.
4. Connect the wires from the fixture with the wires in the
outlet box according to generally accepted electrical
standards.
5. Slip the fixture onto the backplate (B). Using a phillips
head screwdriver, secure the fixture to the outlet box by
tightening the screw (A).
(A)
(B)
Ceiling Fixtures
No. 3502, No. 3503 & No. 3505