Assembly instructions for – Holtkoetter 5231 User Manual
Page 2
e-mail: [email protected]
www.holtkoetter.com
ASSEMBLY INSTRUCTIONS FOR
Major lamp parts manufactured in Germany by Holtkötter Leuchten GmbH.
Final assembly by Holtkötter in South Saint Paul, MN.
Holtkötter
®
and Holtkötter Leuchten
®
are registered trademarks of Holtkötter. All Rights Reserved.
© Holtkötter
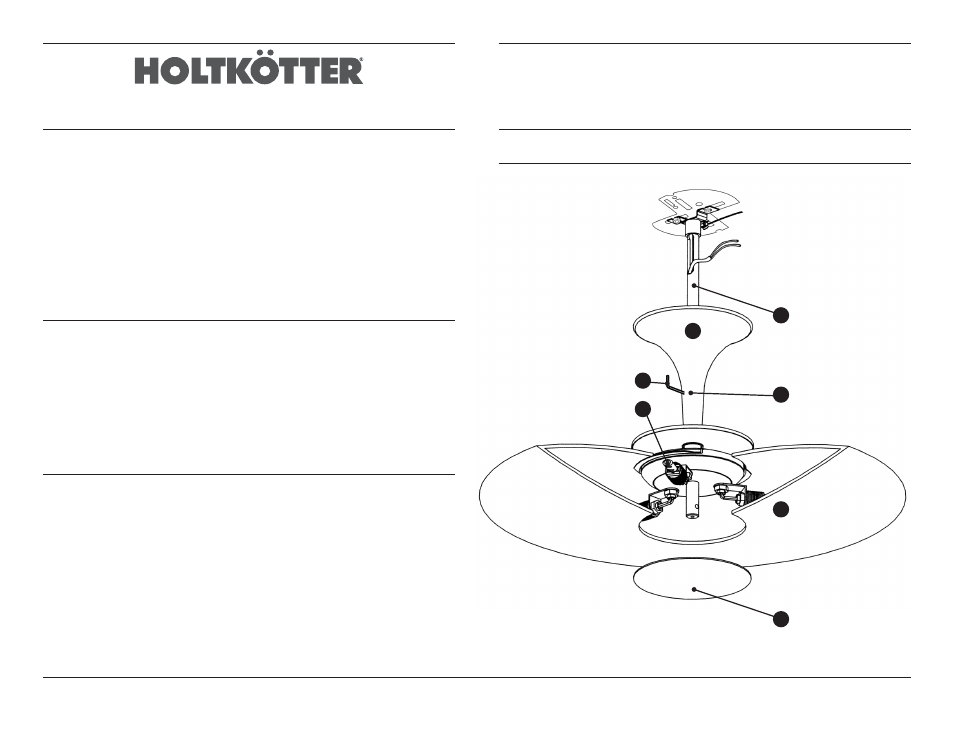
Please make sure that the following parts are enclosed:
A. Fixture including crossbar strap assembly
B. Glass shade
C. Allen Wrench
D. Bulb: 3 each, max. 75 Watt Halopin, Frosted
Order Code: 9250*075-HPNFR
Be sure to turn off the circuit breaker before installing this fixture. It is
recommended that this fixture be installed and hung by a licensed
electrician.
Mounting Instructions
1. Disconnect power to the outlet box prior to installation.
2. Loosen the set screw (E) located on the main stem of the fixture to release the fixture
from the inner stem and crossbar strap assembly (F) with the allen wrench (C) provided.
3. Mount the crossbar strap assembly (F) to the outlet box.
4. Connect the wires from the fixture with the wires in the outlet box according to generally
accepted electrical standards.
5. Slip the fixture onto the crossbar strap assembly being careful to align the groove of the
inner stem (F) with the location of the set screw (E) on the stem of the fixture. Tighten the
set-screw (E) to secure the fixture to the crossbar strap assembly.
Install the Bulb and Glass Shade
Once the fixture is mounted to the outlet box, install the three bulbs.
1. Being careful not to touch the glass portion of the bulb with bare hands, hold the 75
Watt Halopin bulb and push straight into the socket. Repeat for the other two bulbs.
2. Install the glass shade by carefully putting the glass over the bulbs and socket
assemblies. Holding the glass up against the upper backplate, screw the finished
reflector plate (G) onto the stem of the fixture.
Diagram 1
E
B
D
F
A
C
G
Ceiling Fixtures
No. 5231 & No. 5232