HighPoint NA762TB User Manual
Page 16
HighPoint Technologies Inc. 16
NOTE: If the NA762TB was configured in RAID 6 mode, up to two drives can fail with no loss of data. Replace any
failed drive as soon as possible.
Follow the steps below to identify and replace a failed drive.
1) Launch the WebGUI
2) Mute the alarm with the Beeper Mute button.
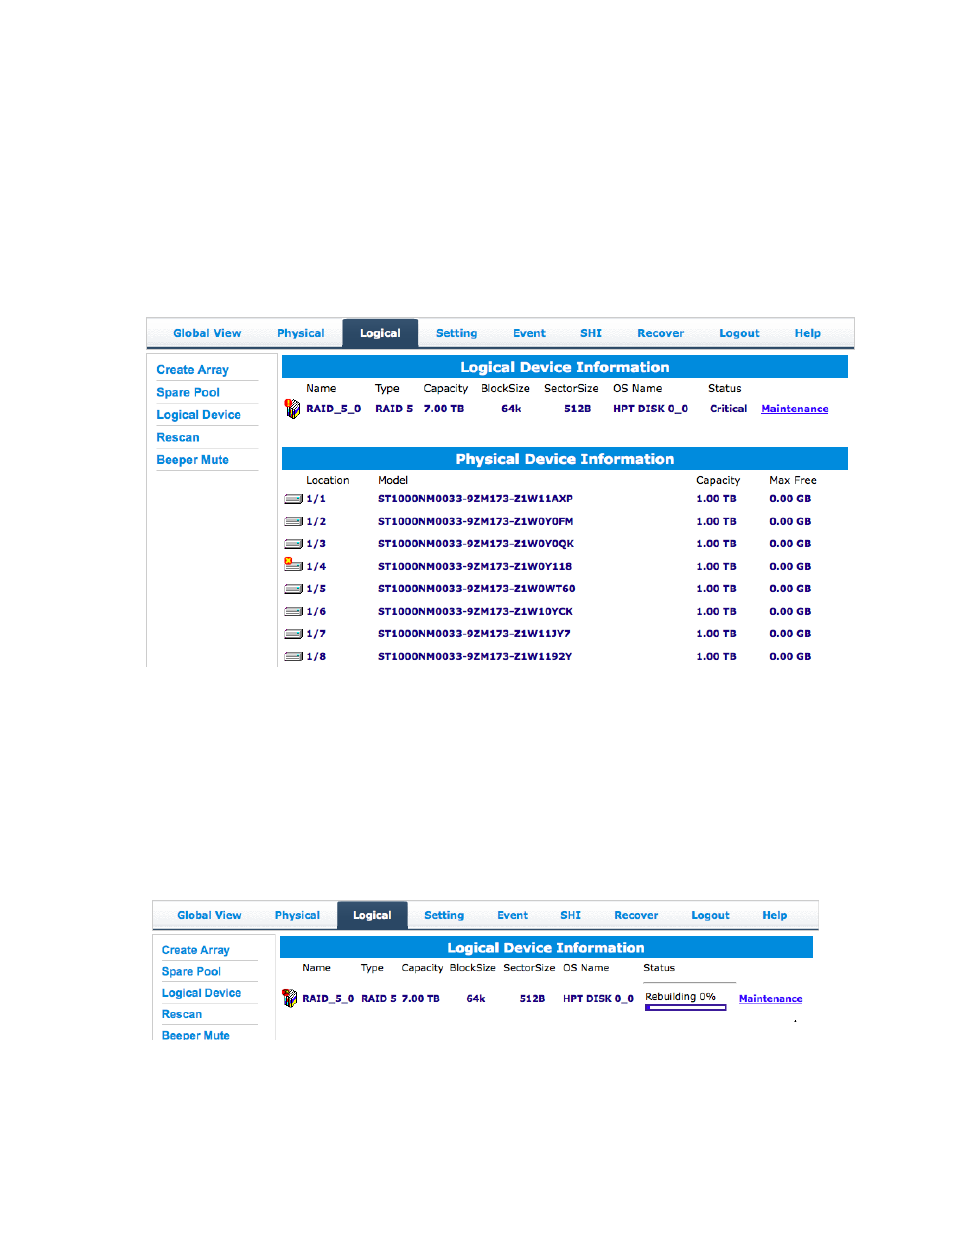
3) The WebGUI will display information like that shown below. An exclamation mark on the RAID array icon
indicates that the “Status” of the array is Critical. The lower portion of the GUI indicates which drive in
which disk unit has failed.
Note: In this example drive 4 of the RAID 5 Array of has failed.
4)
Unlock the disk module Key and remove the failed drive by gently sliding the drive module out of the
enclosure.
WARNING: Make absolutely sure that you remove the failed drive indicated by the GUI. The HDD status LED
can also help locate the Failed disk. When the disk has failed, the NA762TB’s HDD status LED will emit a
solid red light. Reinstall the disk module immediately if you remove the wrong disk module.
5) Replace the failed drive with a new disk module and secure in place. Once the drive has spun up to speed,
the GUI will indicate that the array is rebuilding (The “Status” shows Rebuilding and the percentage
complete) as shown below. The rebuild time is approximately 2 hours per TB.
6) Once the rebuild is complete, the RAID array will return to the Normal status. Your data is now secure.