Caution – Merit Medical ReSolve Biliary Locking Drainage Catheter User Manual
Page 3
INSTRUCTIONS FOR USE:
Seldinger Entry Technique or guide Wire Exchange
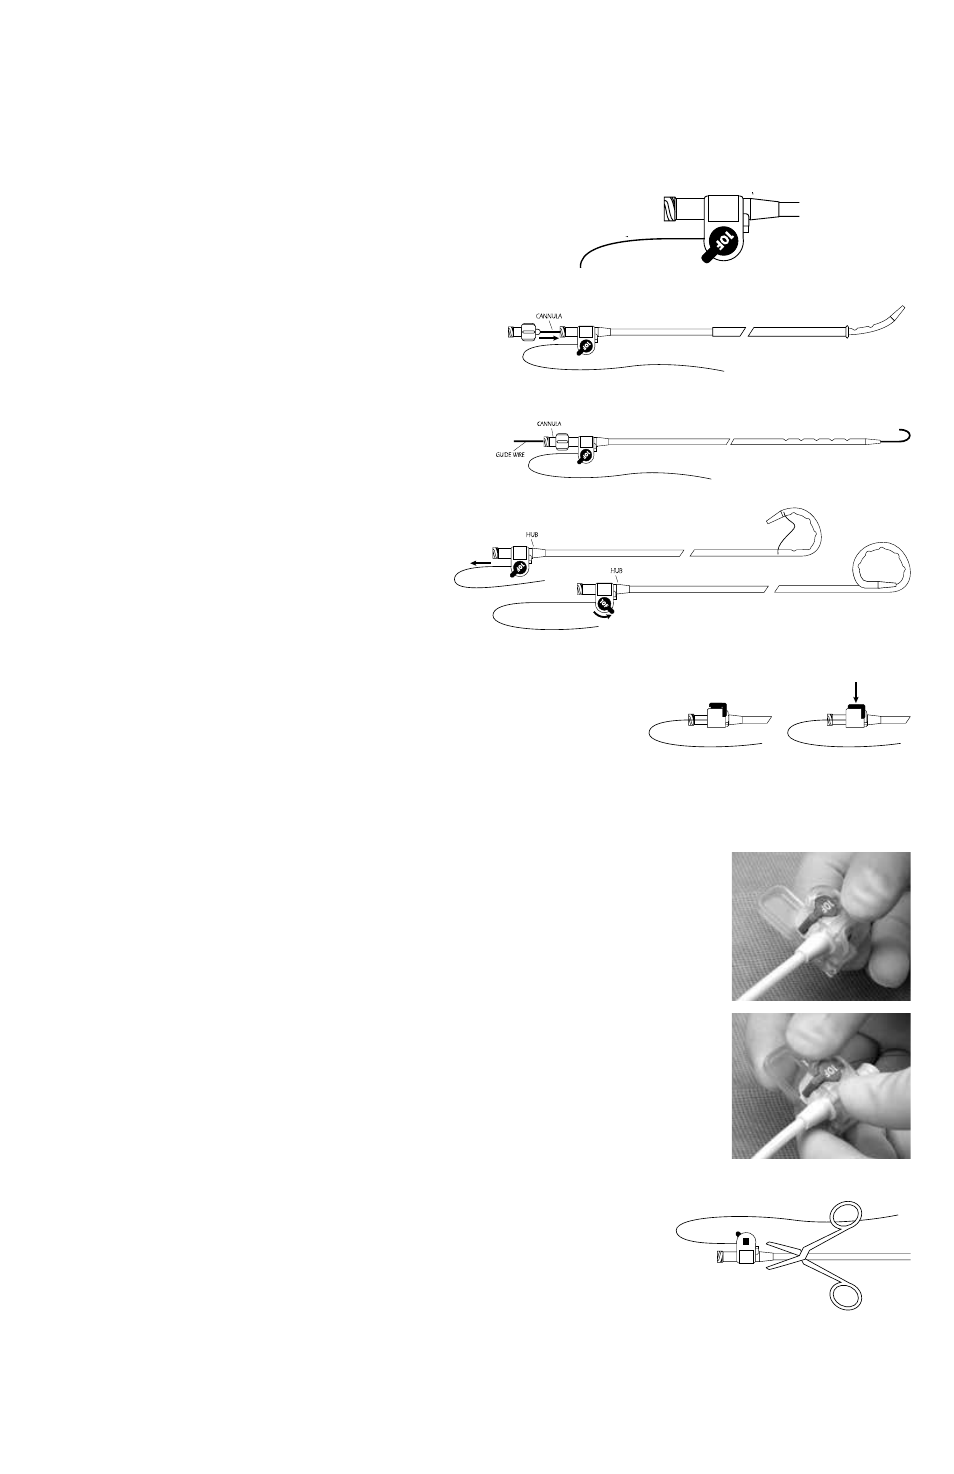
1. Remove the stiffening cannula from catheter.
2. Ensure that the distal portion of the catheter is wet prior to placement. See Cautions, Page 1.
3. Flush catheter prior to use.
4. Ensure suture locking mechanism is in the proximal position.
5. Slide pigtail straightener along distal portion of catheter to straighten curve prior to placing stiffening cannula into the
catheter. Place the stiffening cannula into the catheter and tighten the luer lock fittings. See Figure 1.
6. Remove pigtail straightener from catheter prior to insertion.
7. Place catheter/cannula assembly over appropriate guide wire
and advance into the biliary system. Disconnect stiffening cannula from catheter and continue to advance catheter over
guide wire into desired position. The catheter accommodates a 0.038” (0.97mm) wire. See Figure 2. Placement should be
confirmed with diagnostic imaging.
CaUTION:
Failure to follow could cause stiffening cannula
to lodge in catheter.
8. After placement is confirmed, remove cannula and guide wire.
Engaging the Suture locking Mechanism
9. Pull the suture until desired pigtail is formed. Do not
overly tighten the pigtail as over tightening may damage
the catheter. Rotate the suture locking mechanism
distally to hold the suture in place. See Figure 3.
NOTE: If the catheter needs to be repositioned, unlock the suture locking mechanism by rotating the arm proximally to the
point of resistance. Do not rotate the suture locking mechanism beyond the point of resistance.
10. Once placement is confirmed, and the suture locking mechanism has been
rotated to the most distal position, press the suture locking mechanism into the
hub to secure it. The suture locking mechanism is now locked into position. See Figure 4.
11. The catheter is now ready to be connected to appropriate drainage bag or tubing.
12. A flush regimen should be designed for the circumstances of each patient and the protocol of the physician.
CaTHETER EXCHaNgE, REPOSITIONINg OR REMOVal
1. Disconnect catheter from drainage bag or tubing.
2. To release the pigtail loop choose one of the following options:
Option 1: Using the Repositioning Tool, align the opening of the round section of the
Repositioning Tool in line with the handle of the suture locking mechanism which will release
the suture and allow the pigtail to straighten upon removal.
Option 2: For exchange or removal only, cut the hub off the drainage catheter and sever suture.
This will release the suture and the pigtail loop.
CaUTION:
The suture will no longer be secured to the catheter. Take care to remove both the
suture and catheter.
3. For catheter exchange or if access is to be maintained, advance appropriate guide wire
through catheter; use diagnostic imaging to confirm wire placement. Guide wire will maintain
access to drainage site. To ease guide wire placement, the flexible stiffening cannula may be used.
4. Carefully remove the catheter. Proceed with either catheter exchange or skin closure.
ATTENTION ATTENDING PHYSICIAN: IF PATIENT WILL NOT BE FOLLOWED UP BY YOU, IT
IS RECOMMENDED THAT THE “INSTRUCTIONS FOR USE” OR THE SECTION ON HOW TO
REMOVE THE CATHETER BE ATTACHED TO THE PATIENT’S CHART.
Figure 1
Figure 2
Figure 3
Figure 4