Lokar Dash Insert User Manual
Dash insert installation instructions, Fig. 1
Dash Insert Installation Instructions
General Installation Notes:
Please read instructions completely before beginning
installation. If you have any questions please call.
Important Note:
Lokar Dash Insert design requires gauges be mounted
from the backside of the dash insert. Do not attempt to
mount gauges from the front of insert, as they will not fit.
Dash Insert Installation
Step 1: After deciding where you want to mount the
dash insert, find a level or parallel line, such as
the top of the dash.
Step 2: Draw a horizontal line across the dash that will
represent the center of the 2 end gauges. Now
draw a second line 13/16" above and parallel
to that line.
(Fig. 1) This line will be the top of
the 2 end gauge holes in the insert, one at each
end. Now your insert is level. Holding the dash
insert in place
(Fig. 1), scribe a line around the
rear edge of the insert.
Step 3: Now is the time to cut the hole. Always
undercut the hole so as not to make it oversize,
because the finished edge has a thin lip around
the dash insert to cover your cut.
Dash Insert Installation Instructions
All Styles
All Styles
Step 4: After cutting the hole, mount the gauges (from the
back side) to the dash panel. Gauges are held in
by 8-32 x 3/16 button head screws. You will note
in some of the packets, there are some 8-32 x 1/4
button heads. The longer 8-32 buttons heads are
for the speedo or tach.
Step 5: After the gauges are mounted and centered, if any of
the button head screws holding the end gauges are
sticking out over the back edge of the dash insert,
they must be filed or sanded flat with the edge so
they don’t interfere with installing dash insert.
Step 6: There is an “L” shaped bracket in the kit that holds
the dash in place. Put the dash in from the front and
then install the “L” bracket on the backside. Tighten
the bracket to snug the dash insert.
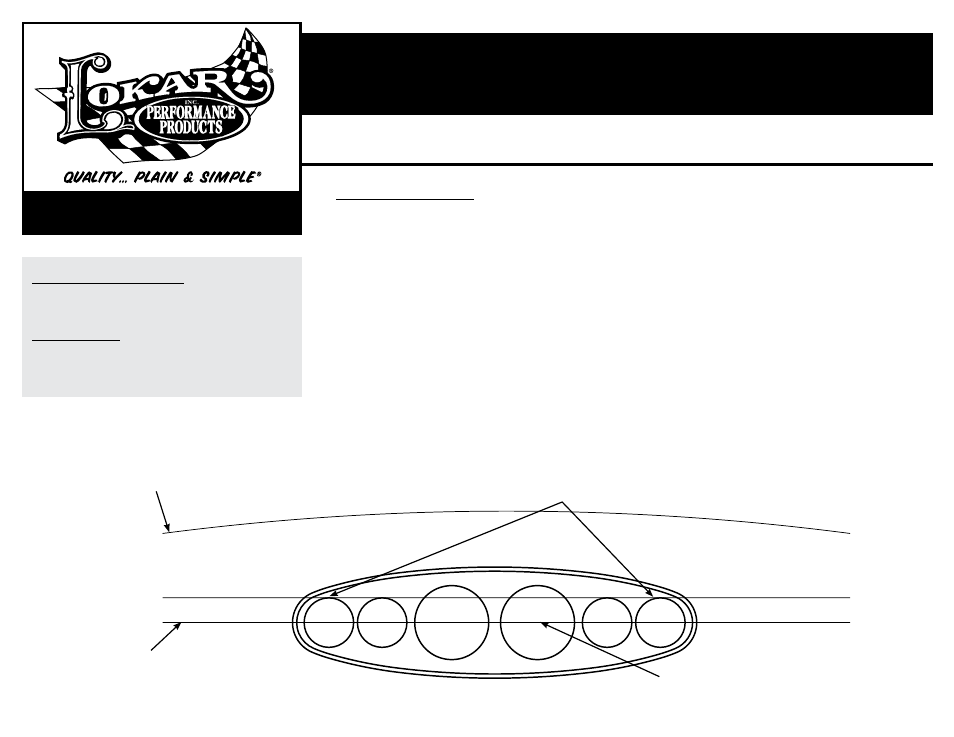
Fig. 1
Measure down on both ends of your
dash to determine the center line
Measure up 13/16" from this line
and make another line to align the
top edges of the end gauge holes
Center line of dash
End holes are centered in
all Lokar Dash Inserts
© 2005 Lokar, Inc.
Building American Quality… With A Lifetime Warranty!
10924 Murdock Dr. • Knoxville, TN 37932
TOLL FREE 1-877-469-7440 • (865) 966-2269 • FAX (865) 671-1999 • [email protected] • www.lokar.com
®
Rev. 08/22/07 RPD 04/27/10