Installation instructions – Flex-a-Lite 3961-3967 Oil Filter Sandwich Adapter User Manual
Page 2
Rev. 05-21-13 99797 Page 2 of 2
The Flex-a-lite Limited Warranty
Flex-a-lite Consolidated, 7009-45th St. Ct. E. Fife, WA 98424, Telephone No. 253-922-2700, warrants to the original purchasing user, that all Flex-a-lite products to
be free of defects in material and workmanship for a period of 365 days (1 year) from date of purchase. Flex-a-lite products failing within 365 days (1 year) from
date of purchase may be returned to the factory through the point of purchase, transportation charges prepaid. If, on inspection, cause of failure is determined
to be defective material or workmanship and not by misuse, accidental or improper installation, Flex-a-lite will replace the product free of charge, transportation
prepaid. Flex-a-lite will not be liable for incidental, progressive or consequential damages. Some states do not allow the exclusion or limitaion of incidental or con-
sequential damages, so the above limitation or exclusion may not apply to you. This warranty gives you specific legal rights and you may have other rights, which
vary from state to state. The Flex-a-lite warranty is in compliance with the Magnuson-Moss Warranty Act of 1975.
INSTALLATION INSTRUCTIONS
1. BE SURE THE ENGINE IS COOL BEFORE PROCEEDING.
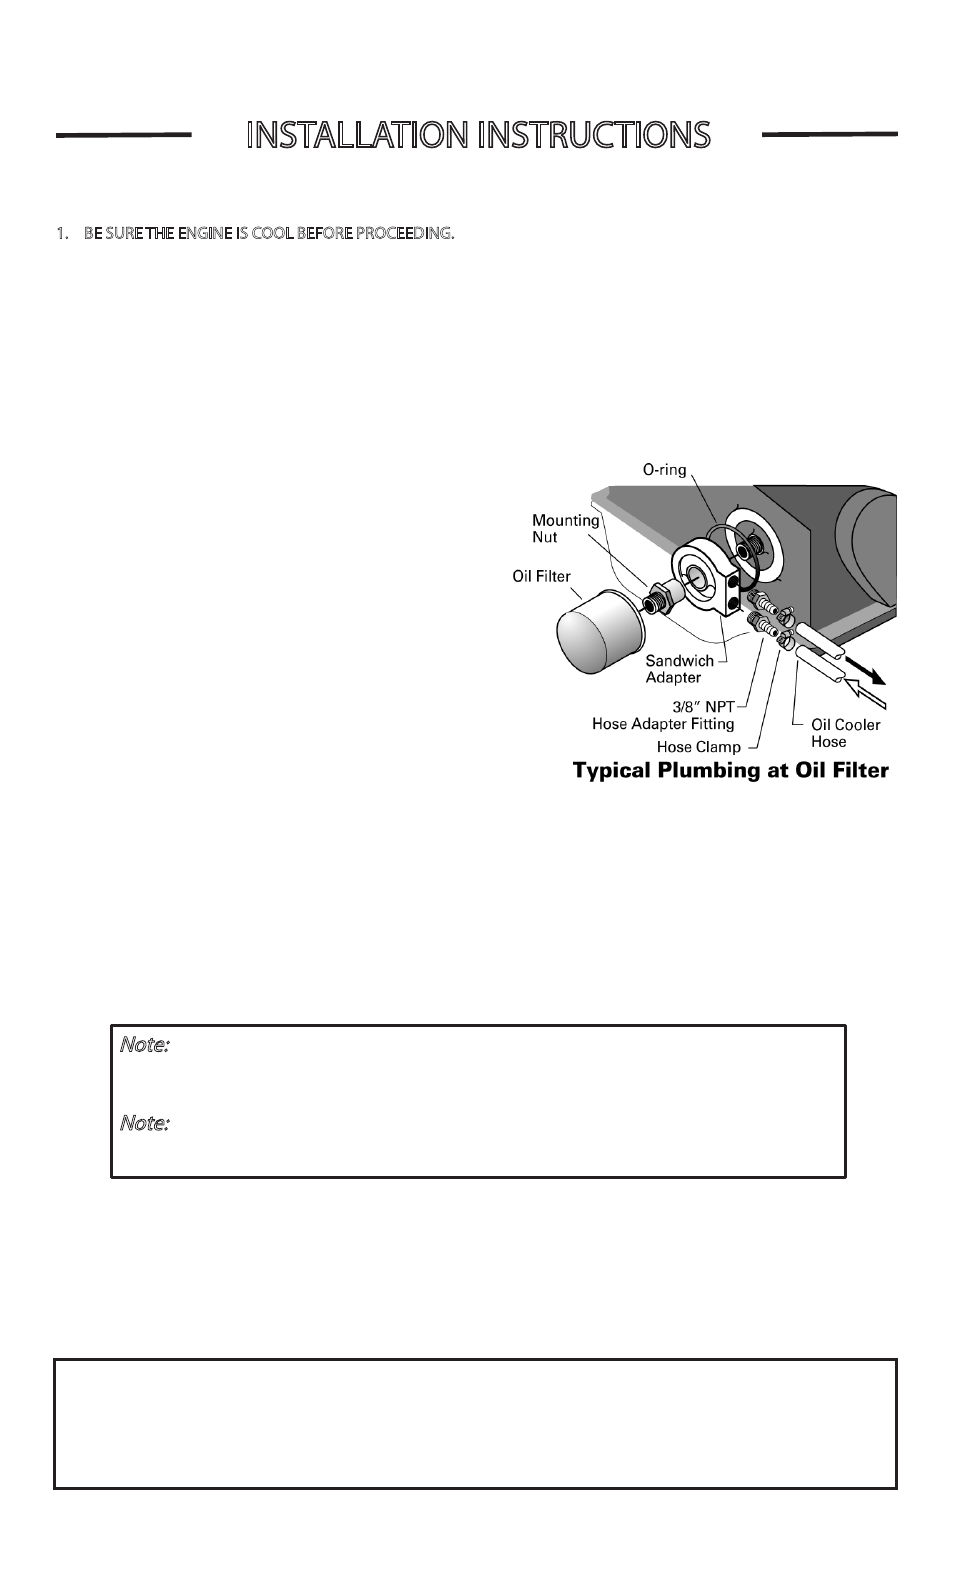
2. Wrap NPT hose adaptor fittings (not incl.) with Teflon tape, or coat with automotive thread sealer, and screw them
into the sandwich adapter.
3. Remove oil filter and clean the oil filter landing on the engine block.
4. Apply a light coat of oil to rubber o-ring and fit to groove in sandwich adapter. Fasten sandwich adapter to the
engine block using the appropriate mounting nut, with o-ring facing engine block. Point fittings toward hose
route, then tighten mounting nut. Do not over tighten.
5. Run hoses from sandwich adapter to cooler. Mount and/or wire cooler according to product instructions.
When running the oil hose avoid kinks and sharp or moving
objects. Allow a little extra when calculating hose lengths.
Route hoses away from exhaust pipes, etc. Attach hoses to
fittings, but do not tighten yet. If using threaded fittings,
use Teflon tape or thread sealer on threads. Secure hoses to
prevent damage from moving or hot objects. Once hoses
are in their final position, tighten hose fittings. Use a back-
up wrench on the cooler fittings to prevent damage to the
thin walls of the oil cooler tubes. Do not over tighten.
6. Replace oil filter. Start engine and check oil pressure. If
oil pressure does not reach normal within 5-10 seconds,
shut off engine; oil is not flowing. Review instructions and
correct the installation. If pressure is OK, let engine run until
it reaches normal operating temp. Check that both ends of
cooler are warm. If not, oil is not flowing through cooler.
Shut off engine and correct installation.
7. Inspect for leaks and fix any leaks found. Top off oil, if necessary. Periodically inspect all fittings during the first 100
miles of driving.
Note:
Visit our website www.flex-a-lite.com to register product for warranty and
review warranty policy.
Note:
For questions regarding mounting of this product, call 1-877-767-0554
for assistance.