CMP PXRC-REX User Manual
Page 2
INSTALLATION INSTRUCTIONS FOR CMP CABLE GLAND TYPE PXRC
DUBAI
• HOUSTON • NEWCASTLE • SINGAPORE • SHANGHAI • PUSAN • PERTH
DUBAI
• HOUSTON • NEWCASTLE • SINGAPORE • SHANGHAI • PUSAN • PERTH
www.cmp-products.com
www.cmp-products.com
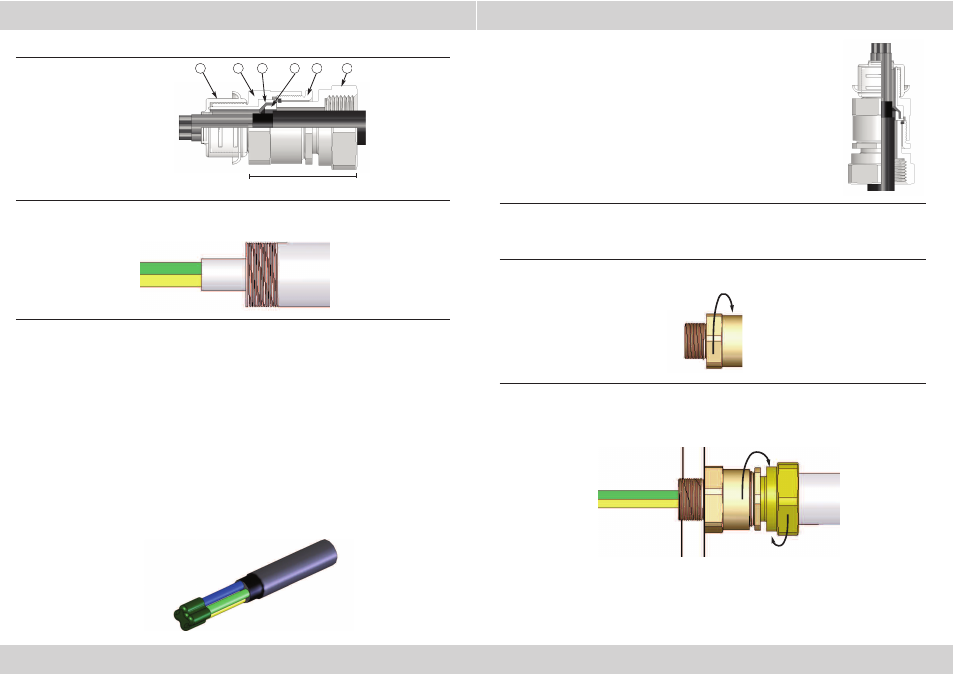
CABLE GLAND COMPONENTS
PLEASE READ ALL INSTRUCTIONS CAREFULLY BEFORE BEGINNING THE INSTALLATION
1. Prepare the cable (if used) by removing the outer sheath from the cores so that they are exposed
within the Compound Tube when finally assembled.
2. If the installation involves a cable, remove any bedding or fillers from around the cable cores.
If the cable cores have braid screens, these should be unravelled and then twisted together to form a
single core if required.
If the cable has individual and / or overall foil screens, the foils must be removed completely and the
drain wire(s) passed through insulation tubing.
NOTE: To ensure a proper seal, the drain wire should be exposed for up to 5mm next to the resin dam
(so that the resin can bond to the drain wire elements). If heat shrink tubing is used it should be
shrunk onto the drain wire.
Electrical tape MUST be wrapped around the tips of the cable cores to prevent damage to the resin dam
when the cable is installed.
If the installation uses only cores (i.e. no cable sheath) then tape must be wrapped around the cores at
the position at which it will engage the resin dam.
Use the length of the gland as a guide to position the tape as shown above (guide length “L”).
3. Pass the cable/cores through the gland so that the cable sheath / the tape
around the cores (if a cable is not being used) just passes through the resin
dam. (Use guide length “L” to determine how far to push the cable into the
gland.
Secure the Entry Item assembly to the Running Coupling (5) by tightening Nut
(4).
Fit the Thread Shield (6) and hold the assembly upright.
5. Refer to ‘RapidEx Resin’ assembly instructions to fill the connector Compound Tube
with the required amount of resin. The resin should not be mixed or applied at
temperatures below 5°C (40°F).
6. Once the resin has cured, remove the Thread Shield (6) and slacken the nut (4). Fit the Entry
Item (1) into the equipment.
7. Attach the conduit to the Running Coupling (5) and fully tighten. Finally, fully tighten nut (4) to
complete the installation.
8. Attach the conduit and tighten the running coupling (5) to complete the installation.
1. Entry Component
2. Compound Tube & Resin Dam
3. Washer
4. Nut
5. Running Coupling
6. Thread Shield
2
1
3
4
5
6
Guide Length “L”