Installation instructions for cmp gland type a2 – CMP A2 User Manual
Page 2
INSTALLATION INSTRUCTIONS FOR CMP GLAND TYPE A2
DUBAI • HOUSTON • NEWCASTLE • SINGAPORE • SHANGHAI • PUSAN • PERTH
DUBAI • HOUSTON • NEWCASTLE • SINGAPORE • SHANGHAI • PUSAN • PERTH
www.cmp-products.com
www.cmp-products.com
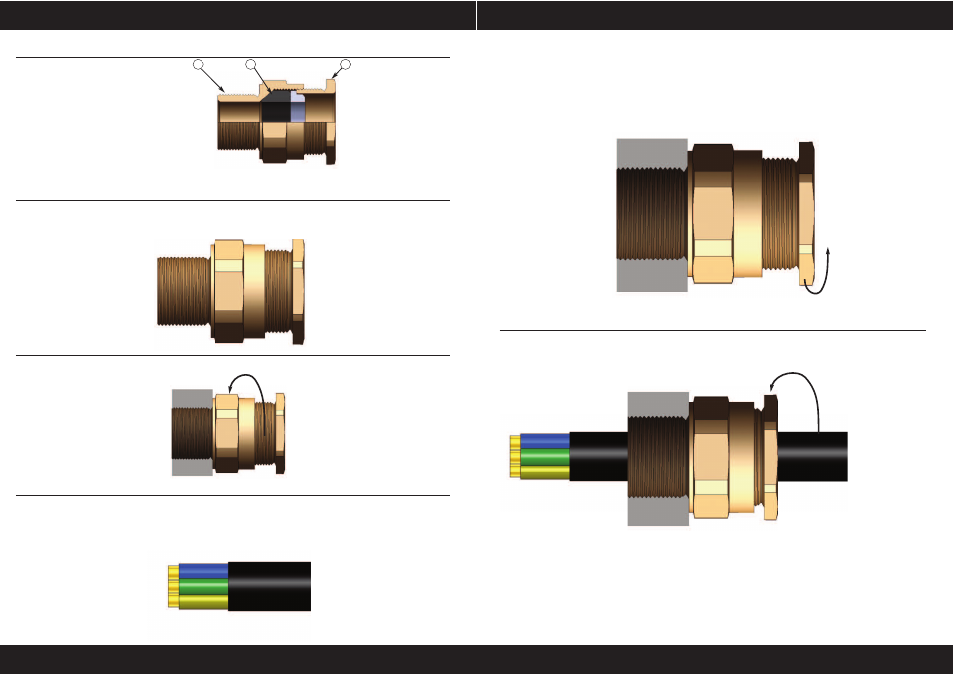
CABLE GLAND COMPONENTS
PLEASE READ ALL INSTRUCTIONS CAREFULLY BEFORE BEGINNING THE INSTALLATION
1. It is not necessary to dismantle the gland any further than illustrated below.
3
2
1
1. Entry Item
2. Seal
3. Seal Nut
2. Fit the gland into the equipment and fully tighten the entry item (1).
4. Slacken the seal nut (3) to relax the seal (2).
5. Pass the cable through the gland to the desired position, then tighten the seal nut by hand until
resistance is felt (when the seal contacts the cable). Tighten with a spanner one further turn.
3. Determine the conductor length required to suit the installation and prepare the cable
accordingly, removing part of the outer sheath where required to reveal the insulated conductors.