Front strut mount bushings bk011 (continued) – BMR Suspension BK011 User Manual
Page 2
Front Strut Mount Bushings
BK011 (Continued)
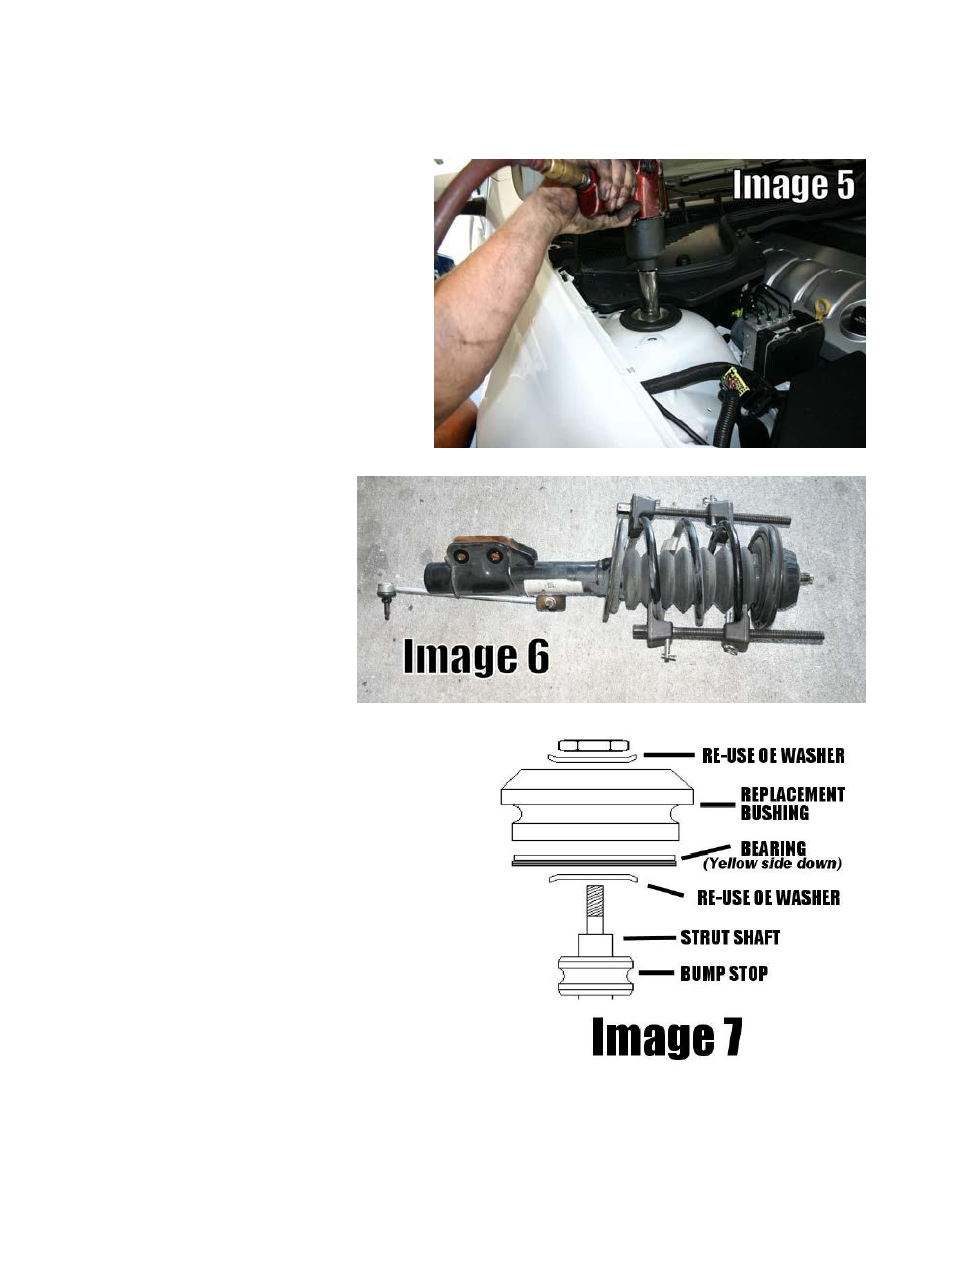
8. Using a 24mm socket, remove the upper
retaining nut and lower the strut assembly.
NOTE: this nut only holds the strut/spring
assembly in the vehicle, it will not unload
the spring. See Image 5.
9. Use an outside spring compressor to
compress the spring until there is enough
“slack” in the spring to remove the upper
mount. See Image 6 below.
10. Using a 24mm socket, remove the nut on
the upper strut shaft. Remove the OE
strut mount and re-assemble using Image
7 below as a guide.
11. Lift the strut/spring assembly back up
into the strut tower and replace the upper
formed washer and nut.
NOTE: due to the significantly
stiffer polyurethane strut
mount, seating the bushing in
the strut tower will be more
difficult. It is not uncommon
to only have a few threads
exposed up top during
re-assembly. This should be of
no concern as the nut will pull
the mount up into the strut
tower when tightened.
12. Replace the plastic nut caps in the engine bay.
13. Reconnect the strut to the spindle and tighten to
130 ft/lbs.
14. Re-connect sway bar.
15. Connect the brake line and re-connect the ABS
wire.
16. Re-install the inner fender.
17. Install wheels/tires and lower vehicle.
WWW.BMRSUSPENSION.COM
This product is an aftermarket accessory and not designed by the vehicles manufacturer for use on this vehicle. As such, buyer
assumes all risk of any damage caused to the vehicle/person during installation or use of this product.