BMR Suspension TAS006 User Manual
Page 9
9
(CONTINUED)
41. Using Image 21 as a guide, thread
one of the two Watts link bars onto
the Watts link pivot and mount the
other end into the drivers side
mount. The bar should be installed
into whichever mounting hole
places the Watts link bar at the
most level position while the
suspension is loaded. Insert one of
the provided ½” x 3.25” bolts.
Thread a stainless washer and nut
over the exposed thread and tighten to 80 ft/lbs. NOTE: the Watts link pivot should be
vertical (straight up and down) with the suspension loaded. It may be necessary to adjust
the rod end in order to achieve this.
42. Duplicate the previous step for the passenger side Watts link bar.
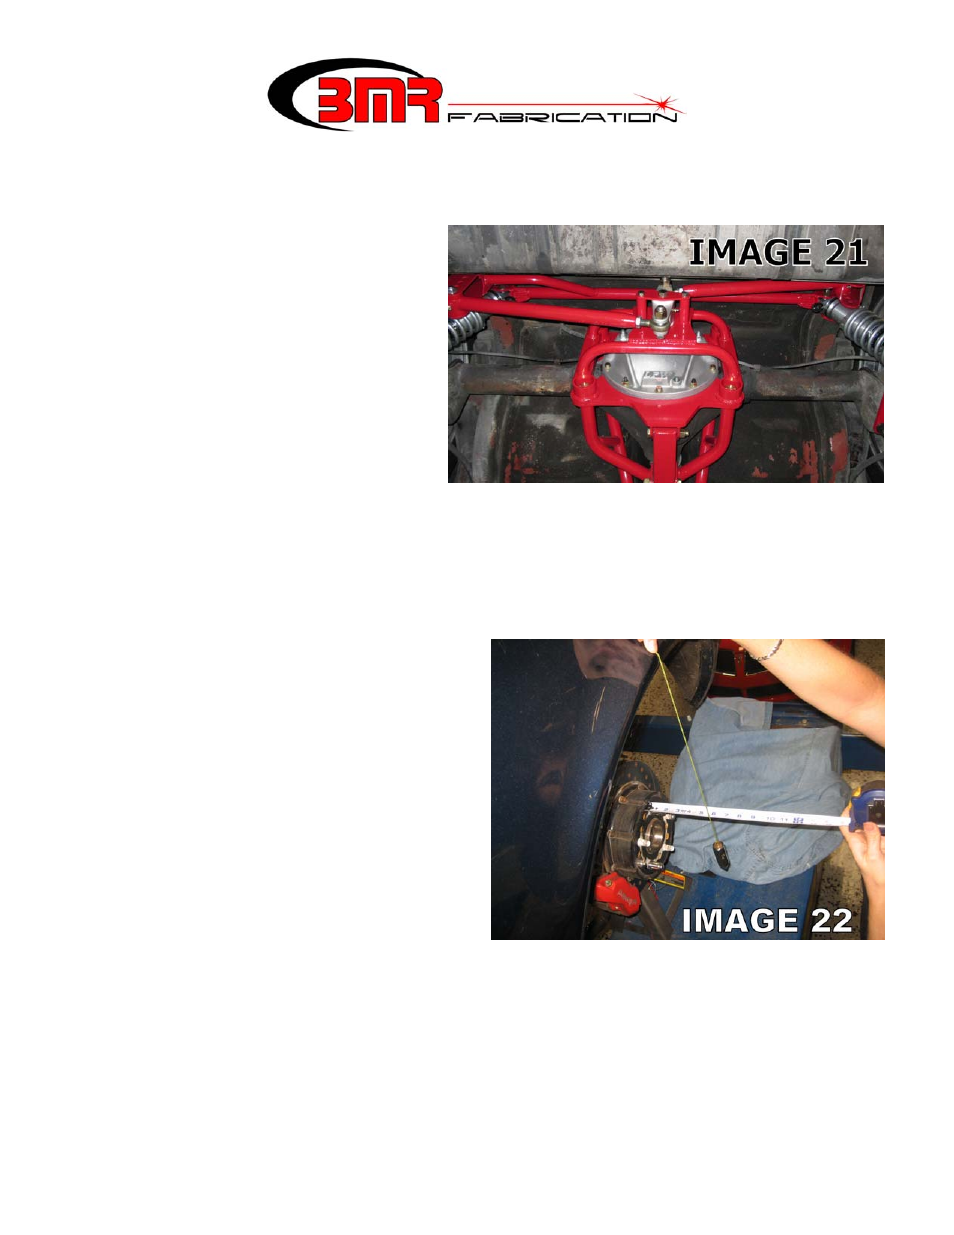
43. As shown in Image 22, use a plumb bob to determine proper axle location. NOTE: it is
not necessary to remove the wheels and tires to accomplish this, the measurement can
also be taken from the wheel itself. Hold
the plumb bob against each wheel well
in the same position and measure the
axle location in relation to the fender.
Adjust the rod ends until each side is
equal while the Watts link pivot remains
vertical (not angled). Once all
adjustments have been made, tighten all
mounting bolts and then tighten the rod
end jam-nuts on the Watts link bars.
44. Except for final setup, the installation is
complete. Double-check all mounting
bolts for tightness and inject a few
pumps of grease into all of the grease
fittings using the supplied silicone based
lube. Re-grease the fittings initially after a few miles and then every other oil change
thereafter.
45. Re-install the fuel tank and plumb the fuel lines.