3 set the date/time, 2 select the language 7-4 select call tone – Aiphone JK-1MED User Manual
Page 8
- 8 -
English
Fr
ançais
Neder
lands
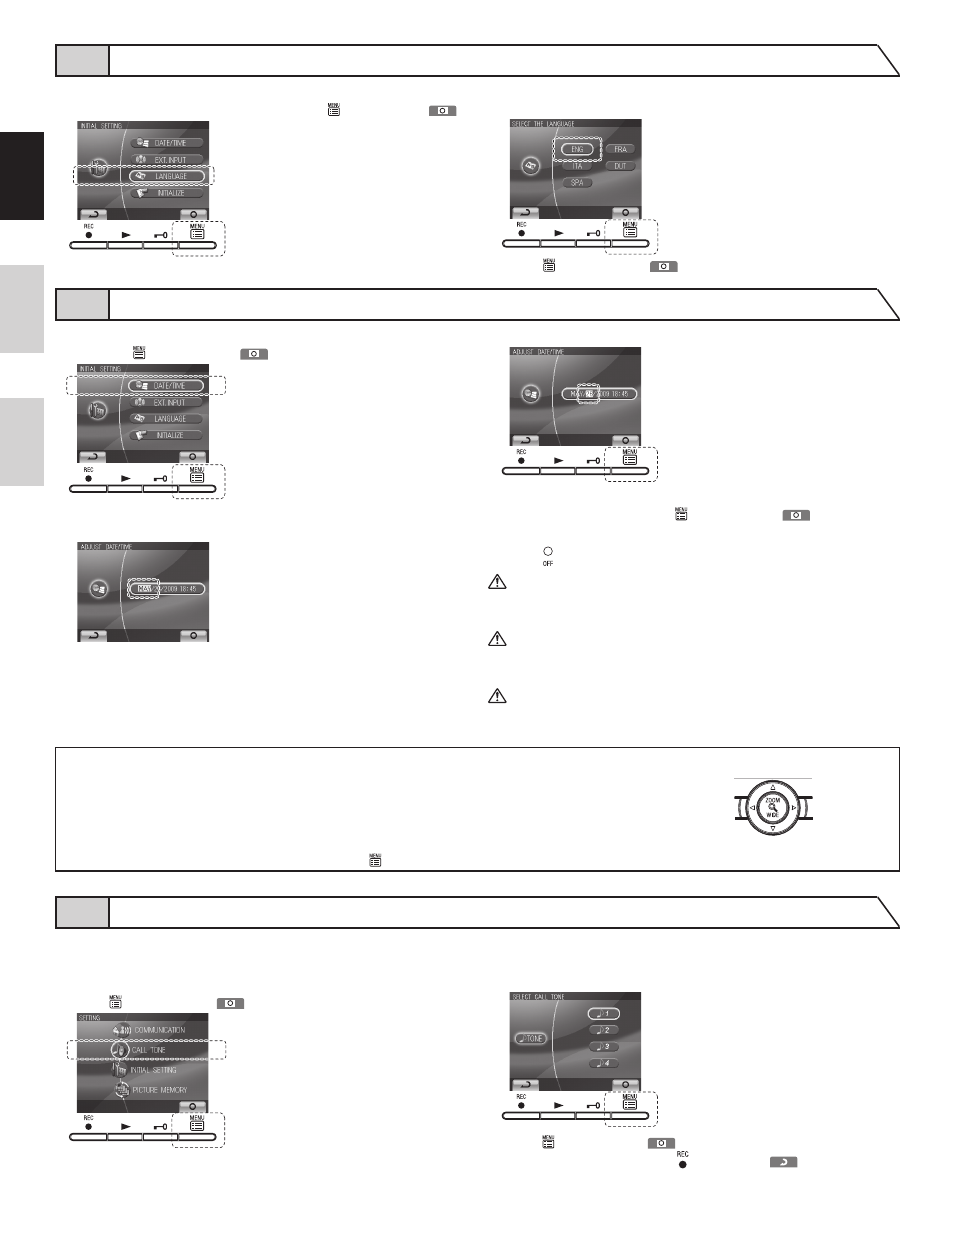
7-3 SET THE DATE/TIME
1
After performing steps 1 and 2 in section 7-1, select "DATE/TIME"
and press MENU button (
).
2
In the "ADJUST DATE/TIME" screen, press button or button
to select the "Month".
3
Pressing button sets the "Month" and moves the cursor to "Day".
4
Perform the same steps to set "Day", "Year", "Hour" and "Minute".
After setting "Minute", press MENU button (
) to complete
the settings.
5
Press OFF button to return to standby mode.
1. If there are no operations for approximately 1 minute during the
setup mode, the setting will end automatically. If the settings end
while incomplete, start again from the beginning.
2. A maximum error of
60 seconds can occur in the displayed
time over a month. Periodically adjusting the time setting is
recommended.
3. When power is not supplied to the unit for a long time, the time
returns to its initial setting of "JAN/01/2009 00 : 00", and the menu
LED (red) will flash as a notification. Reset the time.
NOTES: Operations for setting numbers
button (press once): The date/time increases
by one.
button (press once): The date/time decreases
by one.
button (press once): The cursor moves to the
left.
button (pressed once): The cursor moves to
the right.
button (press and hold for 1 second or more.):
The date or time increases in succession.
button (press and hold for 1 second or more.):
The date or time decreases in succession.
MENU button: Confirm the setting.
The chime tone for the video door station can be selected from 4 sound
types. The initial setting is
1.
1
After performing step 1 in section 7-1, select "CALL TONE" and
press MENU button (
).
2
In the "SELECT CALL TONE" screen, press button or button
to select the desired chime tone. The selected chime tone sounds,
enabling you to check the sound.
3
Press MENU button (
) to complete the settings and return to
the "SETTING" screen. Press REC button (
) to cancel the
setting and return to the previous screen.
1
After performing steps 1 and 2 in section 7-1, select "LANGUAGE"
in the "INITIAL SETTING" screen and press MENU button (
).
2
In the SELECT THE LANGUAGE screen, press ,
,
, and
buttons to select the language.
3
Press MENU button (
) to complete the settings and return to
the "INITIAL SETTING" screen.
7-2 SELECT THE LANGUAGE
7-4 SELECT CALL TONE