Mounting, Names, Jk-1med – Aiphone JK-1MED User Manual
Page 6
- 6 -
English
Fr
ançais
Neder
lands
4
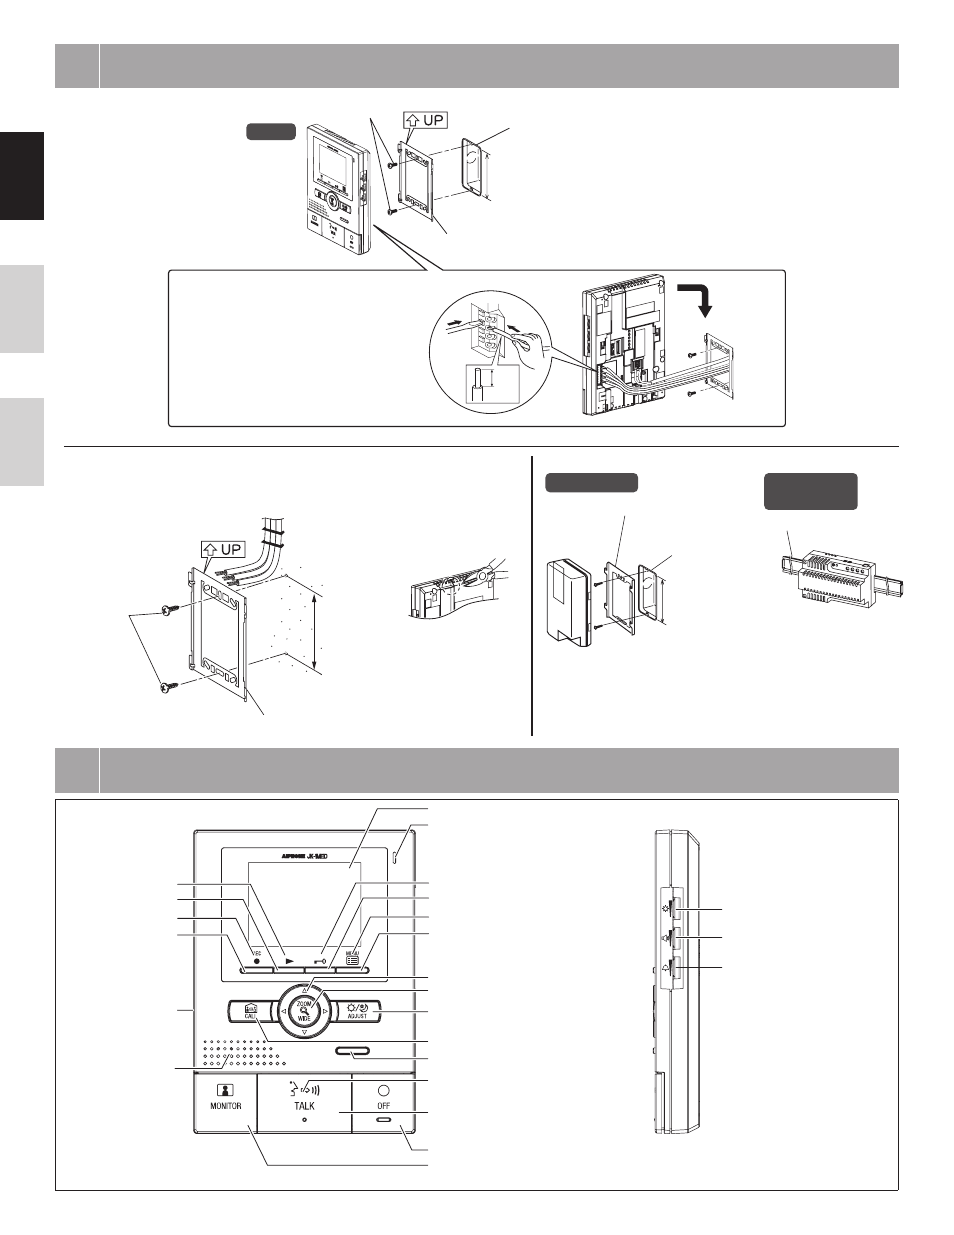
MOUNTING
Back wiring
JK-1MED
1
2
8mm
(3/8")
1. Press RELEASE button
(to insert or remove the wire).
2. Insert the cable into the terminal.
Mounting screws x 2
1-gang box
83,5 mm
(3-5/16")
Mounting bracket
Surface wiring
* When a 1-gang box is not mounted, the cable can be routed as surface wiring to the top or
bottom of the unit. Cut a cable inlet on the upper part of the unit to allow passage of the
wiring into the unit.
PS-1810DIN/
PS-1820DIN
PS-1820
Mounting bracket
1-gang box
Din rail
83,5 mm
(3-5/16")
* To pass the cable through the back of the
unit, cut out the cable inlet.
Wood
mounting
screws x 2
Mounting bracket
83,5 mm
(3-5/16")
5
NAMES
JK-1MED
Play LED (red)
PLAY button
Record LED (red)
RECORD button
POWER switch
Speaker
MONITOR button
OFF button
TALK button
Transmit LED (red)
Option button (*)
CALL button
ADJUST button
ZOOM/WIDE button
PAN/TILT button
MENU button
Menu LED (red)
DOOR RELEASE button
Door release LED (red)
Microphone
Color LCD video monitor
Screen brightness control
(0
10)
Receive volume control
(0
10)
Chime tone volume
(0
10)
(*) The option button controls connected option
units such as turning lighting on and off and
activation of added door releases.