Installation instructions, 2 install mounting bracket, 3 prepare the hood – GE ZV800SJSS User Manual
Page 15
15
Installation Instructions
2 INSTALL MOUNTING BRACKET
This vent hood must be secured to the horizontal
support or wall studs.
With the template taped in place, use a punch to
mark all mounting screw locations.
Drill 1/8” pilot holes at the 6 punched locations.
Remove the template.
The 2 holes in the support bracket holes must
enter studs or the horizontal support.
Use wood screws to secure the mounting bracket
to
the wall. The screws must engage wall studs or the
installed horizontal mounting support.
Check to be sure that the bracket is level.
There is no way to level the hood after hanging
it from this bracket.
:$//02817(',167$//$7,21³5(&,5&8/$7,1*
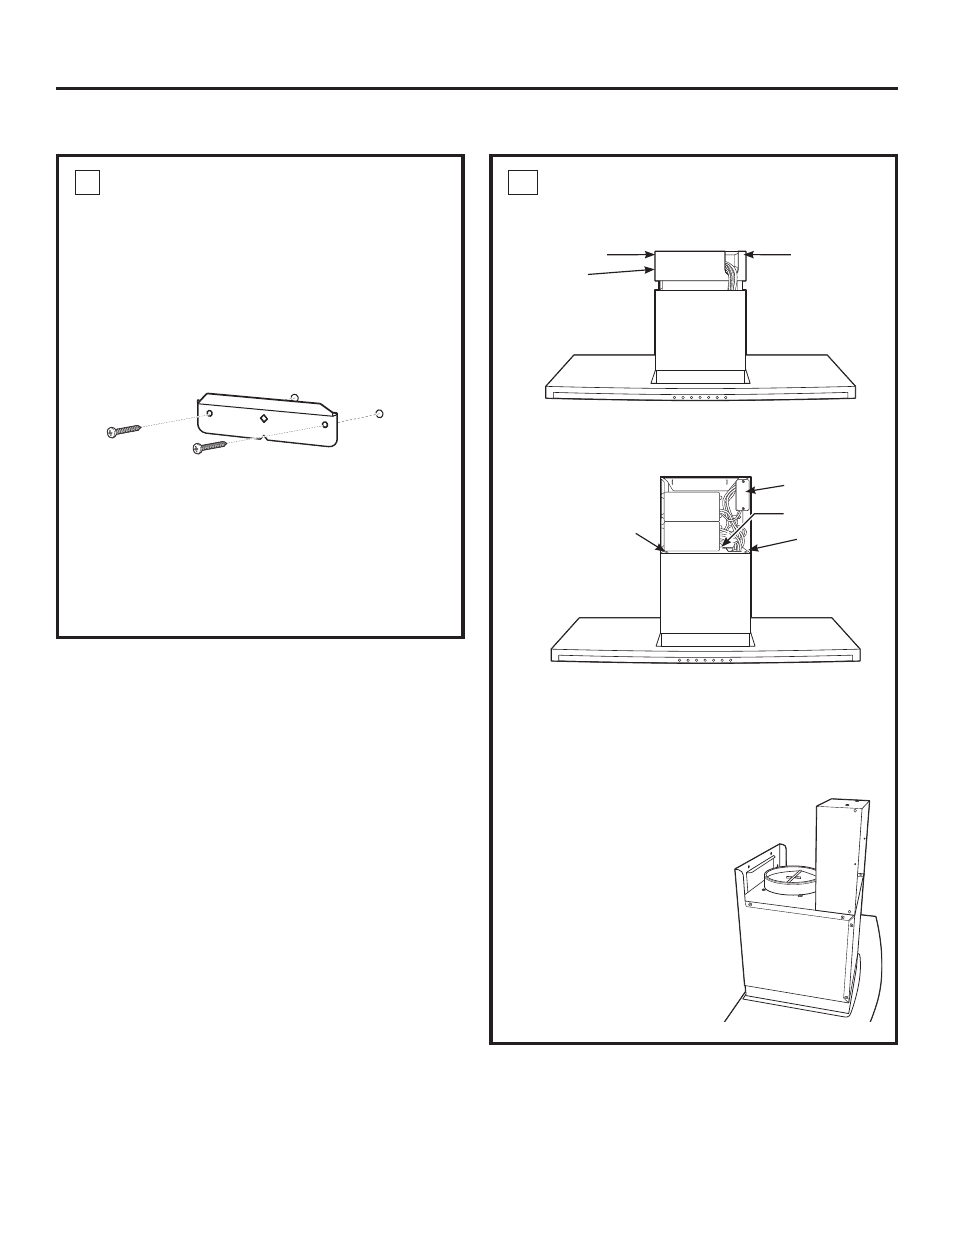
3 PREPARE THE HOOD
Remove the hood from the box. Remove packaging
and tape.
Remove one screw on each side of the cover on
the electrical panel. Lift off the cover and set aside
with screws.
Stand the electrical panel upright.
Align the screw holes in the bottom of the panel
with the holes on the base of the hood at the front
side.
Install 3 screws provided.
Remove 2 side
cover screws
Electrical
panel
Secure
electrical
panel with 3
screws
Junction box
Inside screw