4 operating your rdx removable disk backup system, Front panel – HP RDX Removable Disk Backup System User Manual
Page 16
4 Operating your RDX Removable Disk Backup System
In this chapter:
•
Install the RDX utility (page 16)
•
•
•
Loading and unloading (page 17)
•
Removing power from the unit (page 19)
Install the RDX Removable Disk utility (Windows only)
The RDX Removable Disk utility ensures that the eject function operates correctly under Windows.
It is found on the HP RDX Utility CD supplied with your RDX Removable Disk Backup System and
should be installed before you start to work with the unit.
NOTE:
If the RDX utility is not installed, the eject button and the right-click eject method may not
work properly.
NOTE:
You must be logged in as the Administrator or have administrator privileges to install the
software.
1.
Insert the supplied HP RDX Utility CD into the CD-ROM drive on the server or workstation.
2.
The CD should automatically start the installation process.
If it does not start automatically, locate the RDXInstallationWizard.exe program on the CD
and double-click to run it manually.
3.
Follow the instructions on the screen and restart the server or workstation when asked to do
so.
4.
Your RDX Removable Disk Backup System is now ready to use.
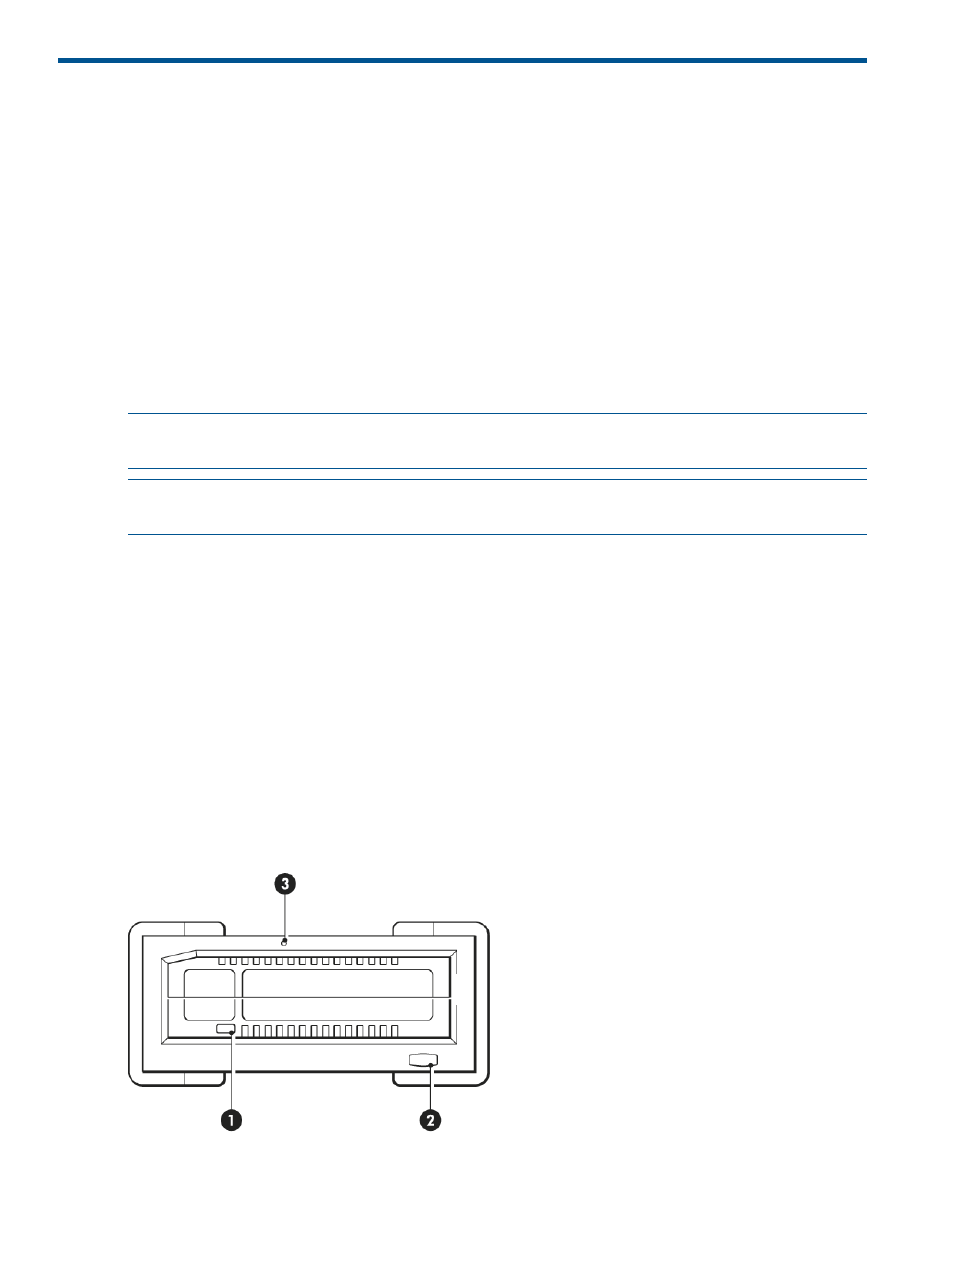
Front panel
The front of the RDX Removable Disk Backup System has an opening for inserting cartridges. A
protective door covers the opening. For more information about LEDs see
Figure 12 Front panel of an external drive
2. eject button / power LED
1. cartridge activity LED
3. emergency reset hole
16
Operating your RDX Removable Disk Backup System