Spill shield installation (select models), Connecting the cables – HP rp5700 Point of Sale System User Manual
Page 12
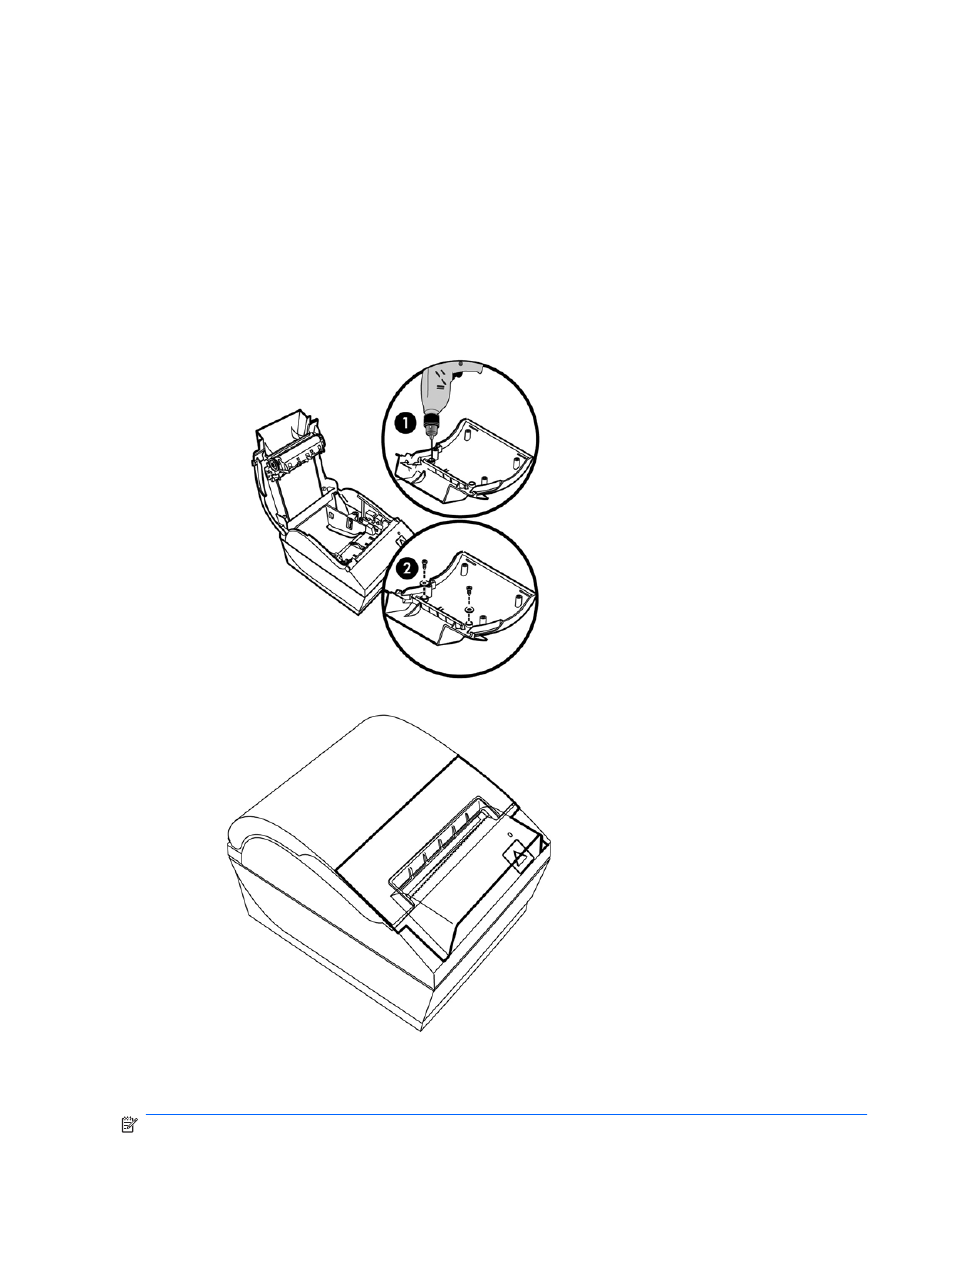
Spill Shield Installation (Select Models)
Top and bottom spill shields provide added protection for the printer from moisture or spills. The
following instructions describe how to install both of these shields. Shields may be installed
individually or as a set. A phillips head screwdriver is required for installation.
1.
Clean the printer receipt cover in the area where the top spill cover is to be installed.
2.
Remove the receipt cover (1) and drill holes using a 5/32 inch or 4 mm drill bit. Open holes
further by drilling with a 5/16 inch or 8 mm drill bit.
3.
Position the spill shield to the printer.
4.
Fasten the spill shield to the receipt cover with the provided screws and washer (2).
Connecting the Cables
NOTE:
Place the printer on a level surface and position it in a location that allows access to cables,
room to open the cover and away from traffic areas to limit the chance of being bumped or damaged.
6
Chapter 2 Setting Up the Printer
ENWW