Adjusting the paper low setting – HP rp5700 Point of Sale System User Manual
Page 11
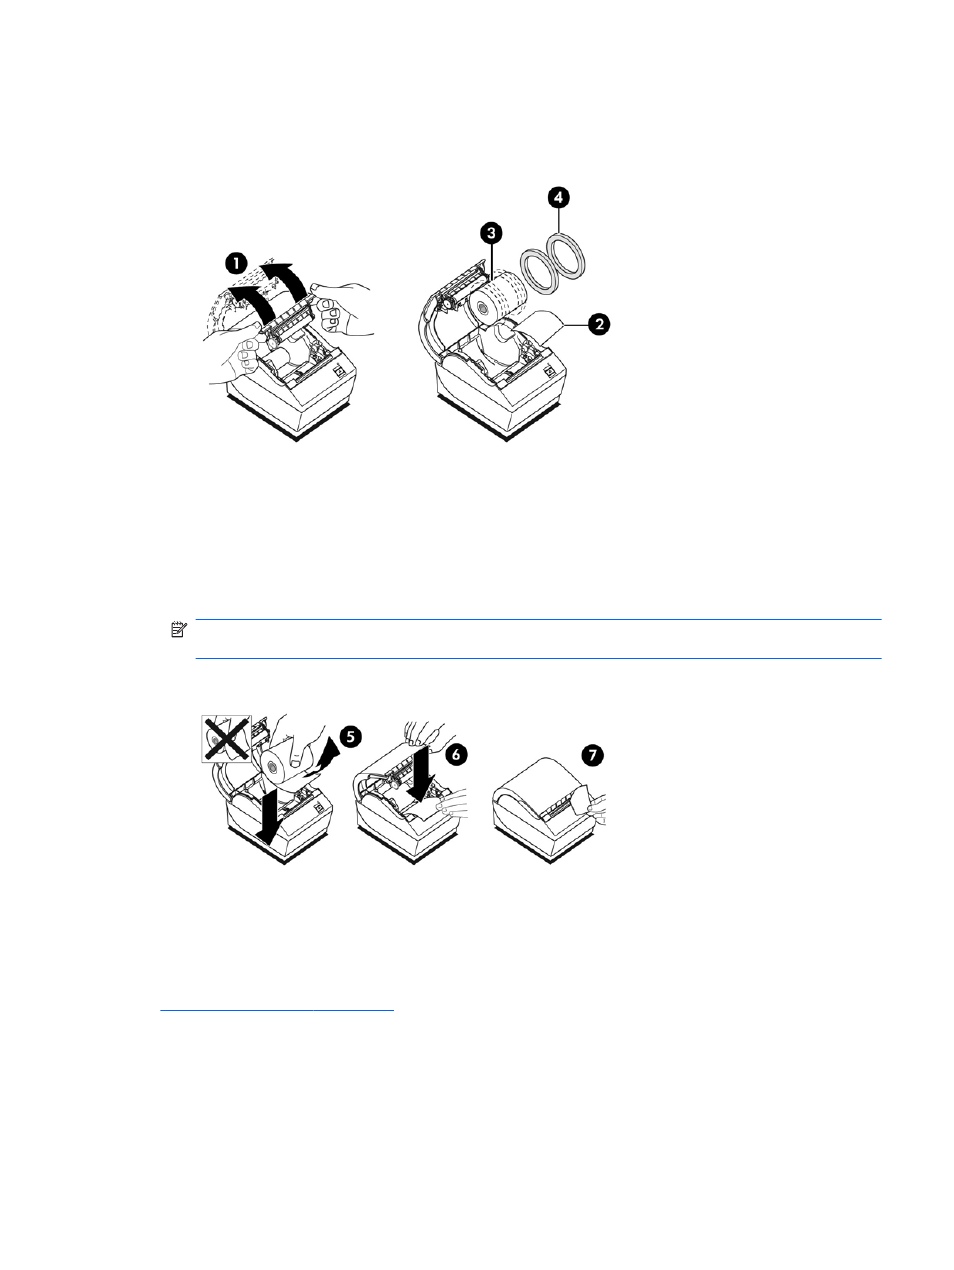
2.
Loading: Remove the test printout (2) and starter roll thermal paper (3). Slide the supports off
the roll (4).
Changing: Remove the used paper roll.
3.
Tear a clean edge on the new receipt paper roll, making sure the tape has been completely
removed.
4.
Place the receipt paper into the paper compartment so it unrolls from the bottom (5). Leave a
few inches of paper sticking out of the printer.
5.
While holding the paper in place, close the receipt cover (6). To test that the paper is loaded
correctly, advance the paper with the paper feed button.
NOTE:
If the paper jams, be sure the roll is inserted correctly. Refer to the previous illustration
in this section for proper paper orientation.
6.
Tear the excess paper off against the blade in the cover (7).
Adjusting the Paper Low Setting
The amount of paper left on the roll when the “paper low” indication is given by the printer should be
approximately 5-20 feet/1.5-6.1 meters. If too much paper is left, there is an adjustable setting in the
configuration menu that can be modified. For instruction on entering the configuration menu, refer to
Operating the Printer on page 10
. In the configuration menu, enter the Hardware Options section
and vary the “paper low extension” setting. The setting chosen will decrease the amount of footage at
paper low.
ENWW
Loading or Changing the Receipt Paper
5