HP XP Array Manager Software User Manual
Page 43
3.
If you do not want to release any other LDEVs from Cache Residency cache, make sure that
the Multi Set / Release box is not checked, click Release, and then click OK on the confirmation
dialog box. The requested operation is displayed in blue in the LDEV information table.
To release additional LDEVs from Cache Residency cache:
a.
Check the Multi Set / Release box, click Release, and then click OK on the confirmation
message to open the Multi Release dialog box.
b.
On the Multi Release dialog box, select the desired LDKC and CU image, and select the
desired LDEVs to release from Cache Residency cache.
c.
Click Release to return to the Cache Residency window. The requested Cache Residency
operations are displayed in blue in the LDEV information table.
4.
Repeat steps 2 and 3 until all desired operations are listed.
Note: You cannot use the Set button until you apply (or cancel) your requested operations.
5.
Verify the Pre-staging setting:
•
To enable pre-staging, select Pre-staging.
•
To disable pre-staging, clear Pre-staging.
6.
To start the operations, click Apply:
•
If Pre-staging was selected, respond to the Yes/No confirmation that displays. To continue
with pre-staging, click Yes. To continue without it, click No.
•
To cancel the operation, click Cancel and then click OK on the confirmation that displays.
7.
Monitor the Cache Residency window to make sure that the operations complete successfully.
The cache information area (see
“Cache Information Area” (page 24)
) displays the progress
of the requested operations.
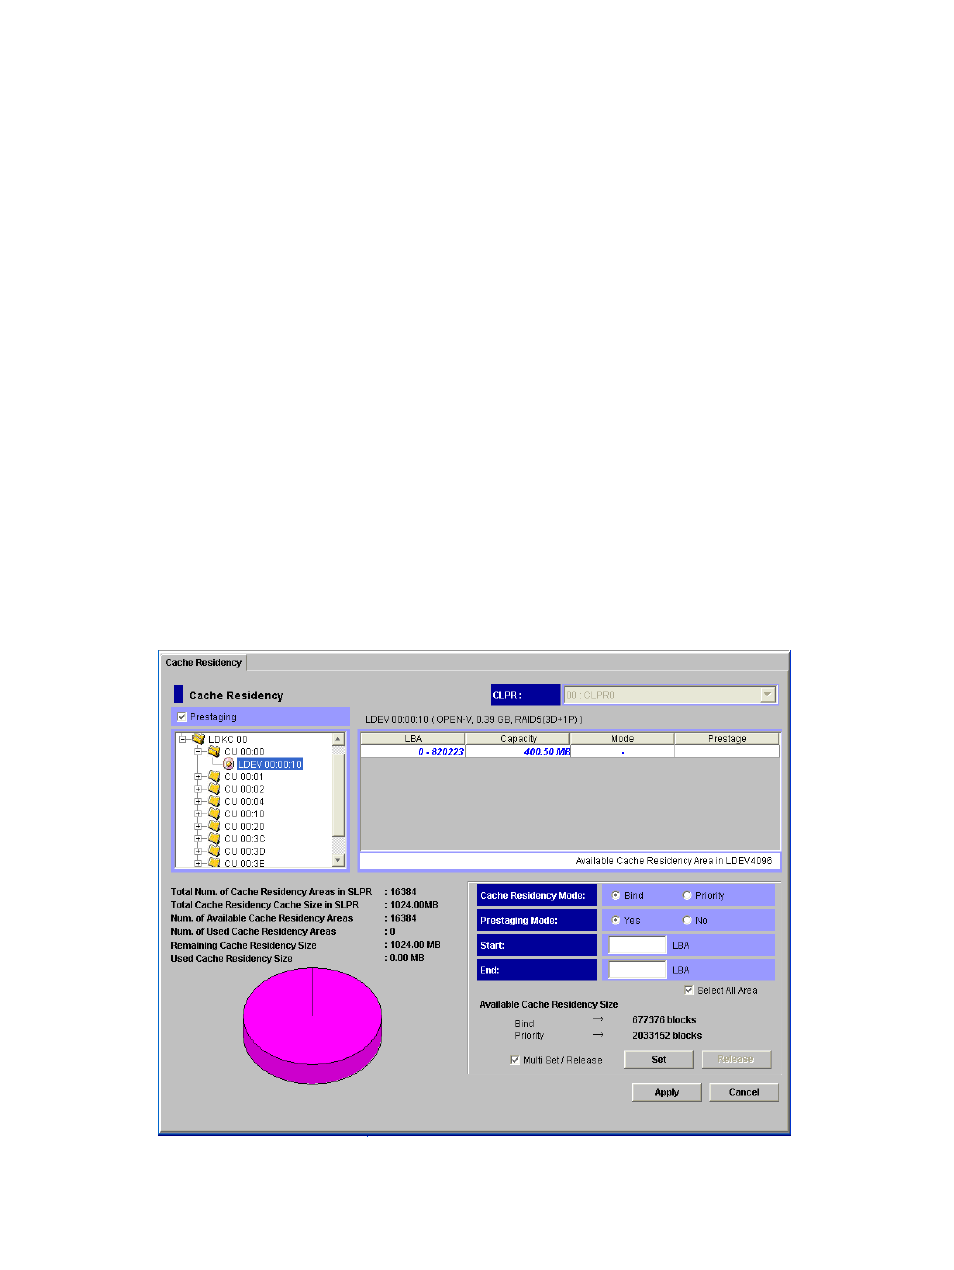
Figure 25 Clicking the Release Button after Selecting LDEVs from Cache Residency Cache
Releasing LDEVs from Cache Residency Cache
43