HP XP Array Manager Software User Manual
Page 30
1.
Select the desired options on the Cache Residency window:
To specify a range of data to place in Cache Residency cache, enter the starting and ending
addresses in the Start and End boxes.
To place all data areas of the selected LDEVs into Cache Residency cache, check the Select
All Area option.
2.
Enable the Multi Set / Release option.
3.
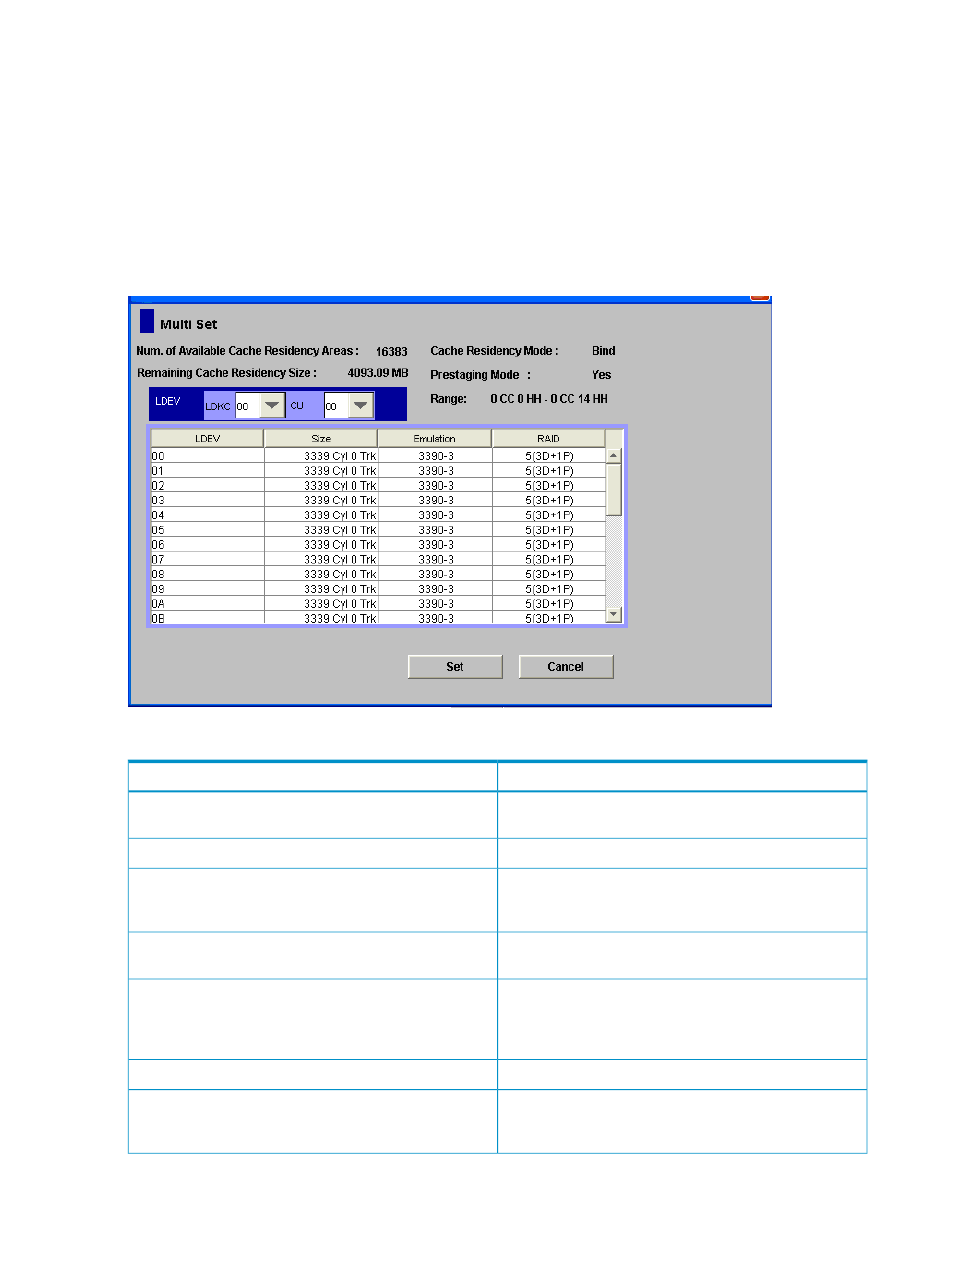
Click Set, and then click OK on the confirmation message. The Multi Set dialog box opens
with the selected options displayed.
Figure 11 Multi Set Dialog Box
Table 6 Multi Set dialog box details
Description
Item
Number of Cache Residency cache extents that can be
created.
Num. of Available Cache Residency Areas
Size of unused Cache Residency caches.
Remaining Cache Residency Size
Cache Residency mode (priority or bind) specified by the
Cache Residency Mode option in the Cache Residency
window.
Cache Residency Mode
Pre-staging mode (yes or no) specified by the Pre-staging
Mode option in the Cache Residency window.
Pre-staging Mode
Range of data to be placed into Cache Residency cache.
The data range is specified using the Start and End fields
in the Cache Residency window. All is displayed if the
Select All Area box was checked.
Range
Selects the LDKC that contains the desired CUs and LDEVs.
LDKC
Selects the CU image that contains the desired LDEVs. Only
CUs owned by the selected CLPR are displayed in the Multi
Set dialog box.
CU
30
Using the Cache Residency Manager GUI