Installation – Ariston E-COMBI 24 30 38 User Manual
Page 14
14
installation
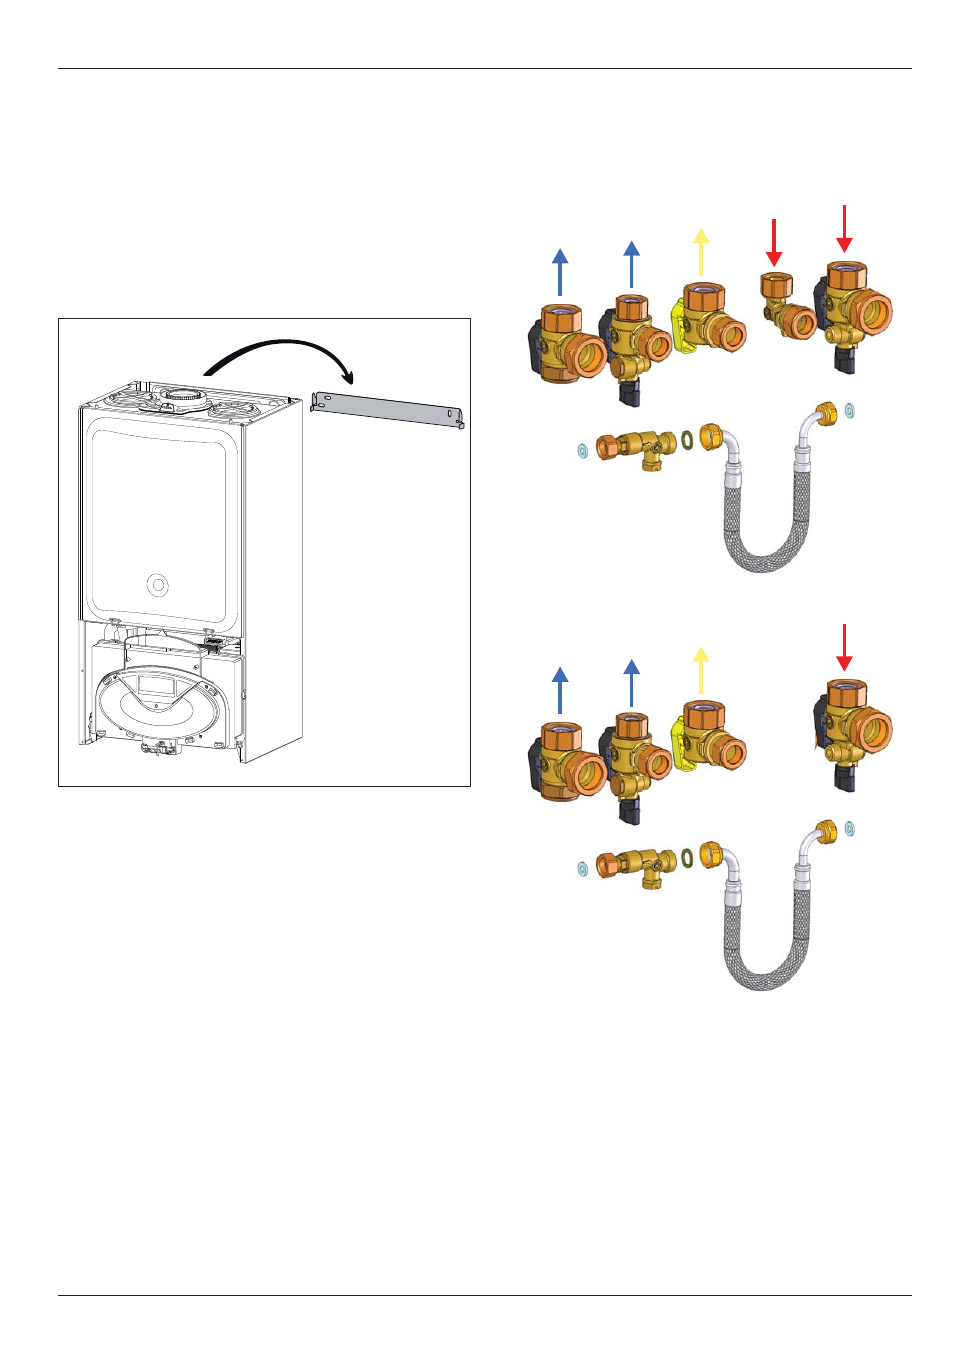
Connecting the boiler to the system
- Remove the boiler casing as described on page 16
- Remove the caps and connect the valves to the boiler using the
washers provided
- 4 x fi bre washers for the CH fl ow and return, cold water inlet and hot
water outlet connections
Installing the Boiler
Please check that you are familiar with the installation requirement
before commencing work (pages 7 - 13).
The installation accessories described in the following list are included
in the boiler packaging:
- Hanging
bracket
- A paper template (showing the dimensions of the boiler with 5
mm side clearances)
-
Connection valves (compression)
- Washers
- Filling
loop
-
Installation, Servicing and Operating Instructions
- Flue
gasket
Method of positioning the boiler on the wall
The paper template can be used to ensure the correct positioning of
kitchen cabinets etc.
The paper template has to be fi xed to the wall and used to locate the
position of the hanging bracket and the centre for the fl ue hole.
Drill and plug the wall and secure the hanging bracket using the
screws provided ensure the hanging bracket is level. Remove the
boiler from its packaging and remove the front casing panel.
Place the boiler on the hanging bracket.
N
OTE
: T
HE
APPLIANCE
MUST
NOT
BE
FITTED
ON
A
COMBUSTIBLE
WALL
SURFACE
.
Note: Connections viewed from behind boiler
Note: Connections viewed from behind boiler
E-COMBI
E-SYSTEM