Manually erasing dust (repair function), P.75, P.75) – Canon EOS Rebel SL1 18-55mm IS STM Lens Kit User Manual
Page 76: Cop y
75
Checking the dust erased spots
After step 3, you can display and check in detail the erased dust spots
one by one by pressing the
keys to return to the previous dust spot.)
Canceling a specified erased dust spot only
After step 3, you can press the
keys to display the erased dust spot, and then press the
+ keys to cancel only the erased dust spot displayed.
Switch between full screen display/normal screen display using
shortcut keys
You can also switch between full screen display/normal screen
display by pressing the
Applying the dust erasure result to another image
You can apply dust erasure to the same place in another image by
clicking the [Copy] button to copy the dust erasure results and then
displaying the other image to which you want to apply the results and
clicking the [Paste] button.
In the main window, you can also automatically erase dust spots in
multiple images appended with Dust Delete Data.
Useful functions of the copy stamp window
For a list of the copy stamp window functions, see
Select multiple images appended with Dust Delete
Data, and then select the [Adjustment] menu
[Apply Dust Delete Data].
Dust spots in all the selected images are erased in a single
operation.
Automatic Dust Erasure Processing in the Main Window
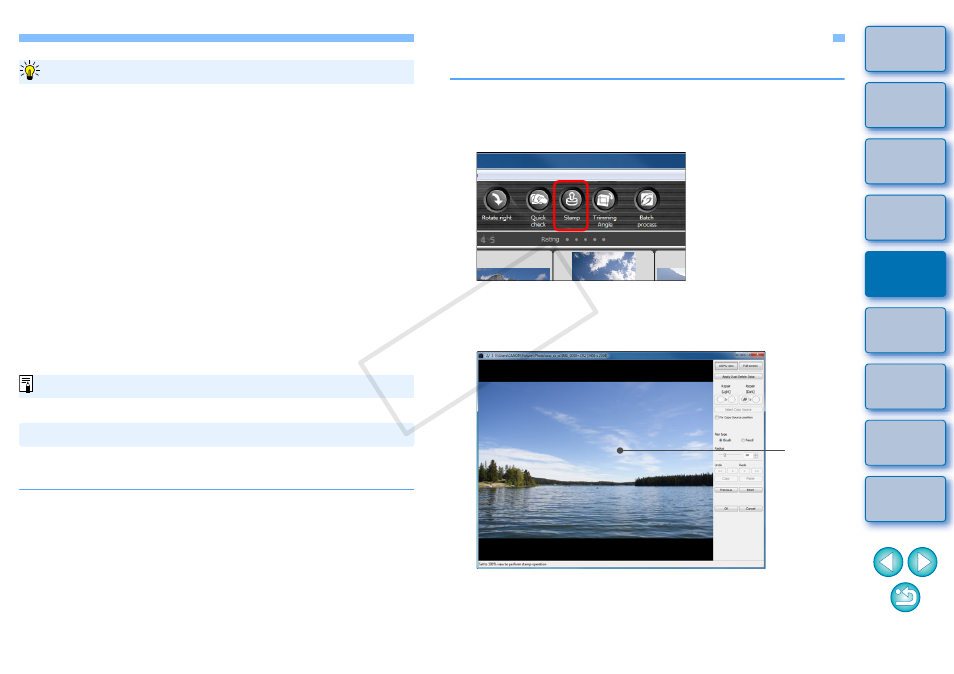
Manually Erasing Dust (Repair Function)
You can erase dust spots in an image by selecting them one by one.
1
In the main window, select the image you want to
erase dust spots.
2
Click the [Stamp] button.
The copy stamp window appears.
3
When the image has redrawn itself, double-click the
point from where dust is to be erased.
The display changes to 100% view.
The display position can be changed by dragging.
Double-
click
COP
Y