Saving the export log, Cop y, Exporting clips – Canon EOS C500 PL User Manual
Page 18
Exporting Clips
18
Adding a RAW clip in the export result list to the export queue again
You may find it convenient to add a RAW clip in the export result list to the export queue again in cases
such as when an error has occurred.
1.
Select a RAW clip in the export result list.
•
You can select multiple clips at once.
2.
In the export window, click Re-add to Queue.
•
The selected RAW clips will be added to the export queue with their previous settings.
•
If necessary, you can also change the destination folder.
Saving the export log
1.
In the Cinema RAW Development menu, select Preferences.
2.
Place a check in the Save Export History box.
3.
Click Browse under Destination folder and select a destination folder.
4.
Click OK.
•
The export log from this point on will be saved in an export log file (CSV format).
•
Export log files are generated on a daily basis on days in which files are exported. The file’s name
will appear in the destination folder as [CRD_Export_YYYYMMDD].CSV where YYYYMMDD
represents the year, month and day.
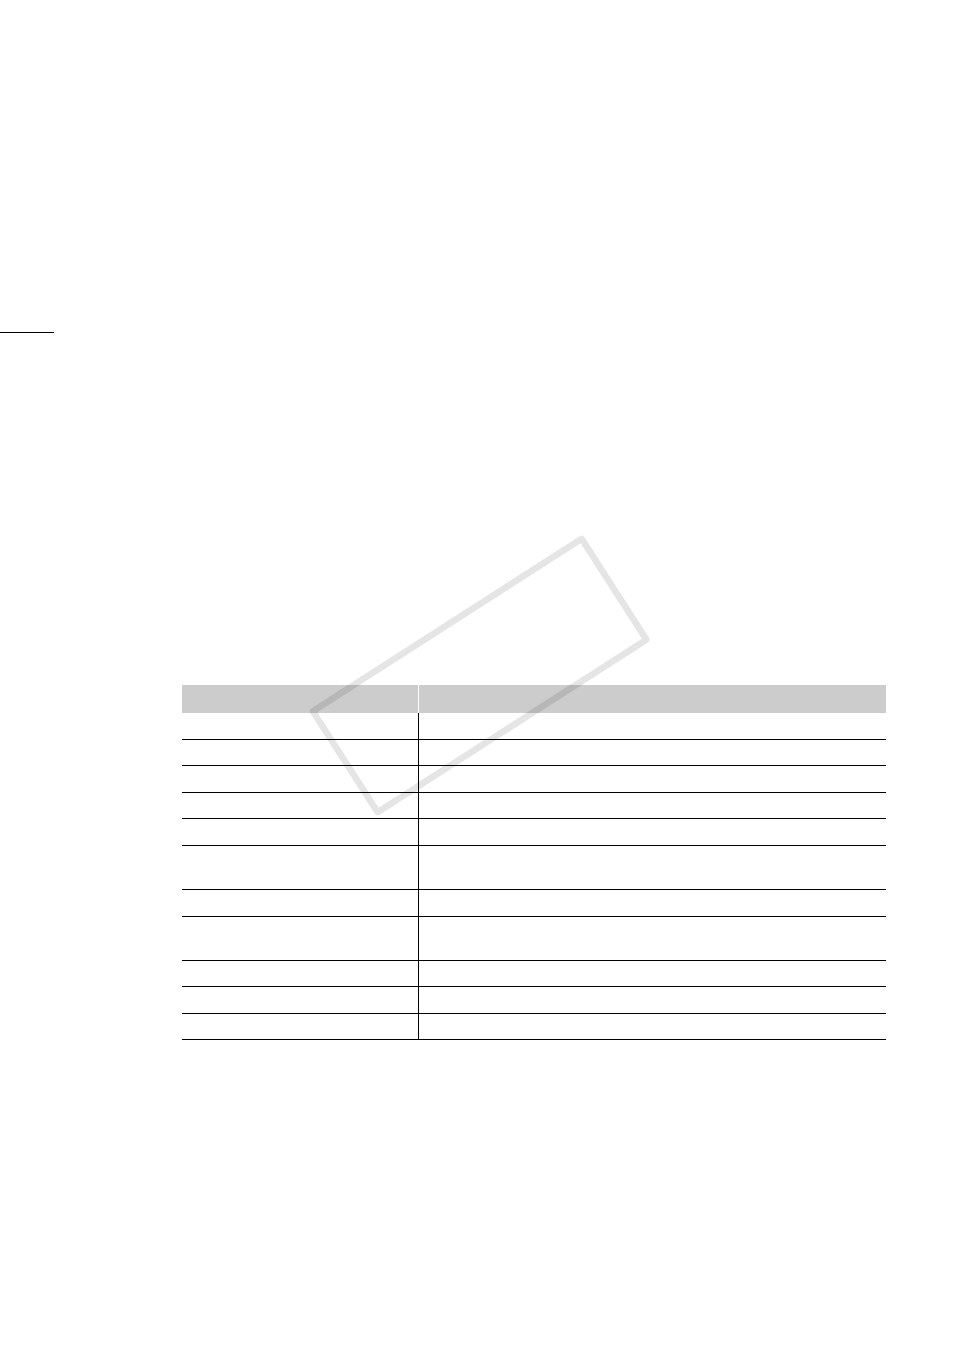
Data recorded in the export log file
Item
Description
Status
Shows the result of the export process.
Date
Shows the date in which the file was exported.
Time
Shows the time in which the file was exported.
Source
Shows the file path of the RAW clip.
Destination
Shows the file path of the exported file.
Type
Shows the output format of the exported file. If the file was copied,
this appears as RMF.
Resolution
Shows the resolution of the exported file.
Gamma
Shows the gamma settings for the exported file. For OpenEXR files,
this appears as Linear.
IDT
Shows the IDT setting applied to OpenEXR files.
Start TC
Shows the starting time code for the exported file.
End TC
Shows the ending time code for the exported file.
COP
Y