Computer input – Canon LV-7392A User Manual
Page 38
38
Computer Input
Select
Digital zoom +. The On-Screen Menu
disappears and
D. zoom + appears. Press the
OK button to expand the image size. Use the
Point ▲▼◄► buttons to pan the image. The
Panning function can work only when the image
is larger than the screen size. A projected image
can be also expanded by pressing the D.ZOOM
+ or the OK button on the remote control unit.
To exit the Digital zoom +/– mode, press any
button except the D.ZOOM
+/– buttons, OK and
Point buttons.
Digital zoom +
Select
Digital zoom –. The On-Screen Menu
disappears and
D. zoom – appears. Press the
OK button to compress image size.
The projected image can be also compressed by
pressing the D.ZOOM
– or the OK button on the
remote control unit.
Digital zoom –
To return to the previous screen size, select a
screen size from the Screen Size Adjustment
Menu or select an input source from the Input
Source Selection Menu (see page 30) again,
or adjust the screen size with the D.ZOOM
+/–
buttons.
Note:
• The minimum compression ratio is limited
depending on the input signal, when the Keystone
function is working or when the custom is selected
for the screen size.
•
True and Digital zoom +/– are disabled and
cannot be displayed when
480i, 575i, 480p 575p,
720p,1035i or 1080i is selected in the PC System
Menu (p.31).
•
Digital zoom +/- cannot be selected when True is
selected.
• The minimum compression ratio is limited at
Normal screen size.
LV-RC06
Remote control unit
D.ZOOM + button
POINT ▲▼◄► buttons
OK button
D.ZOOM - button
When this function is set to
On, the picture
will be top/bottom and left/right reversed. This
function is used to project the image from a
ceiling-mounted projector.
Ceiling
When this function is set to
On, the picture will
be left/right reversed. This function is used to
project the image from rear of the screen.
Rear
To reset the adjusted data, select Reset and
press the
OK button. A confirmation box appears and then
select Yes. All adjustments will return to their
previous figures.
Reset
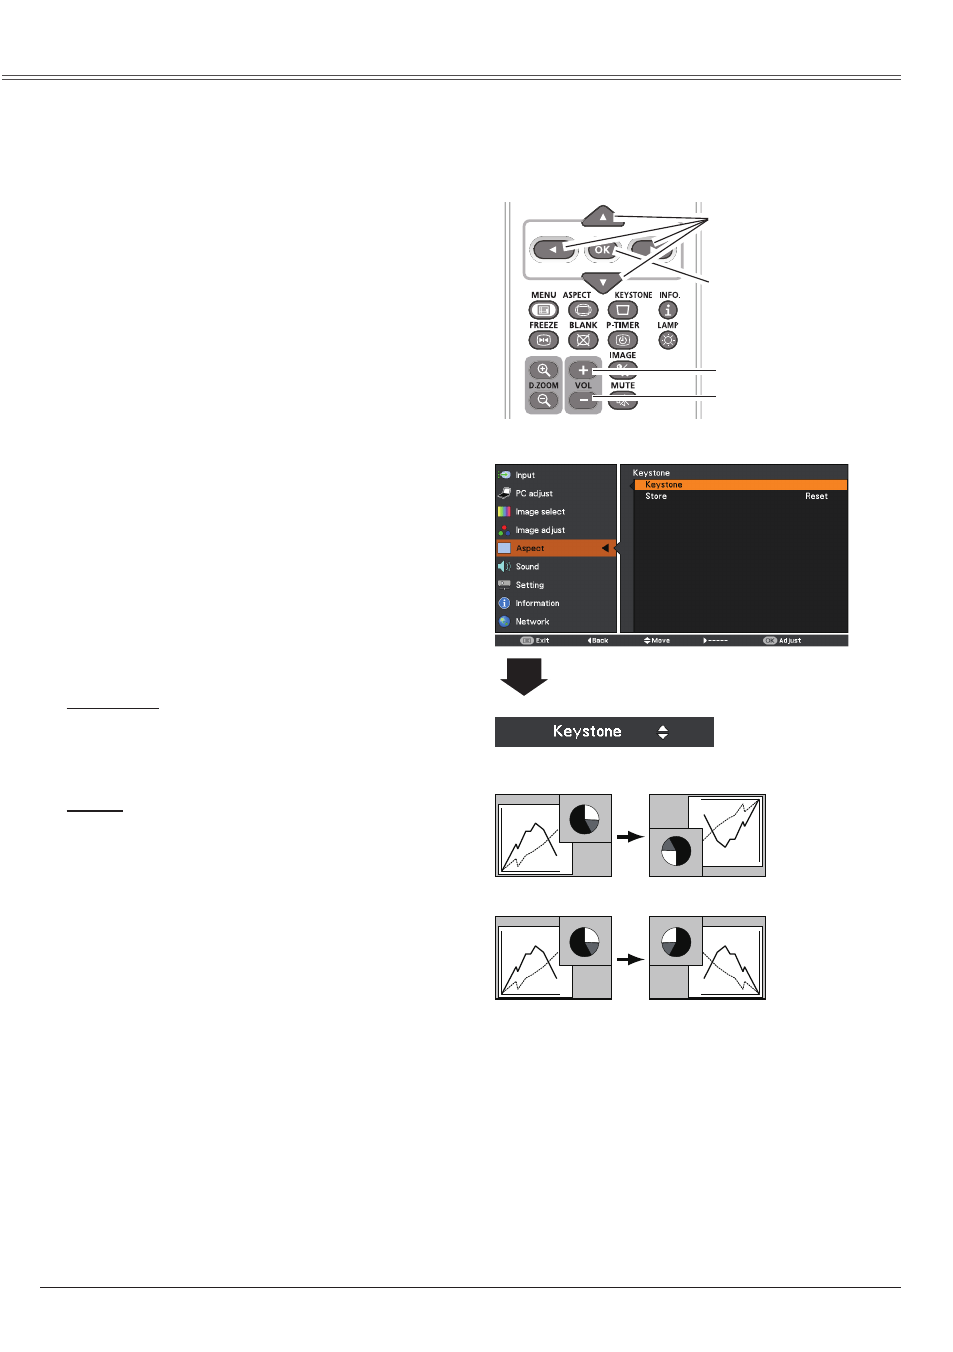
Keystone
This function is used to adjust keystone
distortion of the projected image. Use the Point
▲▼ buttons to choose the item you want to
adjust.
Keystone
To correct keystone distortion, press the OK
button.
Keystone appears on the screen. Use the
Point ▲▼ buttons to correct keystone
distortion (p.26).
Store
To store or reset the keystone correction,
press the Point ► button.
Store .......... Keep the keystone correction
even when the AC power cord
is plugged out or turned off the
projector.
Reset .......... Release the keystone correction
when the AC power cord is
plugged out.
Keystone
Ceiling
Rear
Press the OK button.