Rear terminal, Part names and functions – Canon LV-7392A User Manual
Page 11
11
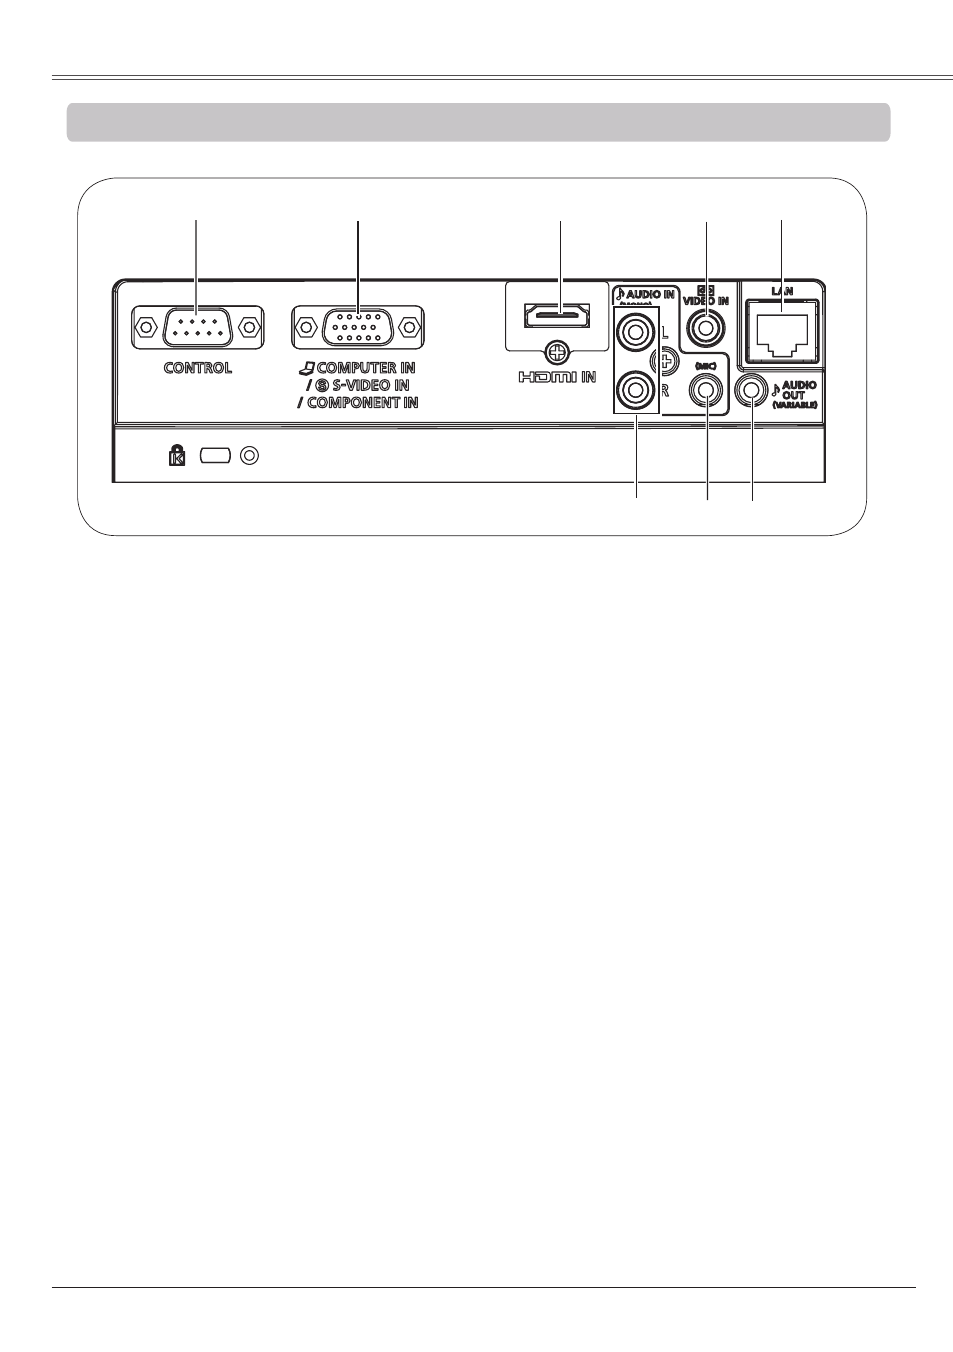
Part Names and Functions
Rear Terminal
②
③
①
⑥
⑤
⑧
④
④ VIDEO IN
Connect the composite video output signal
to this jack (p.18).
② COMPUTER IN/S-VIDEO IN /
COMPONENT IN
Connect output signal from a computer,
component video output, RGB scart 21-
pin video output or S-VIDEO output to this
terminal (pp.17-19).
⑥ AUDIO OUT (VARIABLE)
Connect an external audio amplifier to this
jack (pp.17-19).
This terminal outputs sound from AUDIO
IN terminal ⑦ or ⑧, or HDMI terminal ③
(digital audio).
Never plug headphones and earphones into
AUDIO OUT jack.
① CONTROL
When the projector is controlled by a
computer, connect to this jack with serial
control cable.
③ HDMI IN Terminal
Connect the HDMI signal (including sound
signal) from video equipment or from
computer to this terminal (p.17-18).
HDMI, the HDMI logo and High Definition
Multimedia Interface are trademarks or
registered trademarks of HDMI Licensing,
LLC.
⑦
⑦ AUDIO IN (PC/MIC)
Connect the audio output signal from
computer or video equipment connected to
② to this jack. Or connect the MIC to this
jack (pp.17-19).
⑧ AUDIO IN (L/R)
Connect the audio output signal from video
equipment connected to ④ to this jack. For
a mono audio signal (a single audio jack),
connect it to L(MONO) jack (p.18).
⑤ LAN Connection Terminal
Connect the LAN cable (refer to the user’s
manual of “Network Set-up and Operation”).
(LAN Connection Terminal is only for
LV-7292A, LV-7297A, LV-7392A, LV-8227A.)
Note:
When using AUDIO IN(PC/MIC) terminal
as MIC input, these terminals can be used
for PC audio input.