3 turn on the machine, 4 install the ink cartridge – Brother HL-S7000DN User Manual
Page 4
4
e
Put the paper tray firmly back in the machine.
Make sure that it is completely inserted into the
machine.
3
Turn on the machine
a
Connect the AC power cord to the machine and
then connect it to an AC power outlet.
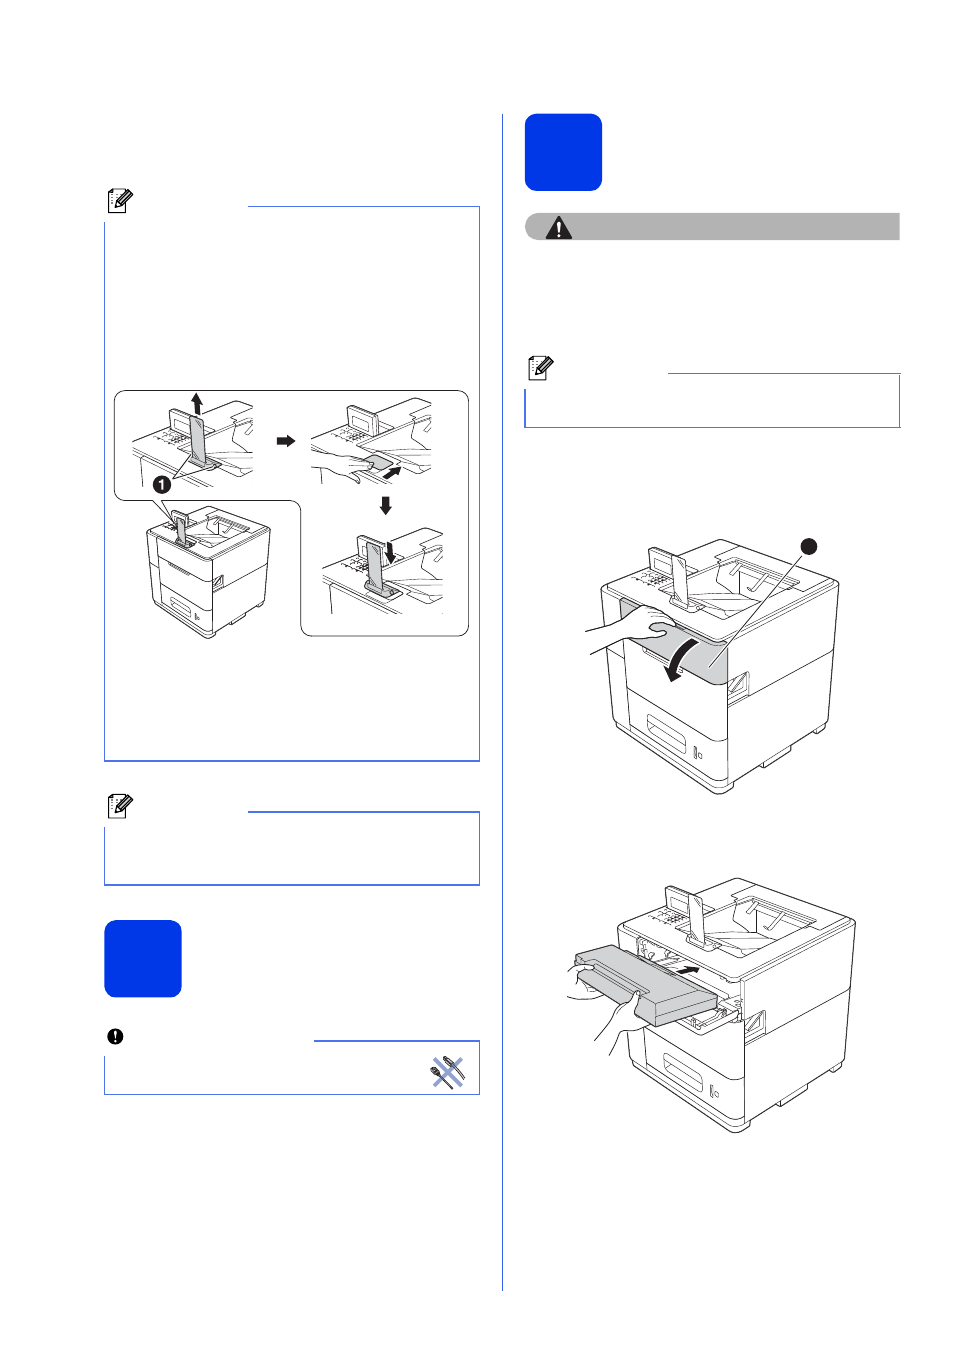
4
Install the ink cartridge
CAUTION
• If ink gets in your eyes, wash it out with water at
once and call a doctor if you are concerned.
• If ink stains your skin or clothing, wash with soap
or detergent at once.
a
Make sure that the power is turned on.
The LCD will show No Cartridge.
b
Open the ink cartridge cover a.
c
Unpack the ink cartridge.
d
Put the ink cartridge firmly into the machine.
Note
• For Legal or Folio size paper, you need to
change the position of the output stopper. To
move the stopper to the Legal position press
the release buttons a on the base of the
stopper and remove it. Then slide the cover
towards the back of the machine as shown. Put
the output stopper back on the machine in the
area exposed by moving the cover.
• When the output stopper is in the default
position it will light according to the machine
status. The light is not available when in the
Legal position. For more information about the
status light, see LED indications in the User’s
Guide.
Note
For more information about recommended paper,
see Recommended paper and print media in the
User’s Guide.
Important
DO NOT connect the interface cable
yet.
Note
Make sure you install the Ink Cartridge included
with your machine first.
1