Screen – Brother TD-2120N User Manual
Page 9
8
e
Return the time/date battery cover to its
original position, and then use a coin or
similar object to slowly turn the
time/date battery cover in the opposite
direction of the arrow on the battery
cover until it stops in order to install the
time/date battery cover.
f
Close the RD Roll compartment top
cover. Press down until it snaps into
place.
NOTE
The time and date can be configured from
the [
] (admin key) on the touch panel.
For details, see the User’s Guide included
on the CD-ROM.
LCD
Lift up the LCD, and then adjust it to an angle
so that the screens are visible. If the screen is
dark and hard to read, the backlight can be
turned on. For details, see Specifying
Settings From the Touch Panel Display
on page 11.
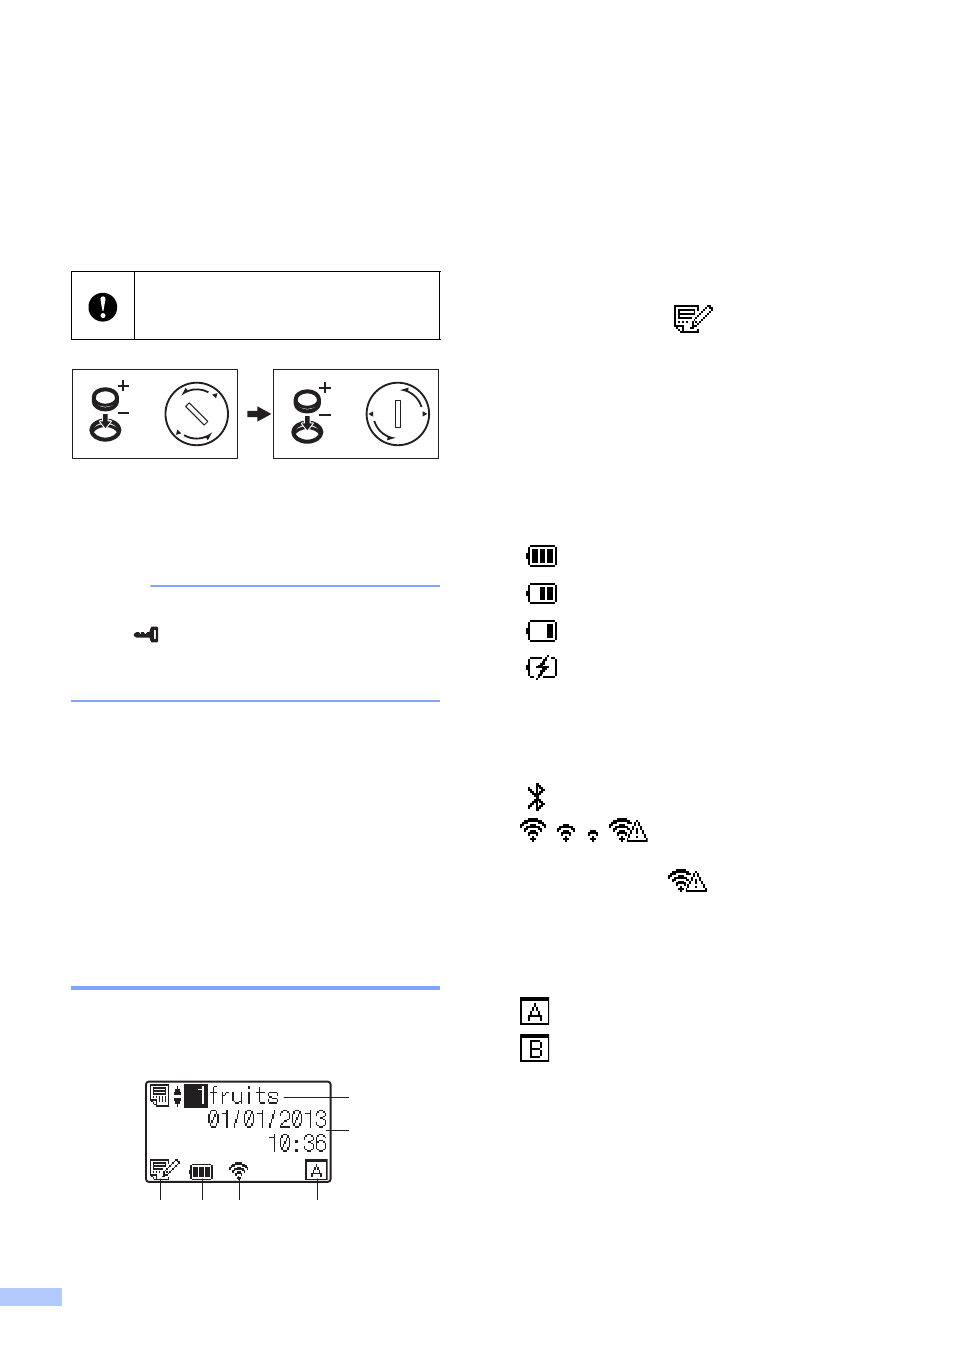
Screen
When the printer is turned on, the main
screen appears.
1 Template name and number
Displays the number and name of the selected
template.
2 Time and date
Displays the current time and date. For details
on specifying the clock settings, see the User’s
Guide included on the CD-ROM.
3 Template editing indicator
When a template is being edited using the
touch panel display,
appears.
4 Battery level display
When the rechargeable Li-ion battery
(optional) is being used, the remaining charge
is indicated.
If you continue to use the printer while the
battery has a low charge, the message
“Recharge Battery!” appears, and the
printer may run out of power, even while
printing.
: Full charge
: Half
: Low charge
: Charging
5 Indicators for available wireless interfaces
If wireless connection settings have been
specified, the marks for the available interfaces
appear.
: Bluetooth
,
, ,
: Wireless LAN
(The connection status is shown at four
different levels, and
appears when there
is no connection.)
6 Touch panel setting
Displays whether the touch panel display has
been set for touch panel A or B.
: Basic control panel (A)
: One-touch panel (B)
If the time/date battery cover is forcibly
turned past the stop position, it may be
damaged.
1
2
3
4
5
6