Edit and rotate labels on a map – Milestone XProtect Smart Client 2013 User Manual
Page 79
Milestone XProtect
®
Smart Client
2014
User's Manual
www.milestonesys.com
79
Defining your views
Drag the Opacity slider to the required level, then click the map element to apply color and
opacity.
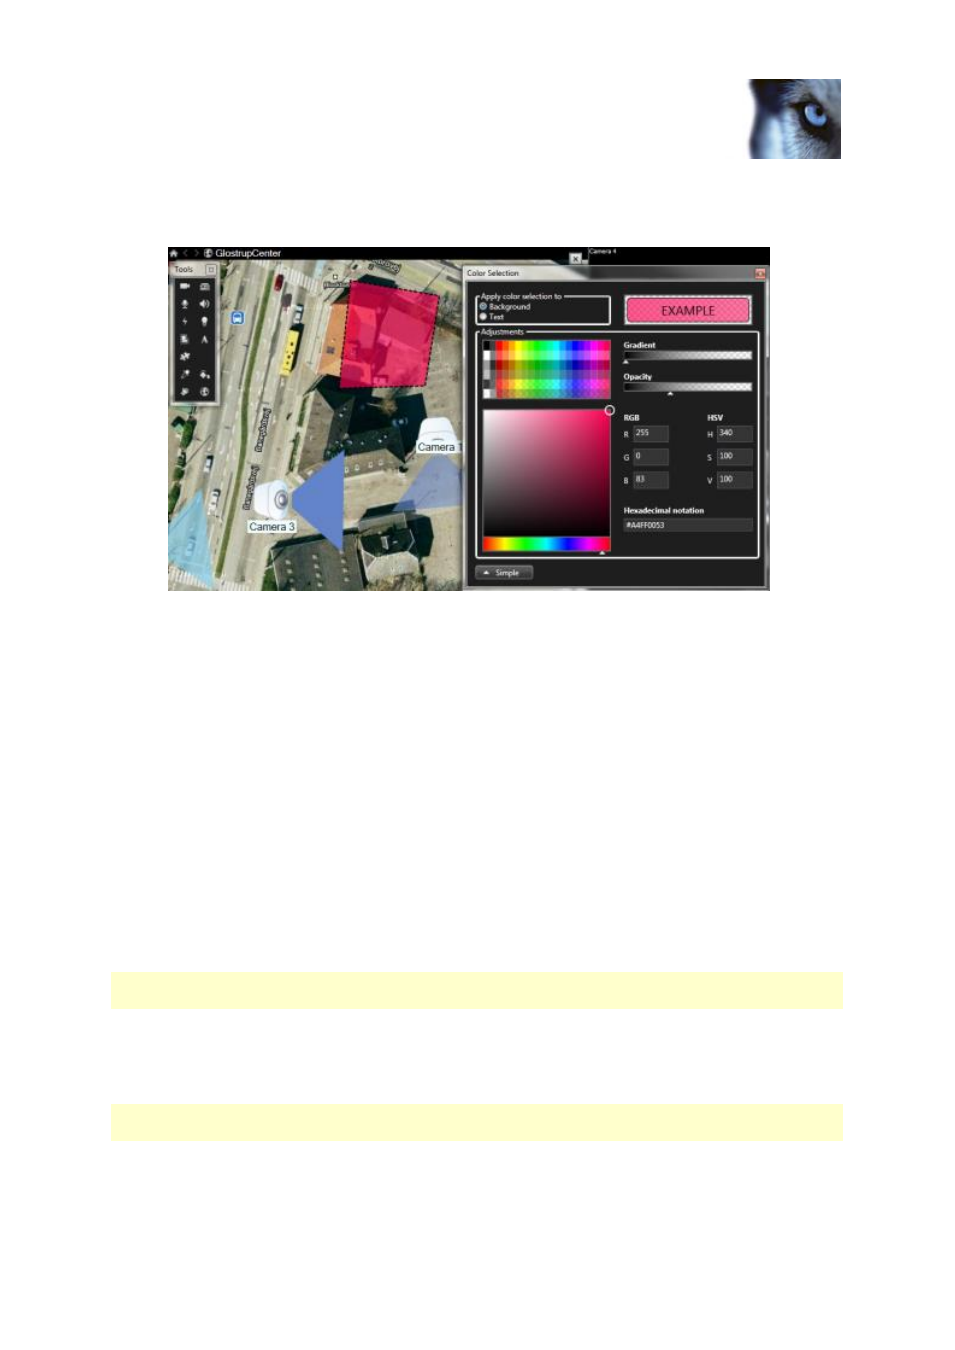
Advanced Color Change
You can fill map elements with any color you like. Click the Color Selection window's
Advanced button to access the advanced color selection options.
Use the color slider to select the main color shade, then drag the color circle to select the
required tone.
- or -
Type the hexadecimal color code in the Hexadecimal notation field.
Edit and rotate labels on a map
All elements on a map have a label, making it easy to identify them.
If you have a great number of elements on a map, it can be difficult to have enough room for all the
labels. You can edit the name of the devices, by selecting the label and then typing in a new (shorter)
name for the device.
When you rename a label, you are only changing the label on the map, not the name of the camera or
element in the system.
You can also make sure your labels don't overlap by rotating them. To rotate a label on a map:
Select the label and place your mouse over one of the sizing handles. When the mouse
pointer changes appearance to a curved arrow, click and drag the label to rotate it.
Another way to save space on a map is to select only to show view zones and PTZ presets on hover
(see "Map settings" on page 71).