Badger Meter ORION AMR/AMI Hardware Solutions for Gas Utilities User Manual
Page 29
Installation Manual
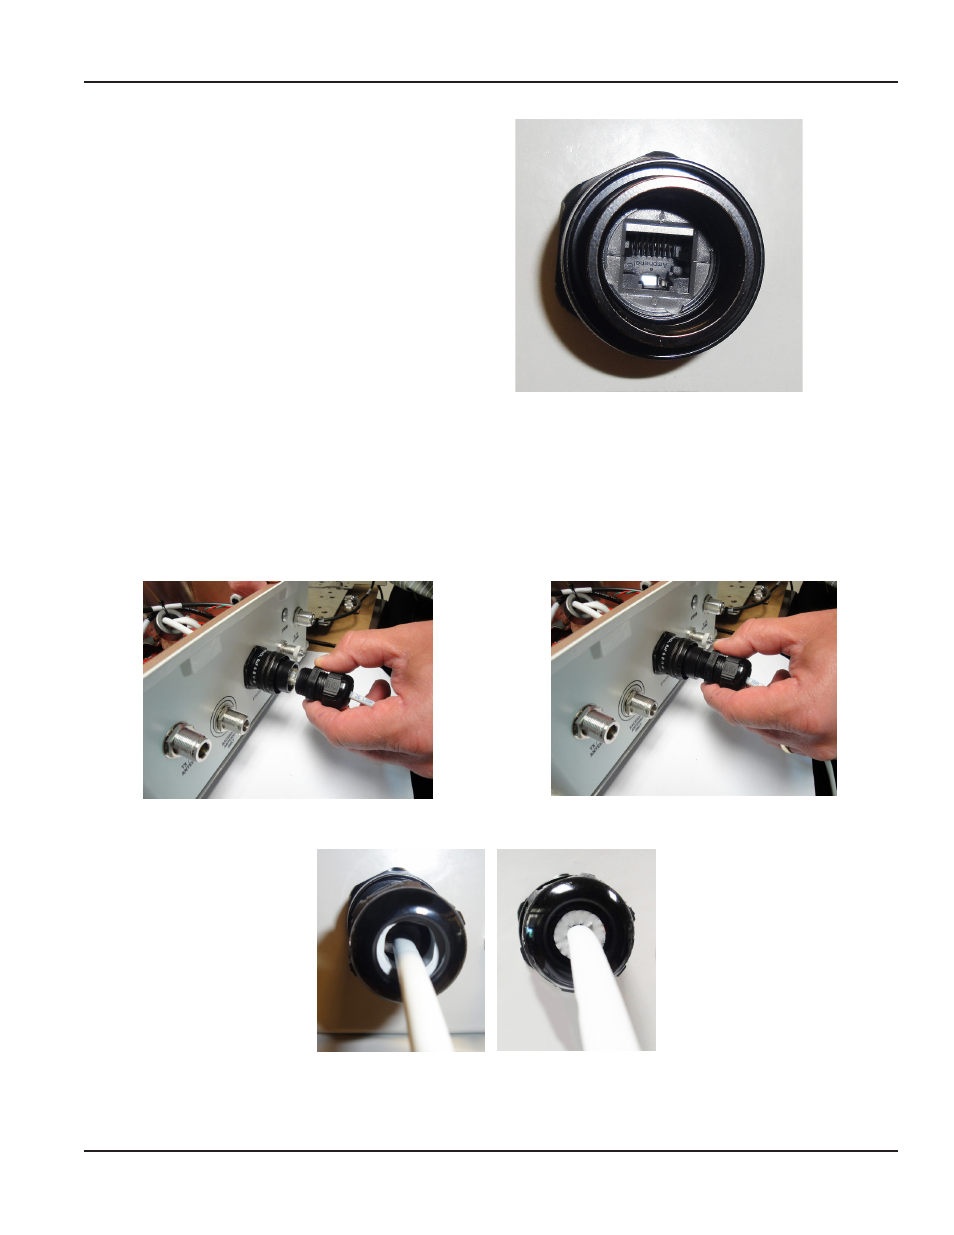
6 . Insert the Ethernet cable connector into
the RJ45 receptacle . Push the connector
in firmly .
The plug latch of the connector fits into
the recessed key section of the RJ45
receptacle . A close-up view from the front
is shown in Figure 37 .
An audible click confirms a
complete connection .
NOTE:
N
Once assembled, RJ45 plugs cannot be
disassembled from the metal housing
without a special tool (67163-001) .
Figure 37: RJ45 receptacle close up
7 . Screw the cable gland onto the metal housing on the RJ45 receptacle and tighten the cable gland nut .
See Figures 38 and 39 . Recommended: Use a torque wrench to tighten to 30…45 inch-pounds.
8 . Tighten the dome nut on the cable gland (Figure 39) . Recommended: Use a torque wrench to tighten to 20 inch-pounds.
NOTE:
N
The gray seal inside the dome nut must be in firm contact with the Ethernet cable . As the dome nut is tightened,
the seal should fill the open end of the dome nut without popping out the front and should be in firm contact
with the outer jacket of the Ethernet cable . See Figures 40 and 41 .
Figure 38: Screw cable gland onto metal housing
Figure 39: Tighten the cable gland nut
Figure 40: Gray seal before dome nut is tightened
Figure 41: Gray seal after dome nut is tightened
Assembly is complete . For additional information, refer t
Page 29
March 2014