Operation, 3 quick setup – KROHNE OPTIFLEX 2200 C_F Quickstart EN User Manual
Page 46
4
OPERATION
46
OPTIFLEX 2200 C/F
www.krohne.com
08/2013 - 4000622103 - QS OPTIFLEX 2200 R03 en
4.3 Quick Setup
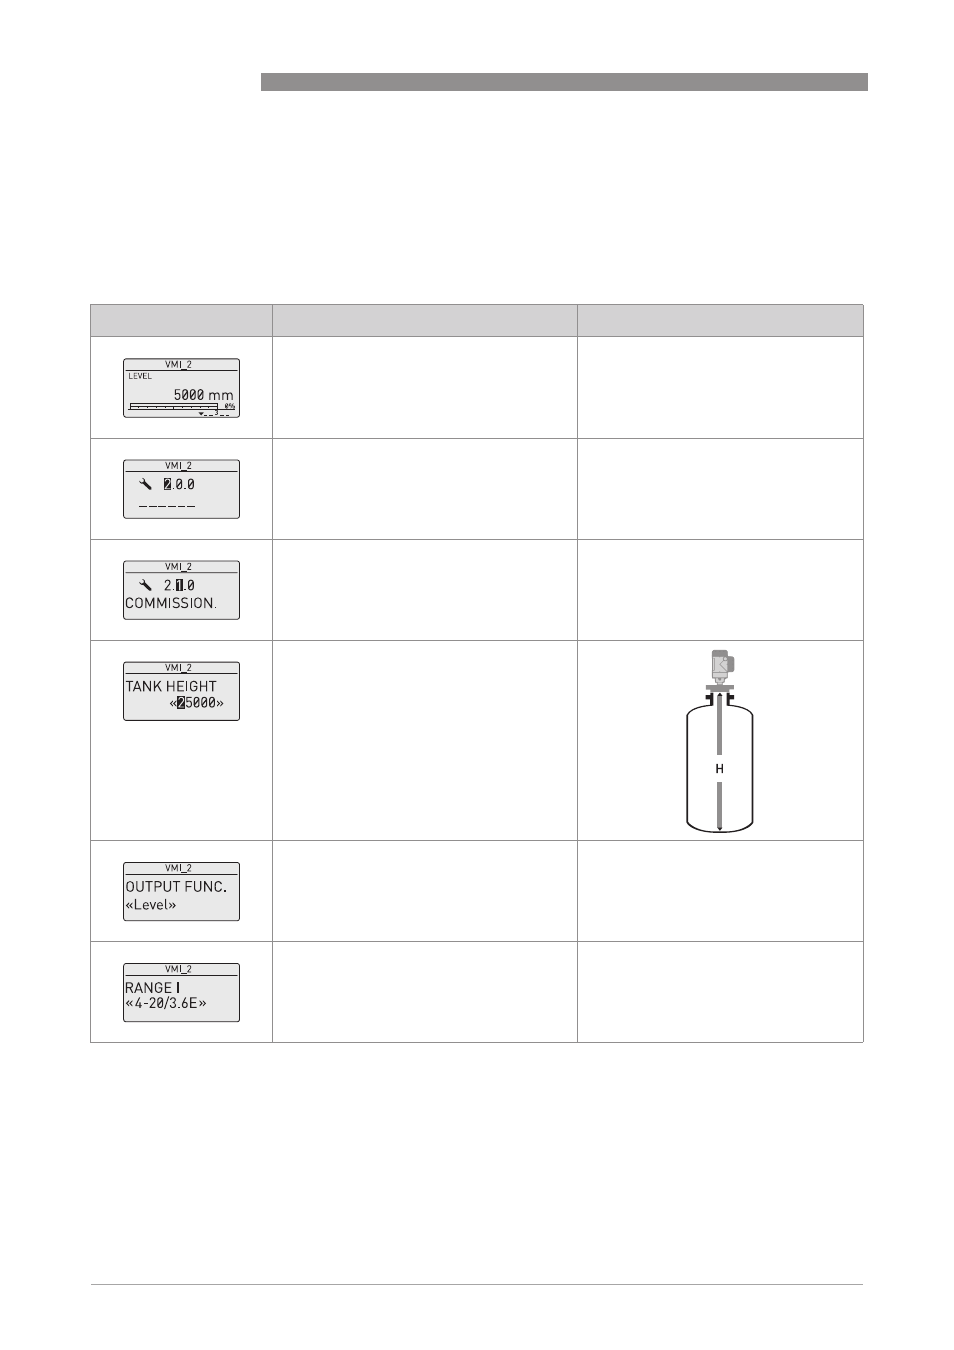
Use this procedure to change the probe length and give the top and bottom measuring limits.
«
xx » in the illustrations shows that you can change the value or the parameter. Push the
keypad buttons in the correct sequence:
Procedure
Screen
Steps
Description
•
[>>>>], [
] and [>>>>].
Default screen.
Enter configuration mode (2.0.0
SUPERVISOR).
•
[>>>>], [^
^
^
^], [
], [
], [>>>>] and [^
^
^
^].
Enter the password (the default password
is shown). If it is necessary to change the
password, refer to the handbook.
•
[>>>>]
Push this button to start the quick set-up
procedure.
•
[>>>>] to change the tank height (H).
•
[>>>>] to change the position of the cursor.
•
[
] to decrease the value or [
] to
increase the value.
•
[^
^
^
^] to confirm.
•
[
] or [
] for the selection of the
measurement name (Distance, Level,
Conversion or Ullage Conv.).
•
[^
^
^
^] to confirm.
The manufacturer sets the output function
to “Level” before delivery.
If it is necessary to measure volume,
ullage volume, mass or ullage mass
(Conversion or Ullage Conv.), refer to the
handbook.
•
[
] or [
] for the selection of the current
output range (4-20 mA/3.6E, 4-20, 3.8-
20.5/3.6E, etc.).
•
[^
^
^
^] to confirm.