Star Water Systems Star 4in Sub Instr2&3-wire User Manual
Page 6
10
Copyright © 2014 Star Water Systems. All rights reserved.
11
Copyright © 2014 Star Water Systems. All rights reserved.
Fuse Box
Outside
Faucet
Pump in
Well
Outside
Faucet
Pump in
Well
Drawdown
Water Level
10 Ft. Min.
20 Ft.
Top of Well Screen
Bottom of Well
WARNING: All electrical wiring or service
should be done by qualified electrician. Be sure to
test cable for continuity with an ohmmeter before
starting the pump.
1. All wells should be flushed clear before allowing
water into the house.
(Fig. 1)
2. Open an outside faucet and allow water to
run until water is clear of sand or any other
impurities. If an outside faucet is not available,
place softener in bypass position, remove aerator
from a high-flow faucet and allow water to run
until it is clear of impurities. Once clear, turn off
water flow, replace aerator and put softener back
into service position.
(Fig. 2)
CAUTION: Be sure you do not stop pump
before water runs clear. This may take several
hours. If pump stops with sand in it, it may lock.
3. If pump lowers water in the well far enough
to lose prime, either lower pump in the well (if
possible) or throttle (slow down) the discharge
of the well with the gate valve to match the
capacity of the well.
(Fig. 3)
NOTE: If the well is low capacity, use a low water
level control.
1
2
3
PRELIMINARY TEST RUN
PRESSURE TANk INSTALLATION
The purpose of the pressure tank is to allow a certain
amount of water to be used before the pressure
drops enough to cause the pump to start. Without
a pressure tank, the pump would start and stop
constantly, every time water is used.
NOTE: Use thread tape and thread paste on all
threaded connections.
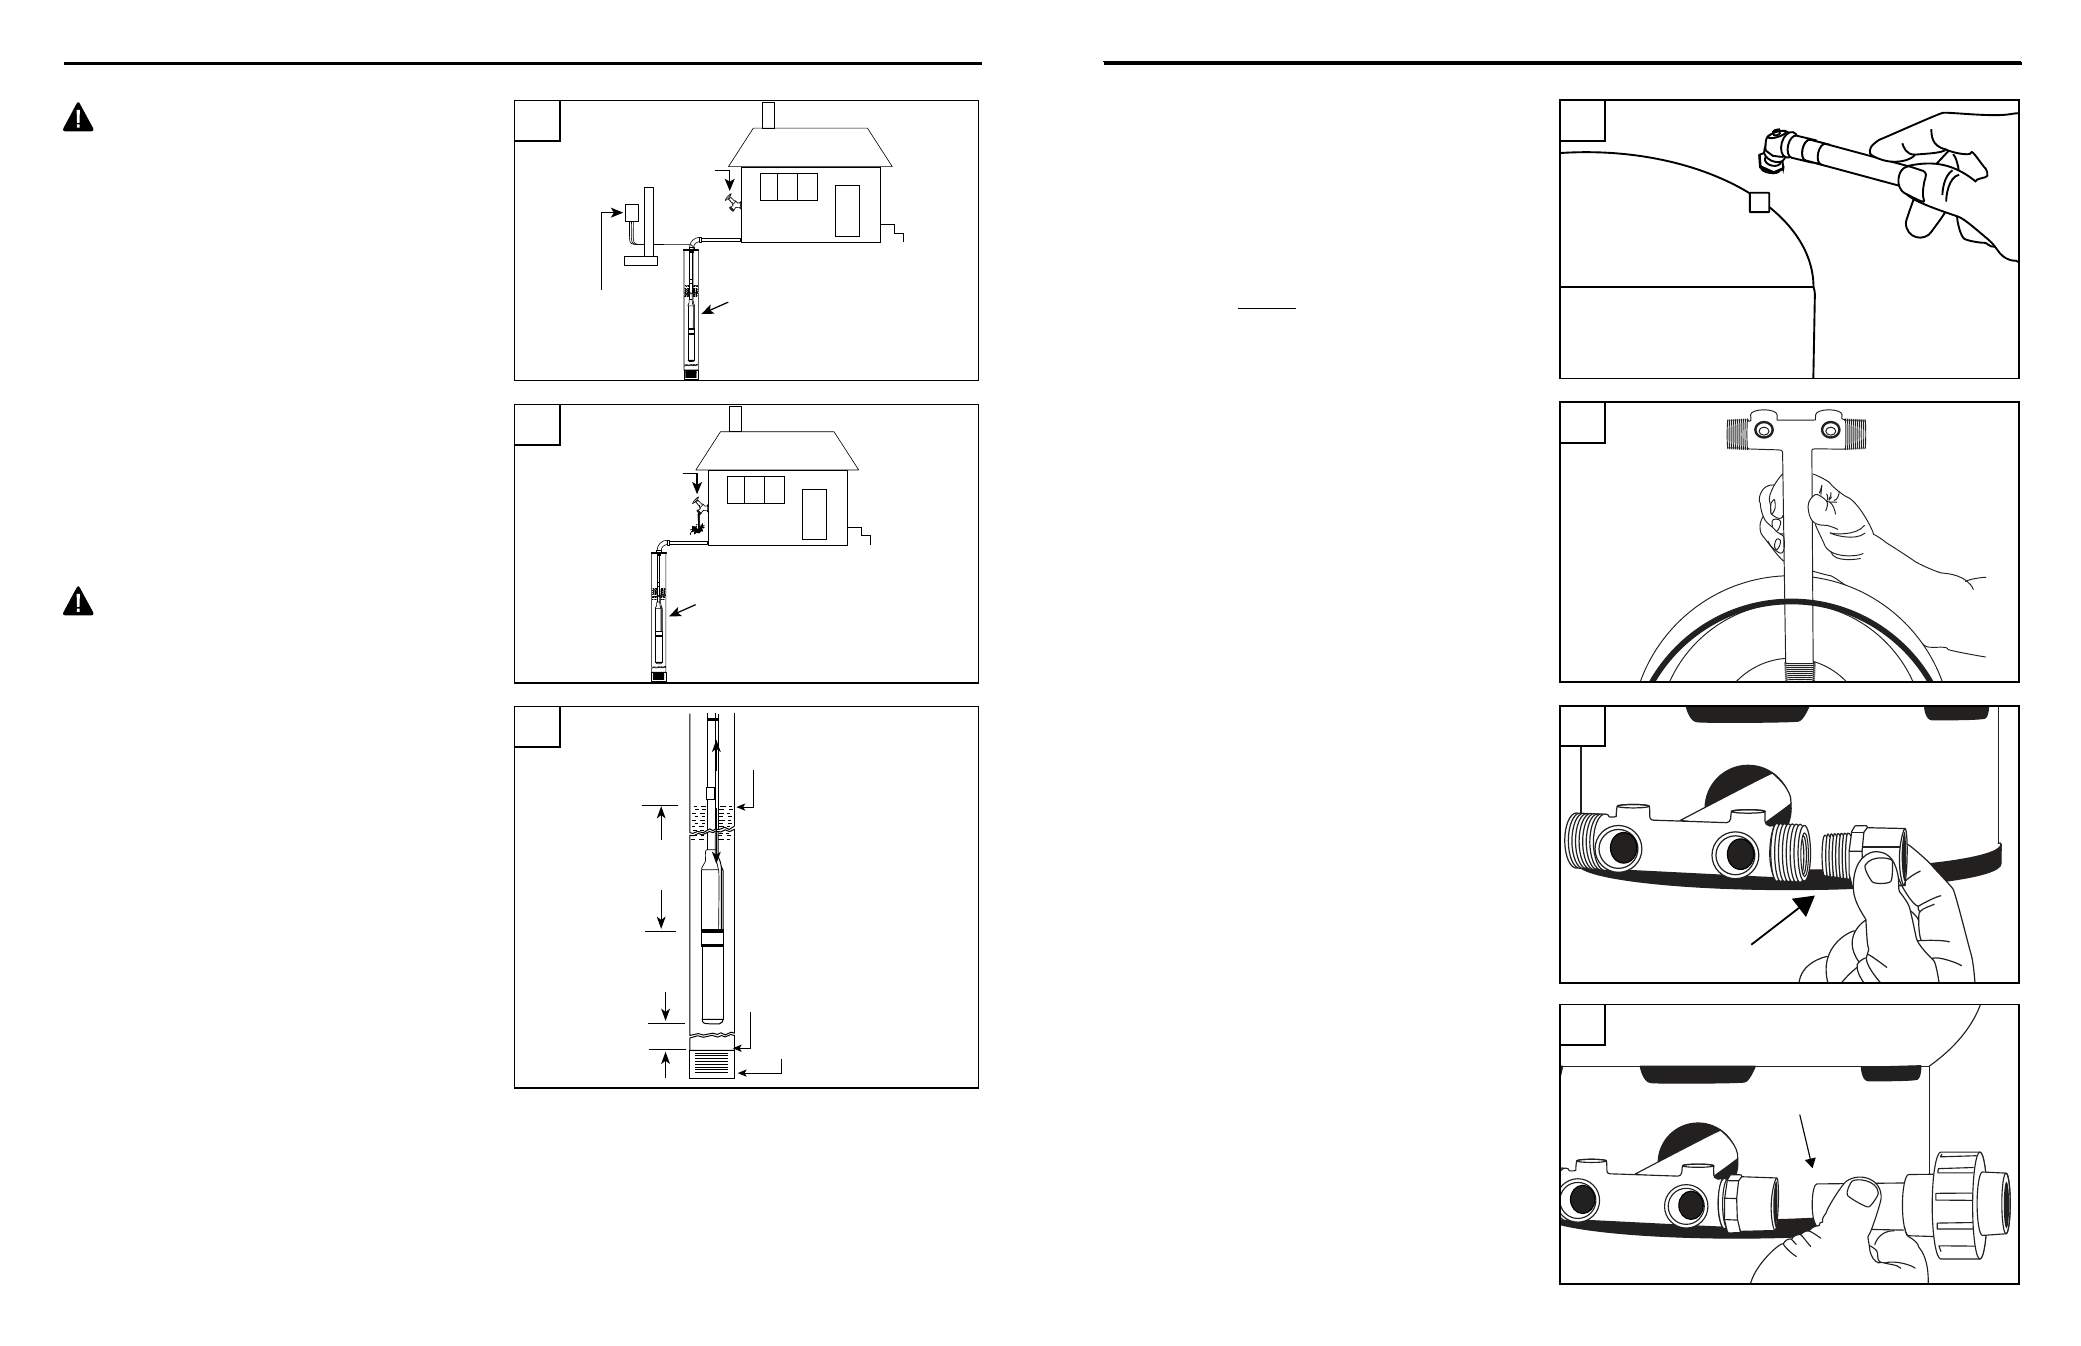
1.
NOTE: Check the air pressure of the tank with
a tire gauge before the system is charged
with water. The pressure should be 2 lbs. less
than the low pressure cut in on the pressure
switch. For instance, for a 30-50 switch, set
the tank pressure at 28 lbs. or less. (
Fig. 1)
2. Apply five wraps of thread tape and thread
paste, insert a tank tee through the opening in
the bottom of the pressure tank, and tighten
securely. (
Fig. 2)
3. Connect a 3/4 in. fitting to the 3/4 in. opening
on the pipe tee. (
Fig. 3)
IL1153
Tape
1
2
3
IL1154
Glue
4
4. Connect a 3/4 in. pipe and union to the 3/4 in.
fitting. (
Fig. 4)