Caution – Hired-Hand RS-400 Door User Manual
Page 9
Part No. 4801-5170 Rev 5/08
RS 400 Door
Page 9 of 26
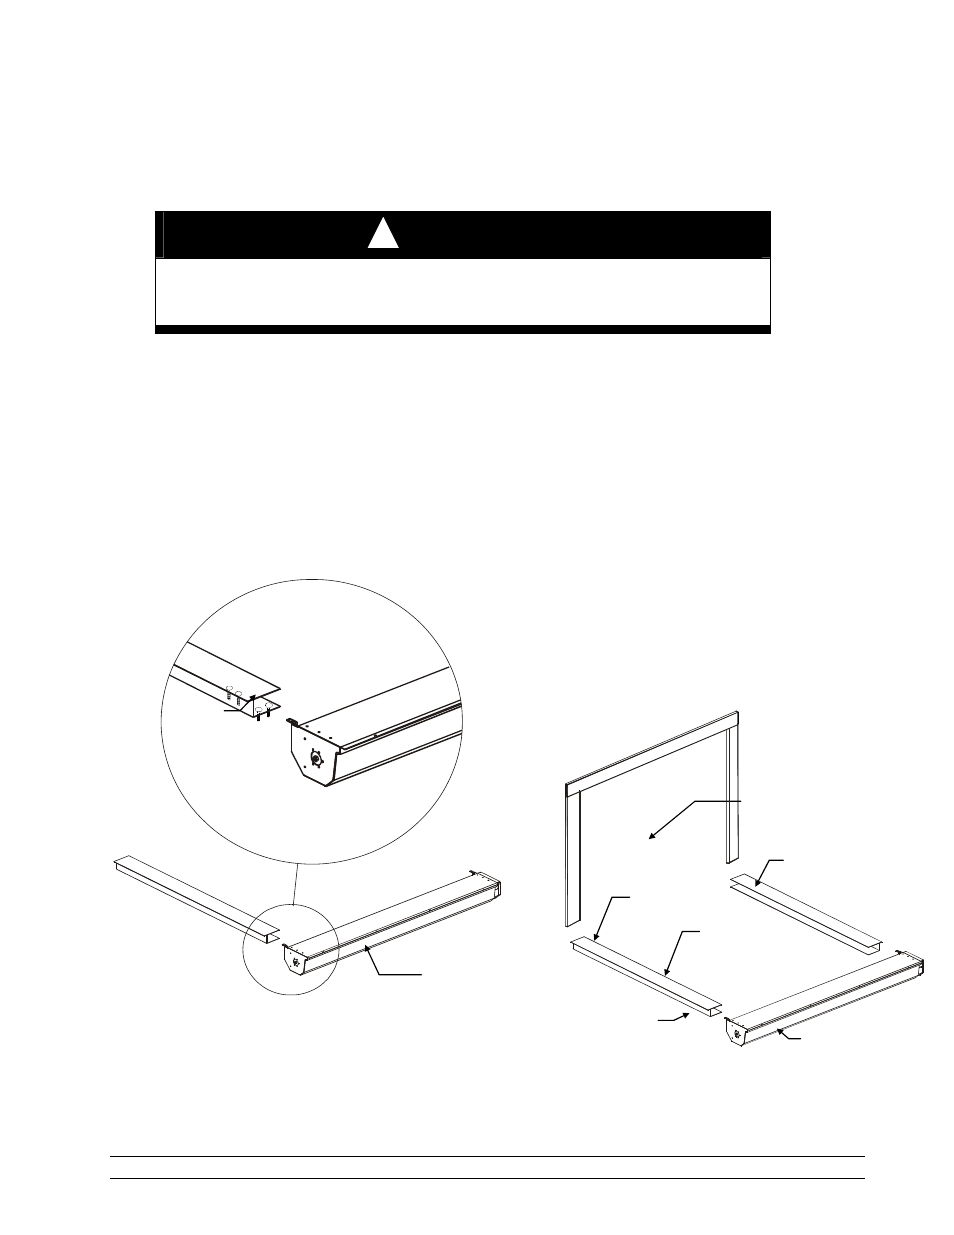
Horizontal Member
(Head unit section)
Left track
(Flange side up)
Bracket fits to
inside of track
Bracket attached to front
of head unit fits to the
outside of track.
Threaded
Pims
5.6
Assembly of Parts
5.6.1
Assembly of Head Unit and Tracks
CAUTION!
Do not remove the Safety Brackets from the door head unit until the door is installed to the
door frame and the Motor/Hoist is properly installed to the door drive shaft. See Section
5.6.4. Without proper support, the door will drop with rapid motion and injury may occur..
1. Arrange the horizontal member (Head Section), left vertical member (left track), and
right vertical member (right track) on the floor in front of the clear opening as shown in
Diagram 4 with the flange side facing upward.
2. At each end of the Horizontal member, there are two brackets. Refer to Diagram 4
shown below. One bracket attaches to threaded Pims inside the track flange. The other
bracket (on the front of the head unit) attaches to threaded Pims on the outside of track
unit. Attach head unit to track unit.
3. Add nuts to threaded attachment Pims. Tighten nuts securely to 90 in-lbs torque.
CAUTION: Excessive torque will damage the threaded Pims. Do not over-tighten.
4. Repeat steps 1-3 to install right track.
Right Track
Left Track
Lay tracks flat with
the flanges on top.
Hook & loop strips
go to inside of
door.
Flange mounting
bracket should be on
top side of track unit.
Clear Opening
Placement of Parts for Assembly
Lay left track, right track, and head unit face
down in front of the clear opening as shown.
Diagram 4
Frame Assembly
Head unit section
(Curtain included)
!