Hired-Hand Funnel Flow Fans: 36 48 & 52 External Damper Kit User Manual
Page 5
Part No. 4801-5165 Rev. 3-09
36”, 48”, & 52” External Damper Kit
Page 5 of 6
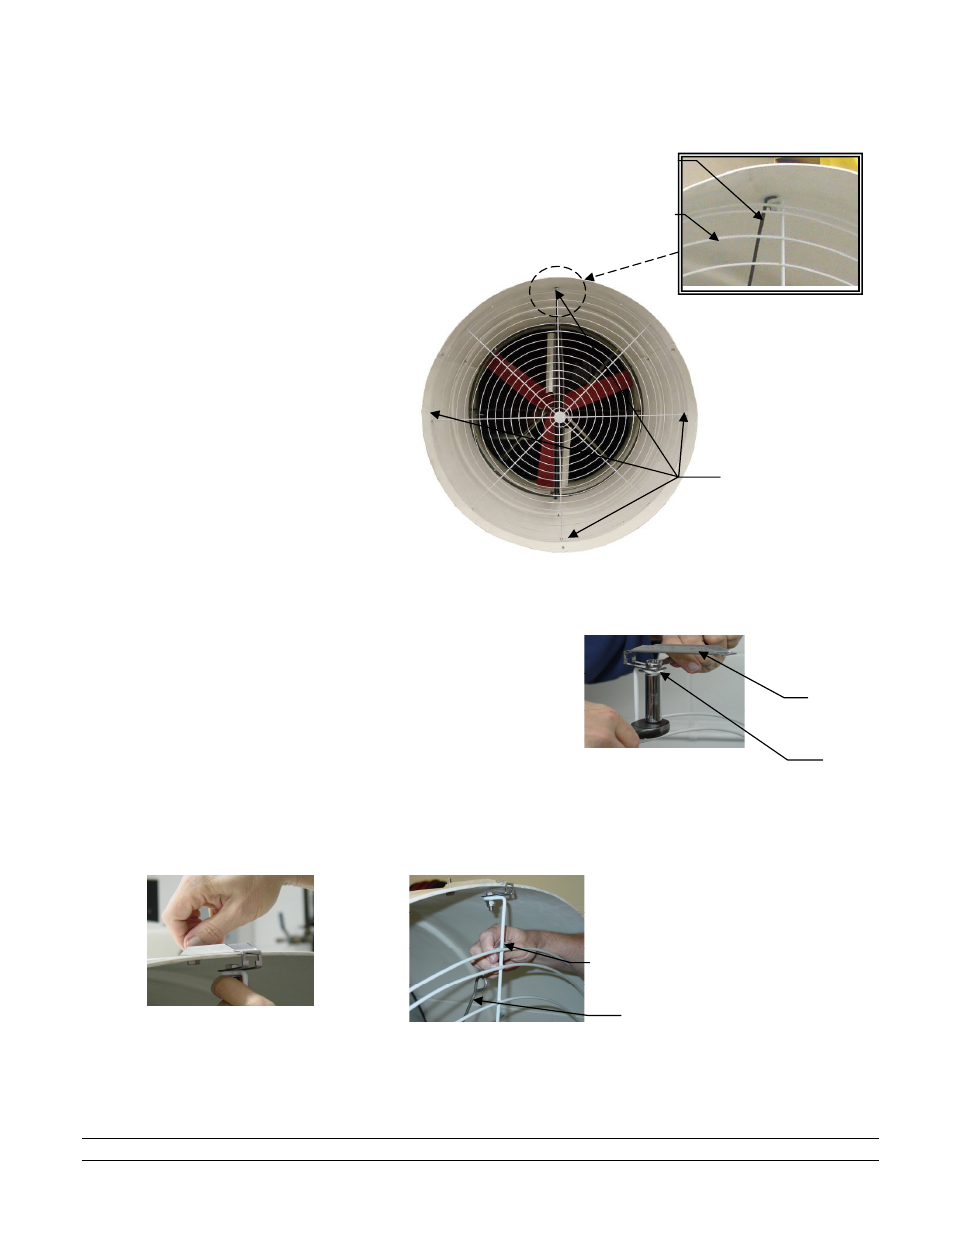
Replace the four
bolts and nuts
holding the Fan
Wire Guard
Figure 9
Attach Wire Guard and Top of Door Bumper
Detail E
Top of Door Bumper
Door Bumper
Wire Guard
Figure 10, Detail F
Attach Cone Guard Brackets to
Front Guard
Figure 10, Detail G
Attach Cone Guard
Brackets/Front Guard to Cone
Figure 10, Detail H
Attach Bumper Spring
to Guard
10. 36” and 52” Fans: Install the Front Wire Guard using
four 5/16x1-1/4” bolts, eight 5/16" washers and four
5/16" nuts. See Figure 9. Note in Detail E, 36” Fan:
the top of the Door Bumper/Bumper Spring hooks on
the vertical support bar above the top Wire Guard
mounting ring. 52” Fan: the top of the Door Bumper
inserts above the top Wire Guard mounting ring
when bolting the Guard back into the cone.
11. 48” Fan: Install the four Cone Guard Brackets onto
the Front Wire Guard using four 5/16x7/8” bolts, four 5/16" washers
and four 5/16" nuts supplied. Slide the head of the bolt into the slot
on the bracket. Insert bolt through eye of the Guard. Slide on
washer and tighten with nut. See Figure 10 Detail F. Second,
install the four Cone Guard Brackets using the four 5/16x1-1/4”
bolts, eight 5/16" washers and four 5/16" nuts that mounted the
guard on the cone originally. See Figure 10, Detail G. Hook the
Bumper Spring into the top of the Door Bumper Rod. Note in
Figure 10, the Bumper Spring hooks on the vertical
support bar above the top Wire Guard mounting ring.
Wire Guard
Cone Guard
Bracket
Door Bumper
Bumper Spring