Instructions for installing external damper kit – Hired-Hand Funnel Flow Fans: 36 48 & 52 External Damper Kit User Manual
Page 2
Part No. 4801-5165 Rev. 3-09
36”, 48”, & 52” External Damper Kit
Page 2 of 6
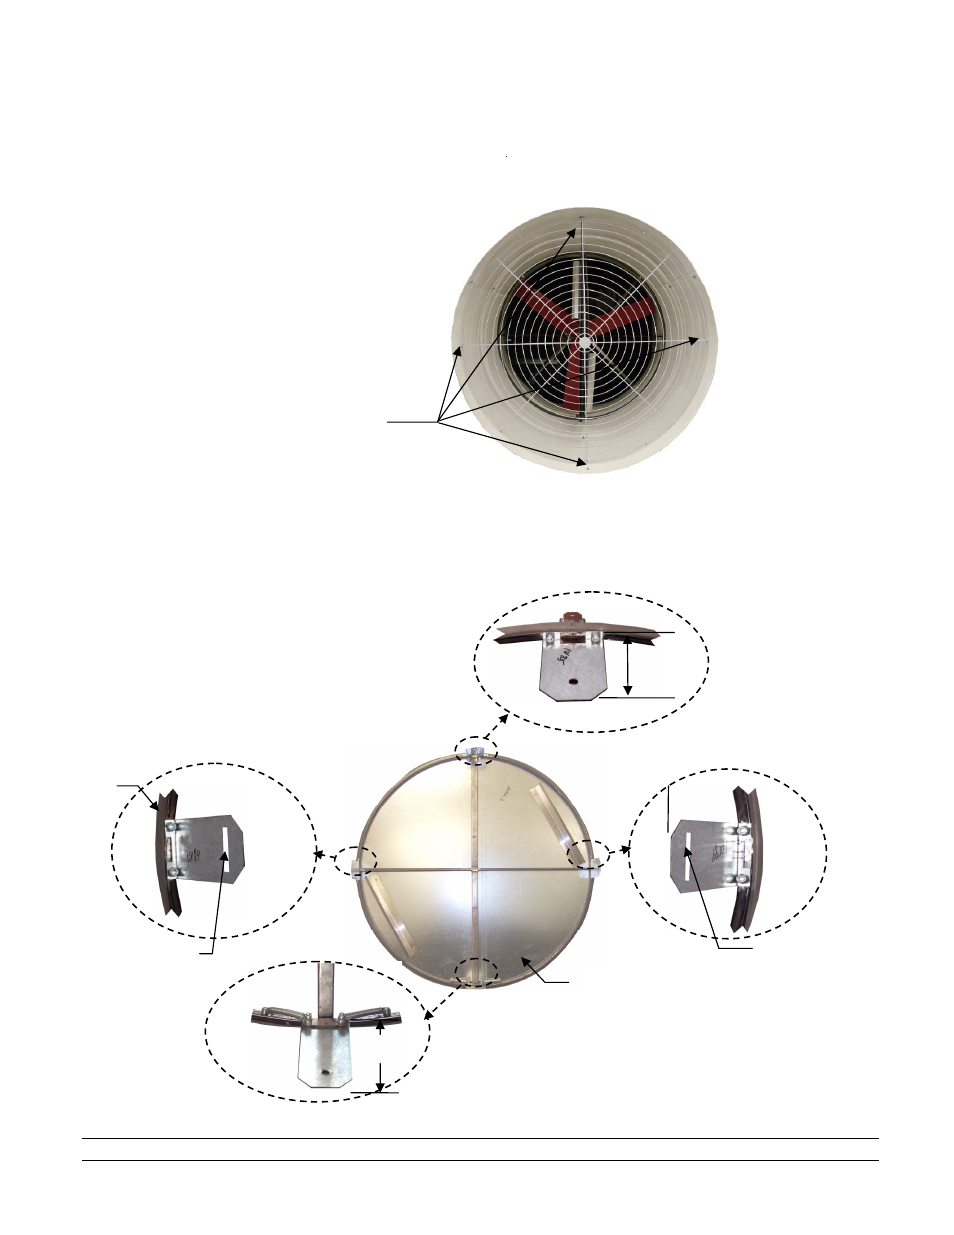
Remove four
bolts holding
the Fan Wire
Guard
2.
Instructions for Installing External Damper Kit
1. Ensure that the electrical power to fan is shut off.
2. If the Front Wire Guard has not been installed on the Cone, skip to Step 4.
3. Remove the four bolts, nuts and washers holding the Front Wire Guard and remove the wire guard. Retain
these parts for re-installation later. See Figure 1.
4. Locate the Damper Ring Assembly (52"/6403-3151, 36"/6403-3165,48”/6403-2705), the Top Ring Bracket
(52"/0404-8016, 36"/0404-10185, 48”/0404-10814), the two Side Ring Brackets (52"/0404-8017, 36"/0404-
10184, 48”/0404-10813) and the Bottom Ring Bracket (52"/0404-8018, 36"/0404-10183, 48”/1815). Note
that the Top Ring Bracket is shorter in length than the Bottom Ring Bracket. The Right and Left Brackets
have extended slots to enable cone alignment. Install the Brackets using two 1/4x20x1 Bolts and Lock Nuts.
See Figure 2, Details A, B and C.
Figure 1
Funnel Flow Fan – Front View
Figure 2
Damper Ring Assembly- Front View
Detail C
Bottom Ring Bracket
Damper Ring
Assembly
Detail B
Left Ring Bracket
Detail B
Right Ring Bracket
Detail A
Top Ring Bracket
NOTE: Place the
bolt heads on the
side of the ring
with the Foam
Seal.
Foam
Seal
See text
See text
Left Bracket has Slot
Right Bracket
has Slot