Hired-Hand Funnel Flow Fans: 36 48 & 52 External Damper Kit User Manual
Page 3
Part No. 4801-5165 Rev. 3-09
36”, 48”, & 52” External Damper Kit
Page 3 of 6
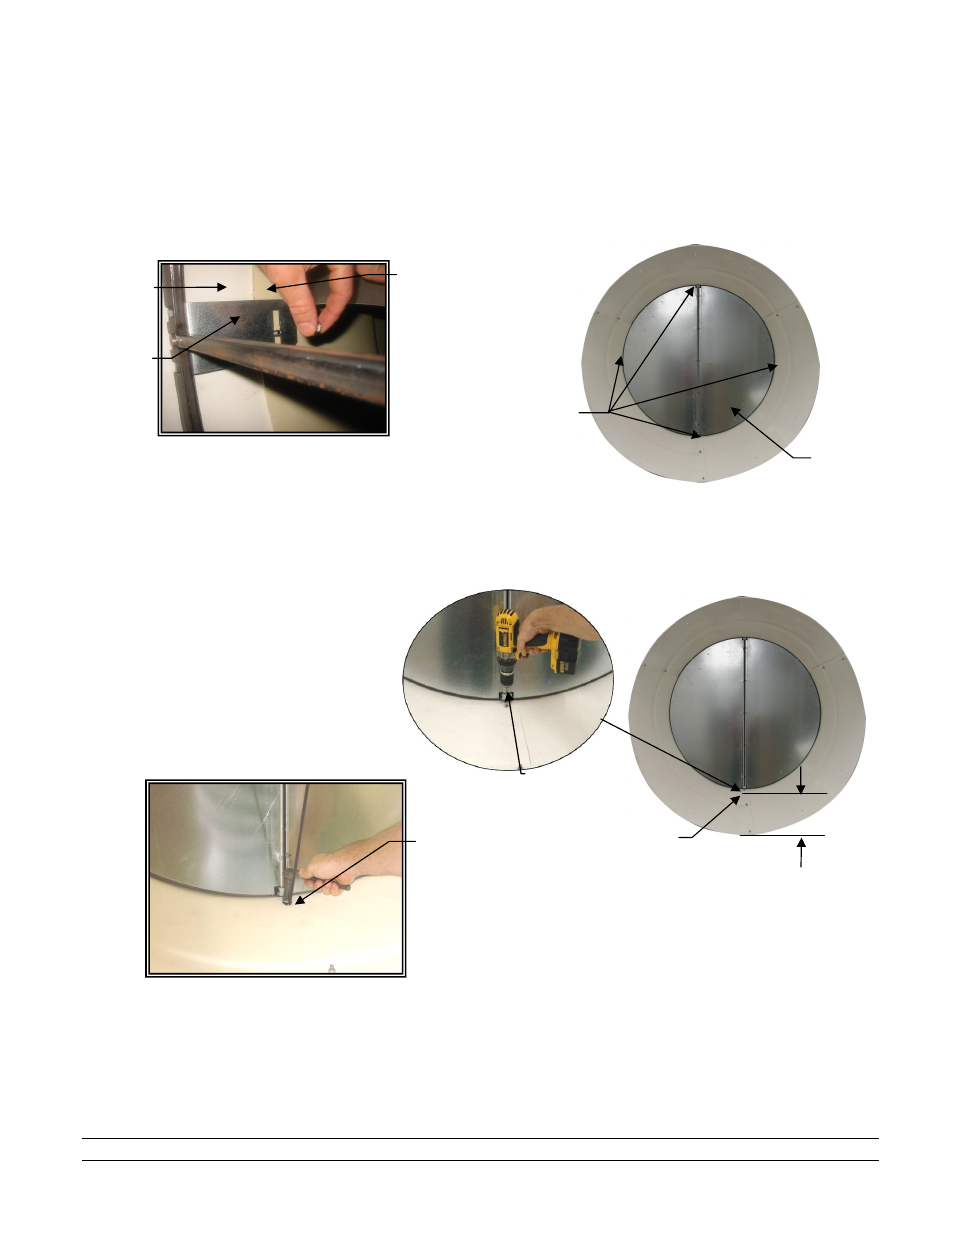
5. Hold the doors of the Damper Ring in the full open position and lift into place in the fan housing. The four bolts
securing the cone will be also be used to hold the Damper Ring. See Figure 3. IMPORTANT: First, remove the
top bolt in the cone and install the top Damper Ring Bracket. Securely tighten the top bolt . Now, proceed with
the side Brackets and finally the bottom Bracket. See Detail D.
6. Mark the location for the bolt for the
Door Bumper (52"/0403-7606) at the
bottom front of the Fan Housing. For
the 52" fan, measure 32 ¾" from the
front center of the Fan Cone. See
Figure 4. Drill a 3/8" hole for the Door
Bumper. For the 36" fan see Step 8.
7. For the 52" door, bolt the bottom of the Door Bumper using
3/8"x16x1-1/4" Cap Screw, 3/8" washer and 3/8"x16 lock
nut. See Figure 5 and 6. Bolt the top of the Door Bumper
during Step 10 when attaching the top bolt of the Front Wire
Guard.
Fan
Cone
Figure 3
Install Damper Ring into Fan Housing
Detail D
Install Damper Ring Brackets
Fan
Housing
Damper
Ring
Bracket
Damper
Ring
Use the four bolts
holding the Fan
Cone to attach the
Damper Ring
See text
Mark Hole
Door Bumper
(Bottom End)
Figure 5
Attach Bottom of Door Bumper
Drill 3/8" Hole
Figure 4
Drill Hole for Door Bumper