Step 1, Step 2, Step 4 – Anthro eNook Standard II Assembly Instructions User Manual
Page 3: Step 3
eNook
®
Assembly Instructions
3
steP 1
select the mounting location
¡
When choosing the right place to install your eNook, be sure to check the location of your power source. The power cord
that comes with your eNook is 6 ft long.
¡
Your eNook can be mounted to drywall or to wood wall studs. If you’re installing to wood wall studs, go to Step 2.
¡
If you’re installing into drywall, go to Step 7
steP 2
Find wall studs
¡
Using a stud finder, locate the studs to which you'll attach your eNook.
steP 4
Attach screws to wall studs
¡
Using a 1/8" drill bit, drill one hole in a stud about
1-1/2" deep. How do you make sure that hole is
1-1/2" deep? Measure that length on your drill
bit and mark it with a piece of masking tape. Stop
drilling when you reach the masking tape.
¡
Using a Phillips driver (or a power driver with a
Phillips bit), attach the first 1-1/2" long screw at that
mounting point, but don’t tighten all the way to the
wall. Stop tightening when the screw head is about
1/4" away from wall.
Drill
Wall Stud Profile
1½"
Tape
¼
"
Screw
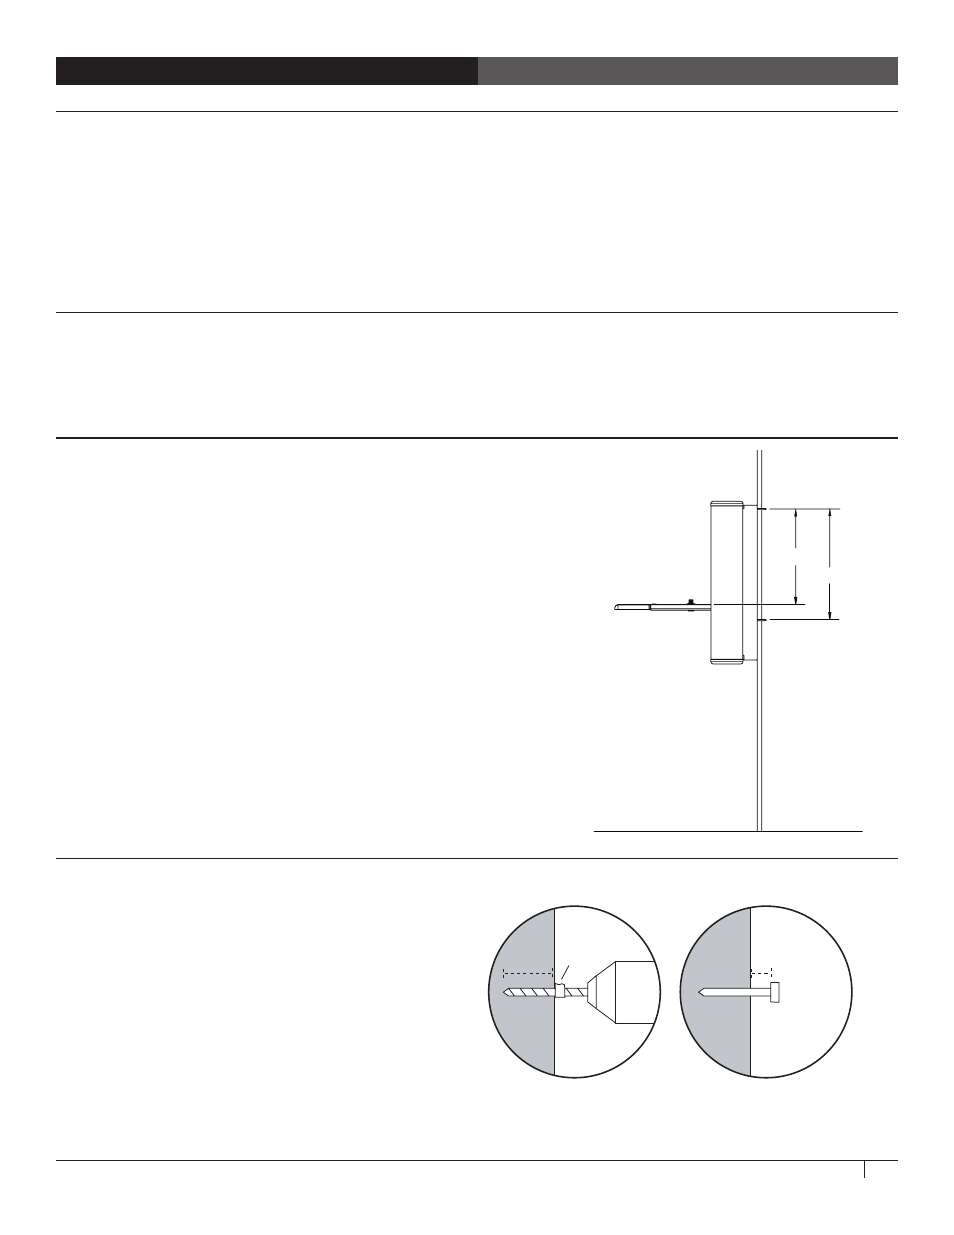
steP 3
Determine mounting Point
¡
Determine the optimal desk height for your eNook.
Typical sitting height is about 29" high; typical
standing height is about 42" high.
¡
Measure up 14-3/4" from the shelf height and mark
that point on one stud.
14.75"
23"