Step 12, Step 13 - this step requires two people – Anthro eNook Pro for Flat Screen Assembly Instructions User Manual
Page 7
eNook
®
Pro Assembly Instructions
7
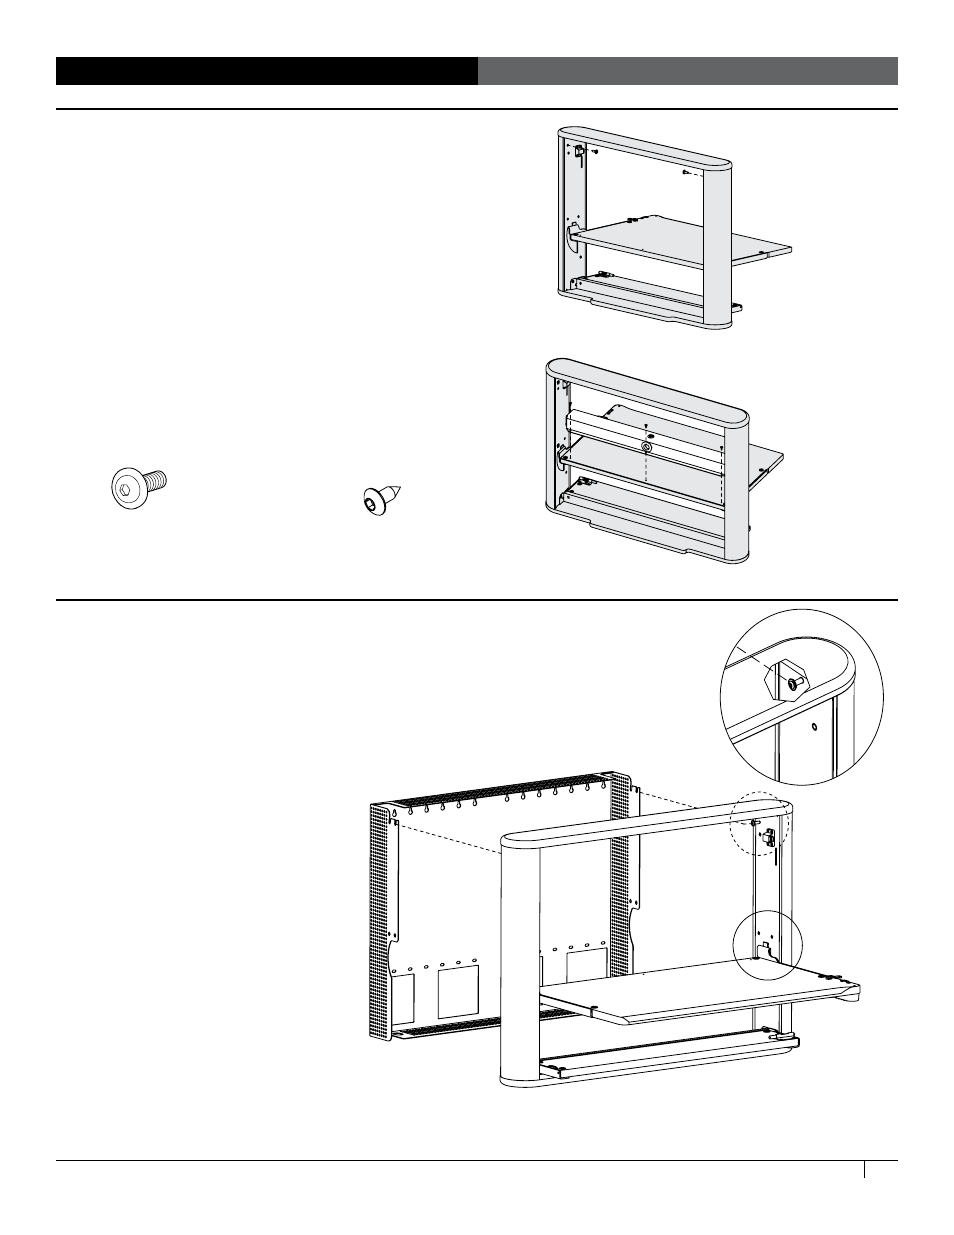
steP 12
Assemble the main unit
¡
Using your Hex Driver, install two Workstation
Screws onto the side walls at the top, but don’t
tighten all the way. Stop tightening when the
screw head is about 1/2" from tight. If you
have a Laptop version, skip ahead to Step 13.
¡
Slip the grommet into the cable opening at
the back of the Keyboard Cubby. Place the
Keyboard Cubby onto the shelf so that the logo
faces up and the cable opening faces the back
of the unit. Align the holes at the back of the
cubby with the divets on the shelf. Attach the
cubby to the shelf with three 1/2" Wood screws
using the Anthro driver.
workstation screw
325-5092-00
steP 13 - this steP reQuires two PeoPle
Attach main unit to Frame
note: enook Pro can be installed at your choice of depth:
7.25" or 8.25" deep. Determine the desired depth before
beginning this step.
¡
Open the top door and find the angle
slots on the Back Frame.
The front set of angled slots is for
8.25" overall depth; the back set is for
an overal depth of 7.25"
¡
Lift the Main Unit onto the
Back Frame by aligning the two
Workstation Screws on the frame with
the angle slots. Make sure that both
fasteners are captured. For Laptop
versions, skip ahead to Step 14.
¡
For the Monitor versions, install
two more Workstation Screws into
the sidewalls at the bottom of the
enclosure, just above the shelf
bracket. Tighten all four Workstation
Screws. Skip ahead to Step 15.
1/2" Assembly screw
325-5008-00