Oit in stal la tion 8, Set jumper for spe cific pro to col 8, Oit installation – Maple Systems MAP460D User Manual
Page 8: Set jumper for specific protocol, Steps
2. OIT Installation
It is necessary to follow all installation procedures described in this chapter for
electrical noise immunity and CE compliance.
2.1. Set Jumper for Specific Protocol
This step is required for a few protocols only. Consult the Protocol Guides in your
documentaion. If the protocol requires RS-485 half-duplex 3-wire
communication, proceed as follows.
STEPS
1. Remove the protective cover from the rear of the unit.
CAUTION: When the rear cover is removed, the circuitry inside is exposed to
possible damage by electrostatic discharge. Refer to Static Awareness on page 4.
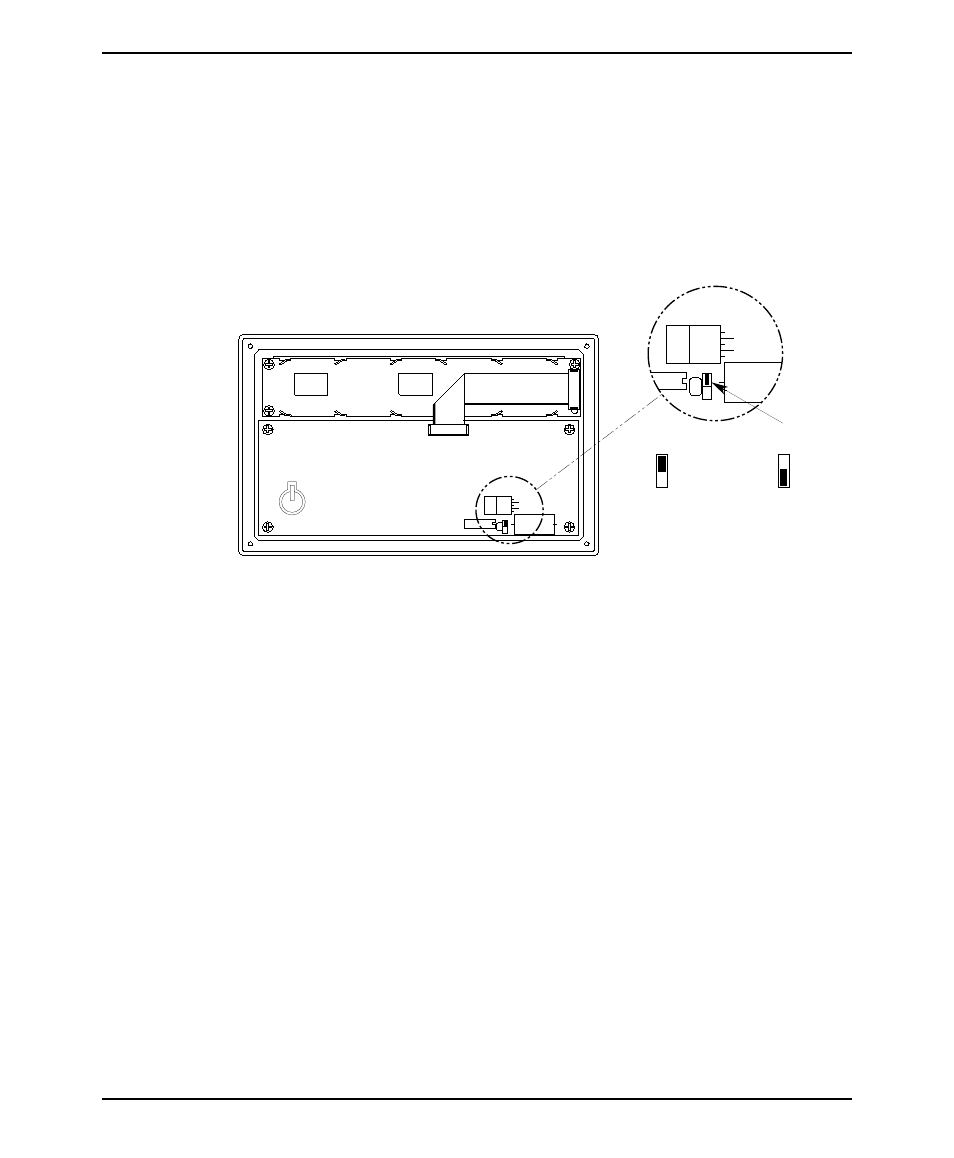
2. Locate jumper “JP4” using Figure 3 as a guide. The jumper is installed on
the upper two pins of a 3-pin header. This is called Position “A”.
3. Move the jumper to the lower two pins of the 3-pin header (Position “B”).
Ensure that the jumper is pressed fully into place.
4. Replace the rear cover and the four retaining screws.
8
MAP460D
1010-0093, REV 03
JP4
B
A
Normal
A
Position "A",
Half-Duplex 3-Wire
Position "B",
JP4
RS485
B
(Display)
(CPU Board)
B
JP4
A
Figure 3 MAP460D Jumper Installation