2 battery installation and removal -9, Figure 2-11 battery installation and removal -9, 2 battery installation and removal – ZOLL AutoPulse Rev D Users Guide User Manual
Page 33
P/N 11440-001 Rev. 3
Page 2-9
User Guide
2.2
Battery Installation and Removal
For more information on the AutoPulse Battery and Battery Charger refer to the AutoPulse Power System
User Guide.
Remove a charged Battery from the Battery Charger. Ensure the Battery is fully charged before insertion
into the AutoPulse Platform (refer to the “Performing a Battery Status Check” section in the AutoPulse
Power System User Guide for more information).
Caution: Remove the protective plastic cap from the Battery connector before attempting to charge the
Battery.
The Battery remaining in the AutoPulse Platform should be replaced with a charged Battery from the
Battery Charger.
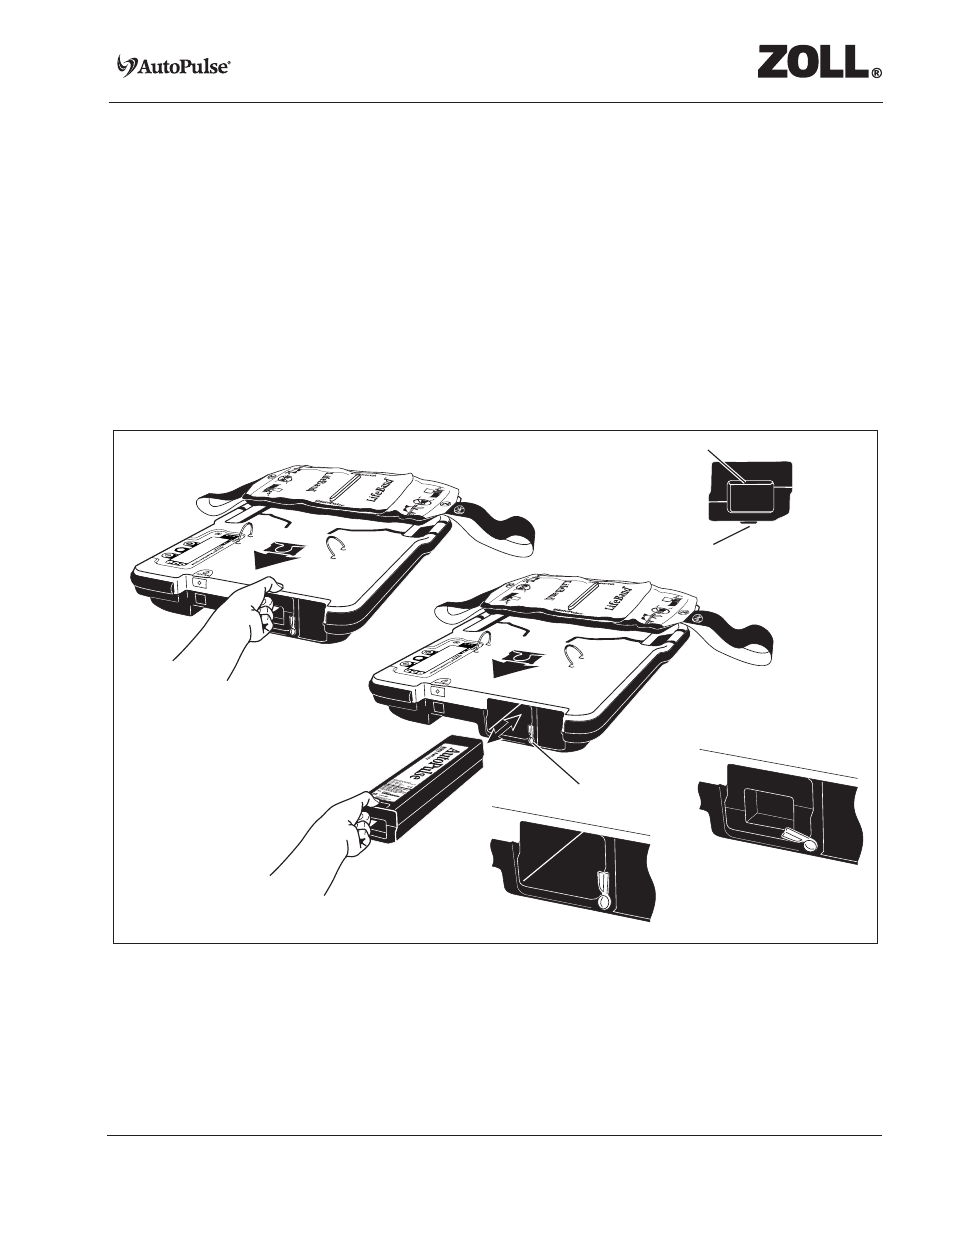
Figure 2-11 Battery Installation and Removal
To install the Battery, first make sure the Battery Latch is rotated out of the way, so that the Battery can
slide into the Battery compartment (see Figure 2-11). Then slide the Battery into the Battery
compartment in the AutoPulse Platform. Push the Battery most of the way into place, then advance the
Battery the rest of the way with your thumbs. The Battery should snap into place and mount flush with
the AutoPulse Platform. Then rotate the Battery Latch into position to ensure the Battery is retained.
Finger Latch
Battery Latch Opened
Battery Latch Closed
Battery Latch
Locking Bar
Battery Front