2 autopulse li-ion battery installation, 2 autopulse li-ion battery installation -2 – ZOLL AutoPulse Rev A User Manual
Page 24
Page 5-2
P/N. 12457-001 Rev. 2
Power System User Guide
5.2
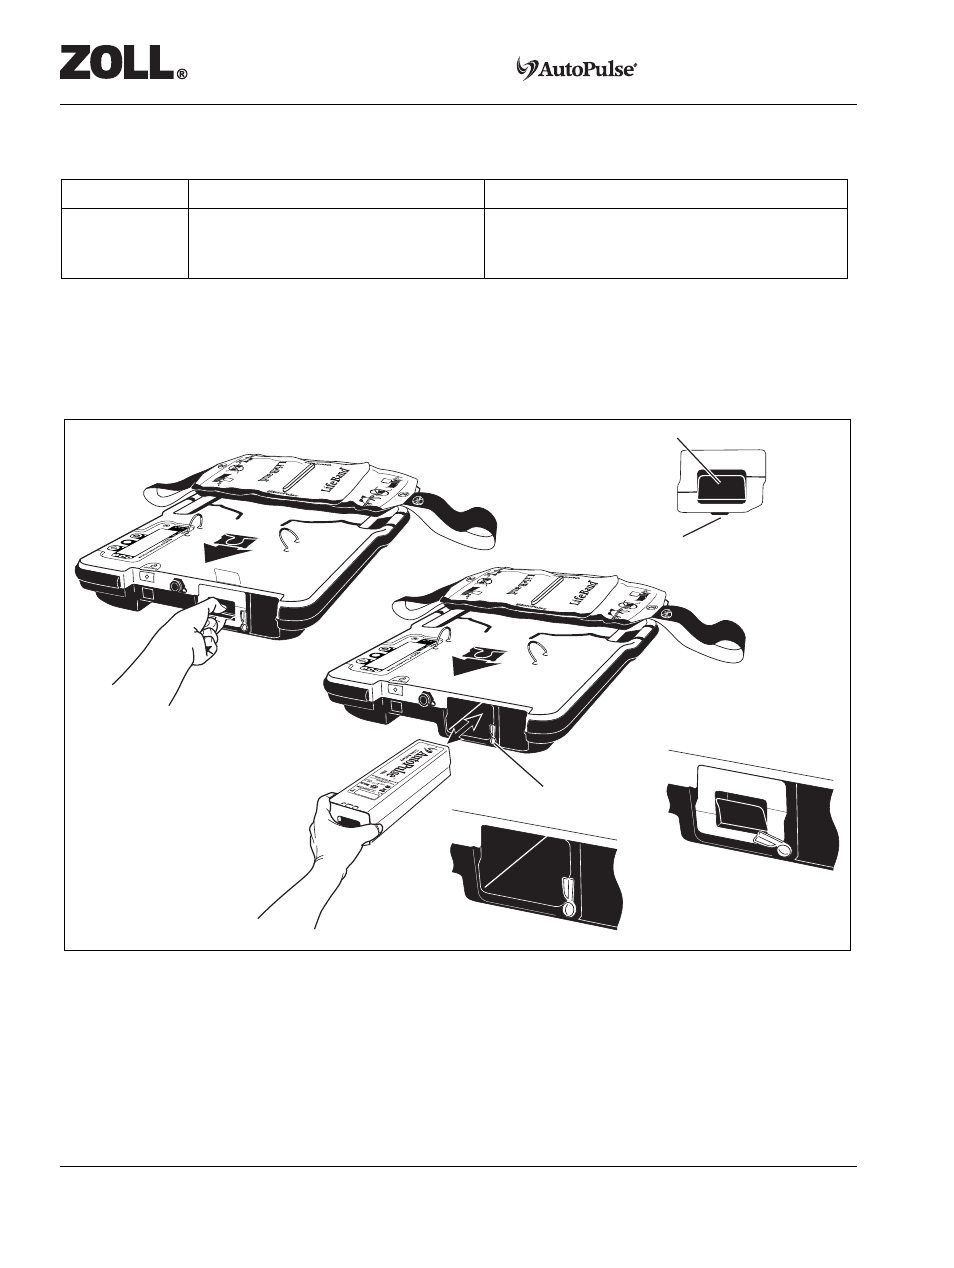
AutoPulse Li-Ion Battery Installation
The AutoPulse Li-Ion Battery is mechanically keyed so that it can only be inserted in one orientation. If
resistance is met, check for appropriate orientation, and check to ensure there are no obstructions to
Battery insertion.
Figure 5-2 AutoPulse Li-Ion Battery Installation and Removal
To install the AutoPulse Li-Ion Battery, first make sure the Battery Latch is rotated out of the way so that
the AutoPulse Li-Ion Battery can slide into the Battery compartment (see Figure 5-2). Then slide the
AutoPulse Li-Ion Battery into the Battery compartment in the AutoPulse Platform. The AutoPulse Li-
Ion Battery should snap into place and mount flush with the AutoPulse Platform. The Finger Latch for
the AutoPulse Li-Ion Battery should also be flush with the AutoPulse Platform such that the red strip on
the inside of the Finger Latch is not visible. Then rotate the Battery Latch into position.
None
The AutoPulse Li-Ion Battery voltage is
too low to illuminate the LEDs.
Charge the AutoPulse Li-Ion Battery by placing it
into the AutoPulse Multi-Chemistry Battery
Charger.
Table 5-1 AutoPulse Li-Ion Battery Status LEDs (Page 2 of 2)
Status LEDs
Definition
Action
Finger Latch
Battery Latch Opened
Battery Latch Closed
Battery Latch
Locking Bar
Battery Front