Warner Electric Blade Brake Clutch Application Guide User Manual
Page 7
7
Warner Electric • 800-825-9050
P-1319-WE • 819-0465
V. Installation
The following describes a general procedure for
installing a BBC on a mower. Some machines
may require deviation from this procedure. In
some cases due to the mower configuration, the
BBC must be partially assembled to the engine
before the engine is assembled to the deck.
1. Apply a small amount of rust inhibitor to the
engine crankshaft.
2. If using a loose key, place the key into the
key-slot in the engine shaft.
3. Align the key and keyway and slide the BBC
onto the engine shaft. Use care not to
contaminate the BBC friction surfaces
with rust inhibitor.
4. Insert the mounting bolt supplied with the
BBC through the clearance hole in the BBC
into the threaded hole in the end of the
engine crankshaft and hand tighten.
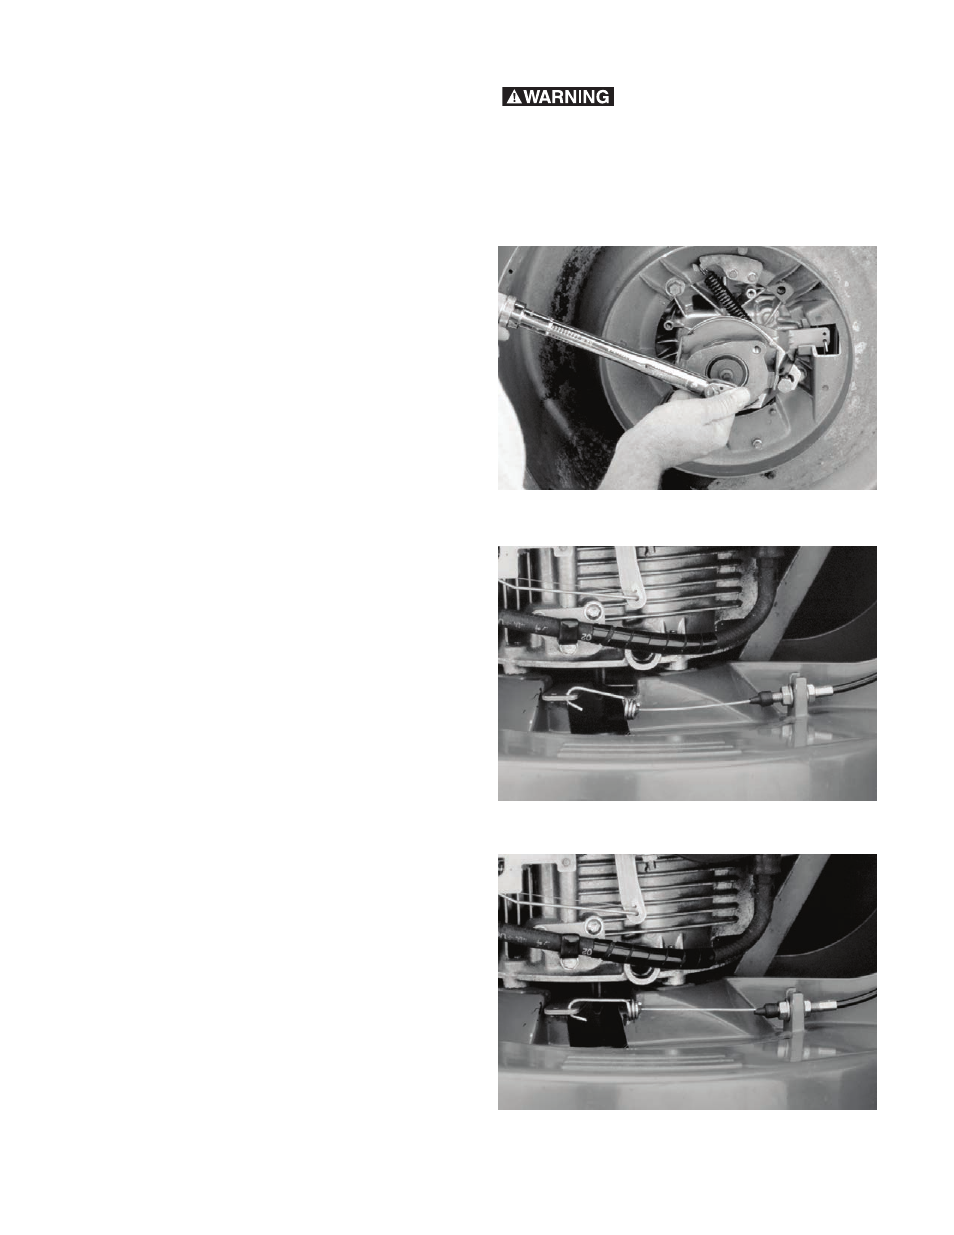
5. While preventing the engine shaft from
rotating, torque (Figure 6) the mounting
bolt to the appropriate torque specification.
(See Table 1, page 4)
6. Install and tighten the anti-rotation bolt.
7. Install the clutch actuation cable.
8. Install the brake return spring. Reference
Sec # IV - D. Check to be sure that the
spring is strong enough to force the
actuation arm to the positive brake stop.
Push on the arm towards the brake stop.
There should be no additional rotation of
the arm. If the actuation arm rotates, it is
indicative that the brake return spring is
not strong enough. (Cable should be
disconnected from deck attachment
bracket at this time.)
9. Adjust the cable as necessary to ensure
the actuation arm moves to the positive
clutch stop. (See Figures 7A and 7B)
10. Install the mower blade.
11. Burnish the BBC per the procedure outlined
in section VI Step C.
Failure to fully rotate the
clutch actuation (See Figures 7A and 7B) arm
to the positive stop may result in the clutch
and brake being engaged at the same time
resulting in drag on the engine and
premature failure of the BBC.
Figure 6
Figure 7A - Slack
Figure 7B - Tight