Operation cleaning and maintenence – Sunex Tools SX10A User Manual
Page 5
SX10A: Parts Breakdown & Operating Manual
5
rev. 04/29/06
SPRAY GUN
1. Submerge the front end of the gun in solvent just until the
fluid connection is covered.
2. Paint that has built up on the gun should be removed using a
bristle brush and solvent.
3. Never submerge all of the spray gun in solvent because:
• This will dissolve the lubricant in the leather packings and
on wear surfaces, causing them to dry out and resulting in
difficult operation and faster wear.
• Air passages in the gun will become clogged with dirty
solvent.
4. Using a rag moistened with solvent, wipe down the outside of
the gun.
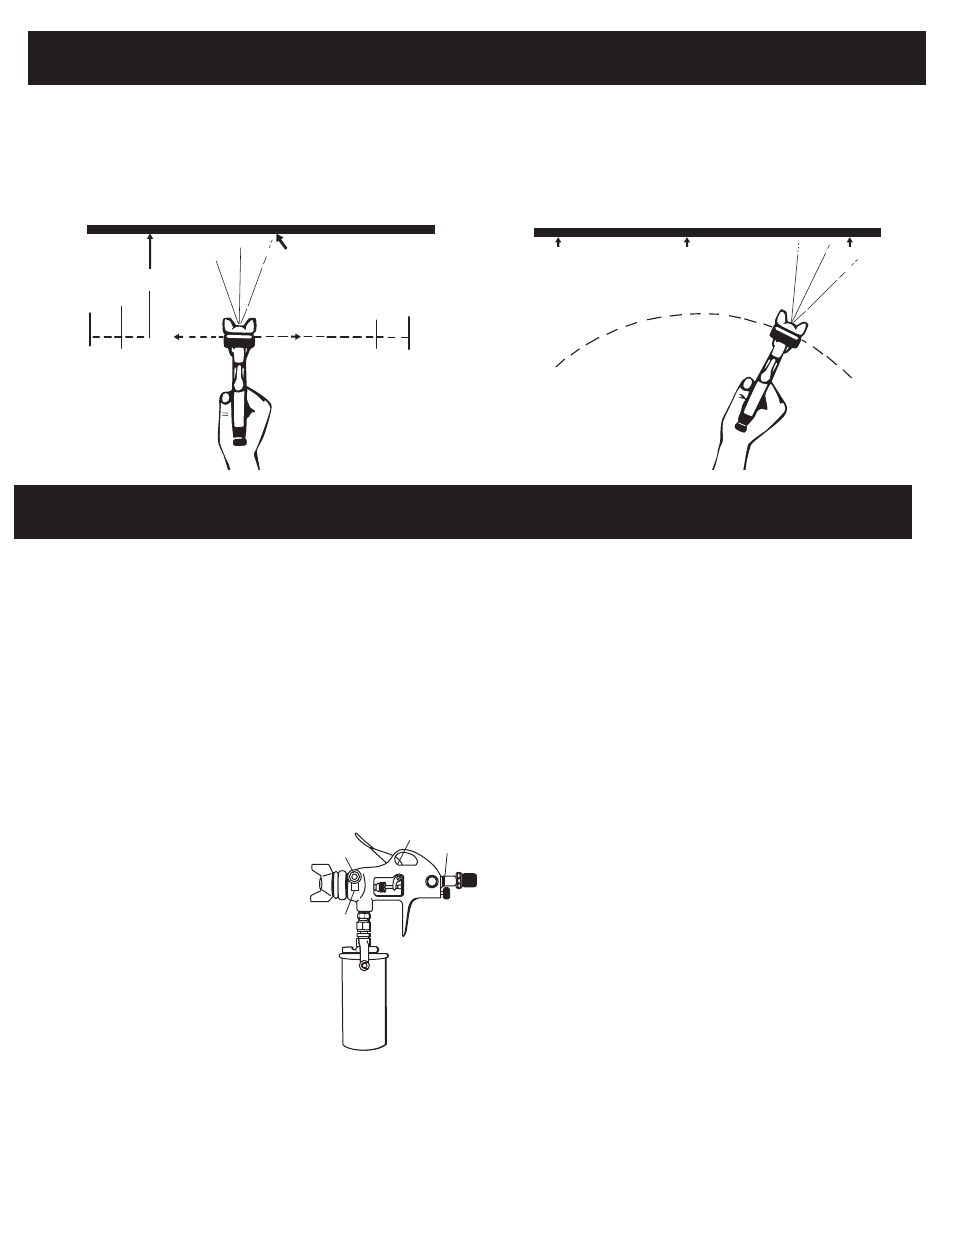
5. Oil gun daily. Use a drop of lightweight machine oil on:
A. fluid needle packing
B. air valve packing
C. trigger pivot point
(trigger side of gun)
D. side port control packing
See Fig. 1 for Location of Above Points.
6. NOTE: Do not soak rubber o-rings
or seals in paint thinner. O-rings and
seals can be wiped clean with paint
thinner but soaking can cause these
items to deteriorate over time.
7. Caution: Do not use lubricants which
contain silicone. Silicone may cause
defects in the finish application.
on material and atomizing pressure. For a uniform finish, lap each
stroke over the preceding stroke, making sure the spray is smooth
and wet.
Using the lowest possible atomizing air pressure will reduce
overspray and provide maximum efficiency.
Proper handling of the gun is essential for obtaining a good finish. The
gun should be held at a right angle to the surface being covered, and
moved parallel with it. For precise control of the gun and material, the
trigger should be released before the end of the stroke.
Hold the gun from 6 to 12 inches away from the surface depending
CAUTION…
To avoid cross-threading, all spray gun parts should be screwed in
hand tight initially. If the parts can not easily be turned by hand , be
sure you have the correct parts, unscrew, realign, and try again.
NEVER use excessive force in matching parts.
AIR NOZZLE, FLUID NOZZLE, AIR VALVE ASSEMBLY
1. All nozzles and needles are made to exact standards. They
should be handled carefully.
2. To clean nozzles, immerse them in solvent until any dried
material is dissolved, then blow them clean.
3. Do not use metal or sharp instrument to probe any of the holes in
the nozzles.
4. Air flow should occur before fluid-flow when the gun is triggered.
It may be necessary to adjust the fluid control screw to make
sure air flows before fluid.
5. Do not alter the gun in any way.
SIPHON CUP
Turn off air supply. Disconnect cup from lid. Raise tube out of
material and pull trigger to allow remaining material to drain back
to the cup. Empty the cup of material. Clean the cup, lid and tube.
Add some thinner to cup. Reassemble. Turn on air supply and spray
with proper cleaning solvent. Repeat with clean solvent if necessary.
Remove solvent, disconnect gun, remove air cap and clean. Wipe gun
and cup with rag dampened with solvent.
OPERATION
CLEANING AND MAINTENENCE
Fig. 1
Light Coat
Heavy Coat
WRONG
Start
stroke
Pull
trigger
Release
trigger
End of
Stroke
RIGHT
Even and wet coat
6 to 12 inches
A
B
C
D