Harrington Hoists and Cranes TNER Theater Hoist User Manual
Page 30
both its end links have the same orientation. If the load chain is being replaced due to damage or wear out,
destroy the old chain to prevent its reuse.
1)
When replacing load chain, check for wear on mating parts, i.e. Load Sheave, Chain
Guides and Idle Sheaves, and replace parts if necessary.
2)
Remove all chain components including the Chain Hook Set Assembly, Ball Stoppers, Chain Pin, Chain
Coupling and Chain Clip from the chain for reuse on new chain. Inspect and replace any damaged or worn
parts.
3)
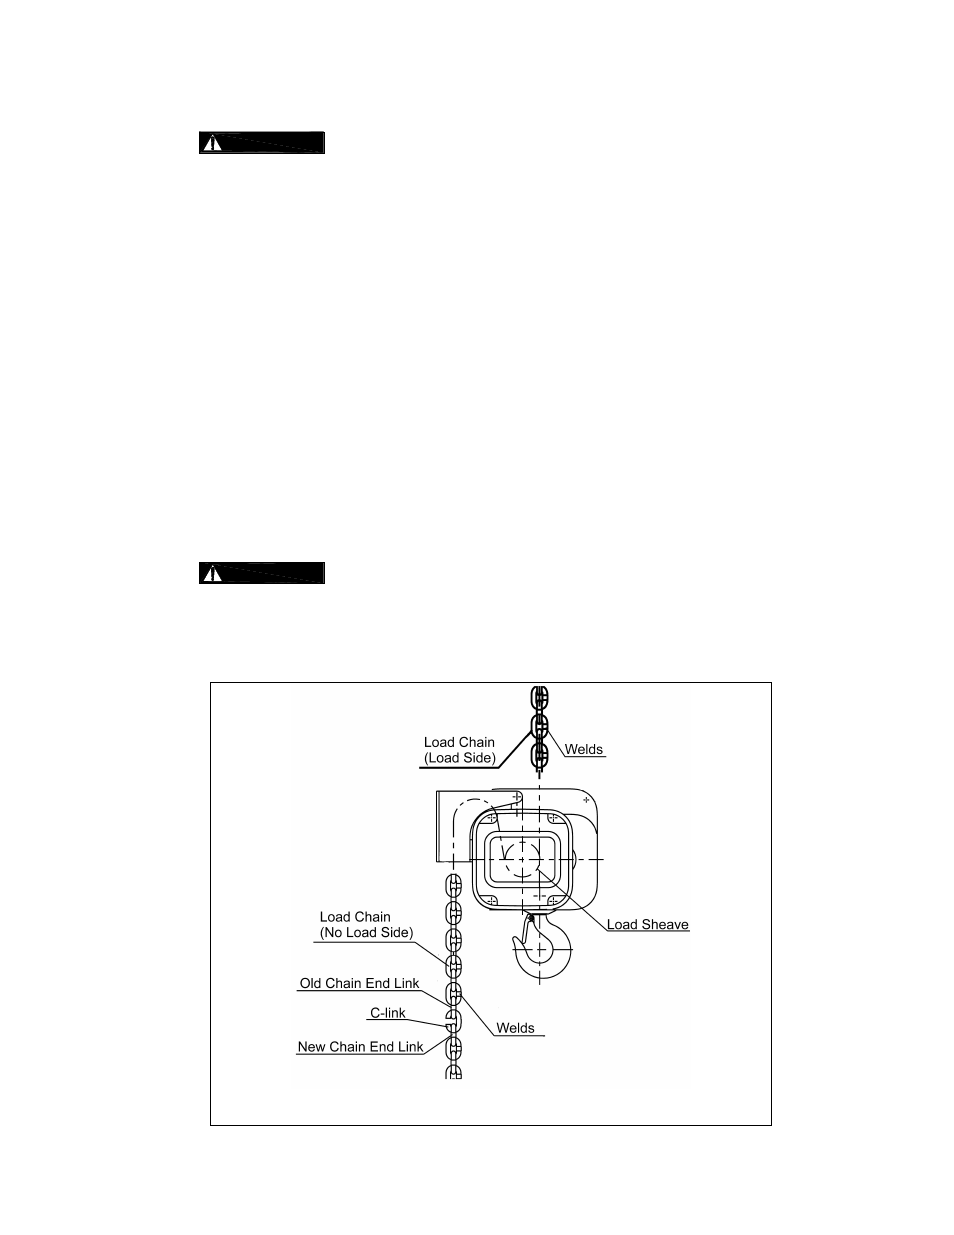
Using a C-link, attach the new chain to the end link of the old chain on the no-load side. The end link of the
new load chain should be connected so that the welded portions of the load chain's standing links are
oriented to the outside as they pass over the sheave. Refer to Figure 6-3.
4)
Operate the hoist down to move the chain though the hoist body. Stop when a sufficient amount of new
chain is accumulated on the load side.
5)
Single fall hoists - Attach the chain components (step 4 above) to the chain. Refer to Section 3.2 for the
proper locations.
6)
Double falls (020L) - Feed the end link on the load side of the new chain through the required chain
components (step 4 above) and the bottom hook’s Idle Sheave. Attach the remaining chain components to
the chain referring to Section 3.2 for the proper locations. Connect the end link to the top connection yoke
with the chain pin, slotted nut and cotter pin. Ensure that chain remains free of twists. Refer to Figures 3-3
and 3-4.
7)
Make sure Ball Stopper, Chain Coupling and Chain Clip are properly installed. Refer to
Section 3.2.
8)
After installation has been completed, perform steps outlined in Section 3.6 "Preoperational Checks and
Trial Operation".
Figure 6-3 Chain Replacement
30