Pre-2008 mac pro installation, Shut down and open computer – Sonnet Technologies eSATA Extender Cable User Manual
Page 2
Shut Down and Open Computer
1. Shut down your Mac Pro. If the computer has been
on for a while, allow a five to ten minutes for it to
completely cool before beginning the installation.
2. If you need to move the computer to a different area
where you can work freely, disconnect any connected
cables, move the computer, then reconnect the power
cord to the computer and an electrical outlet.
3. Touch the top of the computer to discharge any
potentially damaging static electricity.
4. Disconnect the power cord, and if necessary, any
remaining cables, from the computer.
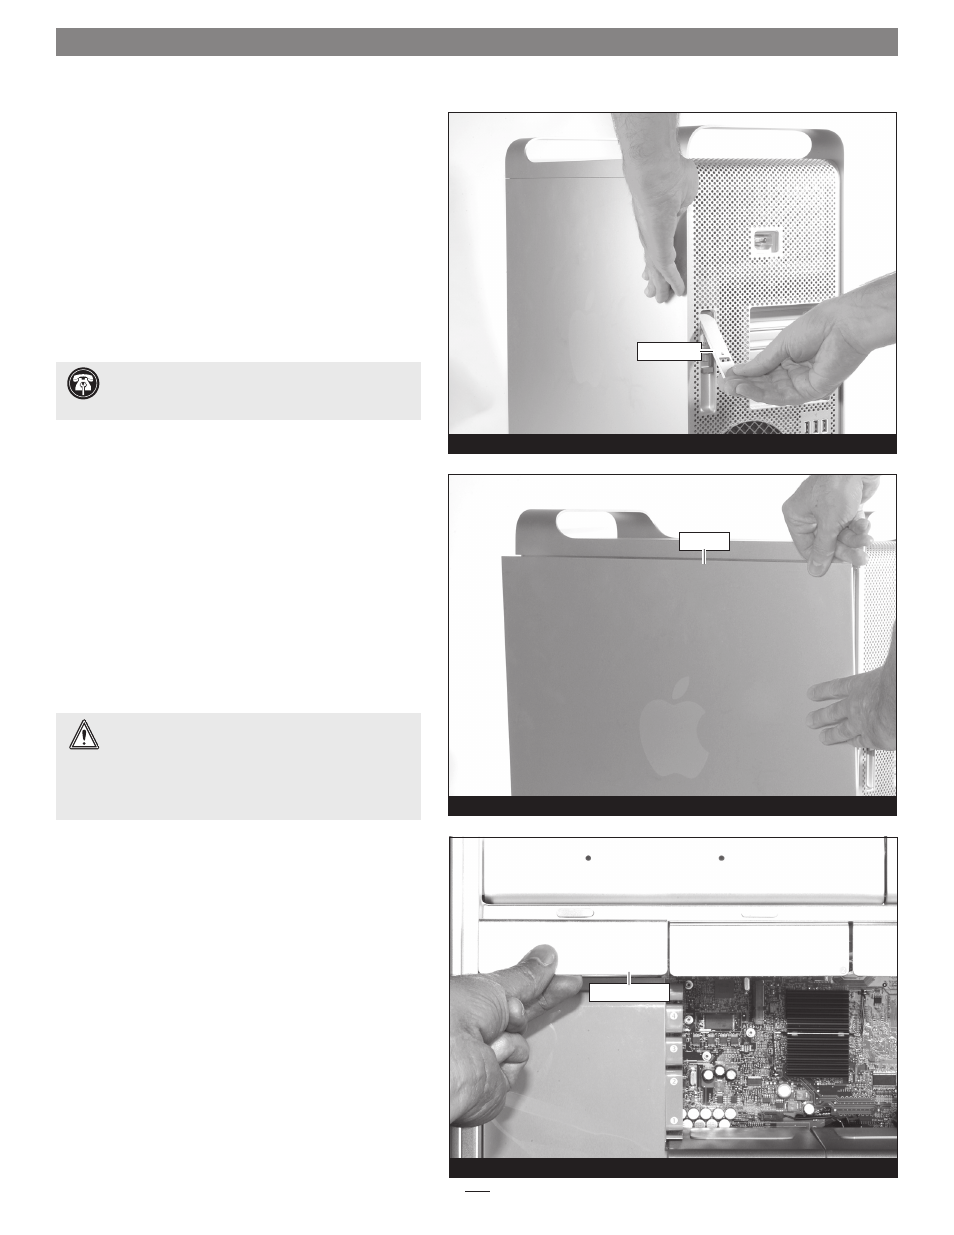
5. While supporting the side panel, lift up the locking
latch on the back of the computer
(Figure 1).
6. Pull out the top of the side panel, and lift it up and
away from the computer
(Figure 2). Set aside the side
panel.
7. With the front of the computer facing left, lay the Mac
Pro down on a soft, clean towel or blanket on top of
your work surface.
Remove Parts to Access Logic Board’s SATA
Connectors
1. Remove the left two hard drive carriers (1 and 2) from
the computer’s drive bays
(Figure 3). Note: Make sure
the locking latch on the back of the computer is in the
open position before attempting to remove the carriers.
PRE-2008 MAC PRO INSTALLATION
Support Note:
To avoid generating a static charge in
your body, do not walk around the room until after
you finish installing the eSATA extender and close the computer.
2
locking latch
side panel
hard drive carrier
Figure 3
Figure 2
Figure 1
WARNING:
When handling computer products, take
care to prevent components from being damaged
by static electricity; avoid working in carpeted areas. Handle
processor upgrade cards only by their edges and avoid
touching connector traces and component pins. Also, avoid
touching the logic board and any of its components.
locking latch
side panel
hard drive carrier