Remote manifold accessory installation, Base mount cabinet installation, Post mount cabinet installation – Kasco Marine Robust-Aire User Manual
Page 7
7
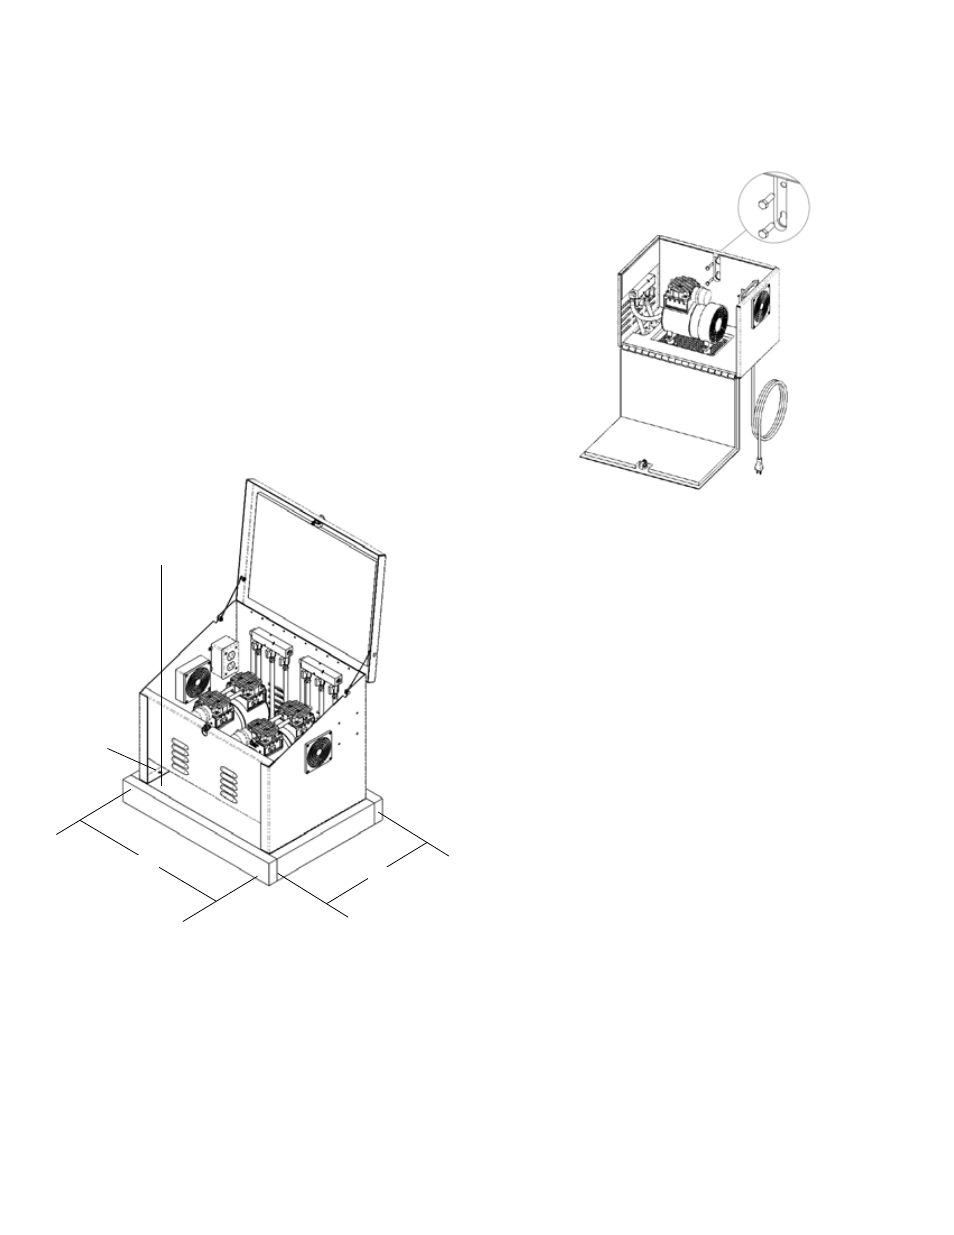
7/16” socket wrench. Hang the cabinet from this
screw using the bottom key-hole slot in the cabinet (a
second person may be needed to help hold the cabi-
net in place). Install the second lag screw in the top
mounting hole. Tighten the bottom lag screw.
Remote Manifold Accessory Installation
Robust-Aire systems that were ordered with the
optional remote manifold accessory were factory built
with a single air line exiting each compressor. Follow
the instructions below to assemble and install the
remote manifolds.
Materials required:
• ¾” Sch. 40 PVC Pipe (amount to be determined by
user)
• ¾” Sch. 40 PVC Pipe Couplings (as needed)
• PVC Primer and Glue
• PVC Pipe Cutter
• Shovel or other tools to dig a trench
• Pliers (hose clamp installation)
• Thread sealant
A trench will need to be excavated to bury the PVC
air line. Start by determining the path of the trench
from the Robust-Aire system to an area by shore. The
path should be in as straight of a line as possible with
a gentle downward slope from the Robust-Aire system
down towards the shore. Excavate the trench 6” to 8”
deep.
For two or three station valve manifolds, excavate
Base Mount Cabinet Installation
Choose a location for placing your base mount cabinet
assembly. The location should be placed far enough
from shore to avoid the potential of flooding. Plant-
ings can be used to help hide the cabinet from sight,
however be sure that both the inlet and outlet vents
will not be blocked as fresh air is needed to keep the
compressor from over-heating.
The cabinet can be placed directly on the ground or
can be permanently attached to a concrete pad. The
bottom feet of the cabinet have holes which can be
used to anchor the cabinet in place.
The cabinet should be placed adjacent to the electrical
service which will provide power to the system. The
cabinet will have 6 foot power cord(s) with plugs. DO
NOT USE EXTENSION CORDS.
24”
18”
Optional Foundations
•
Pea Gravel
•
Rubber Mulch
•
Cement
6 holes
7/16” DIA.
Post Mount Cabinet Installation
The post mount cabinet can be attached to a 4x4 post
or to a vertical wall (shed) with electrical service.
(2) lag screws are provided to mount the post mount
cabinet. Pre-drill (2) 3/16” holes vertically spaced 2
3/8” apart. Install (1) lag screw into the wall or post,
leaving the hex head out about ¼” using a standard