On shore preparation, Diffuser assembly installation – Kasco Marine Robust-Aire User Manual
Page 3
3
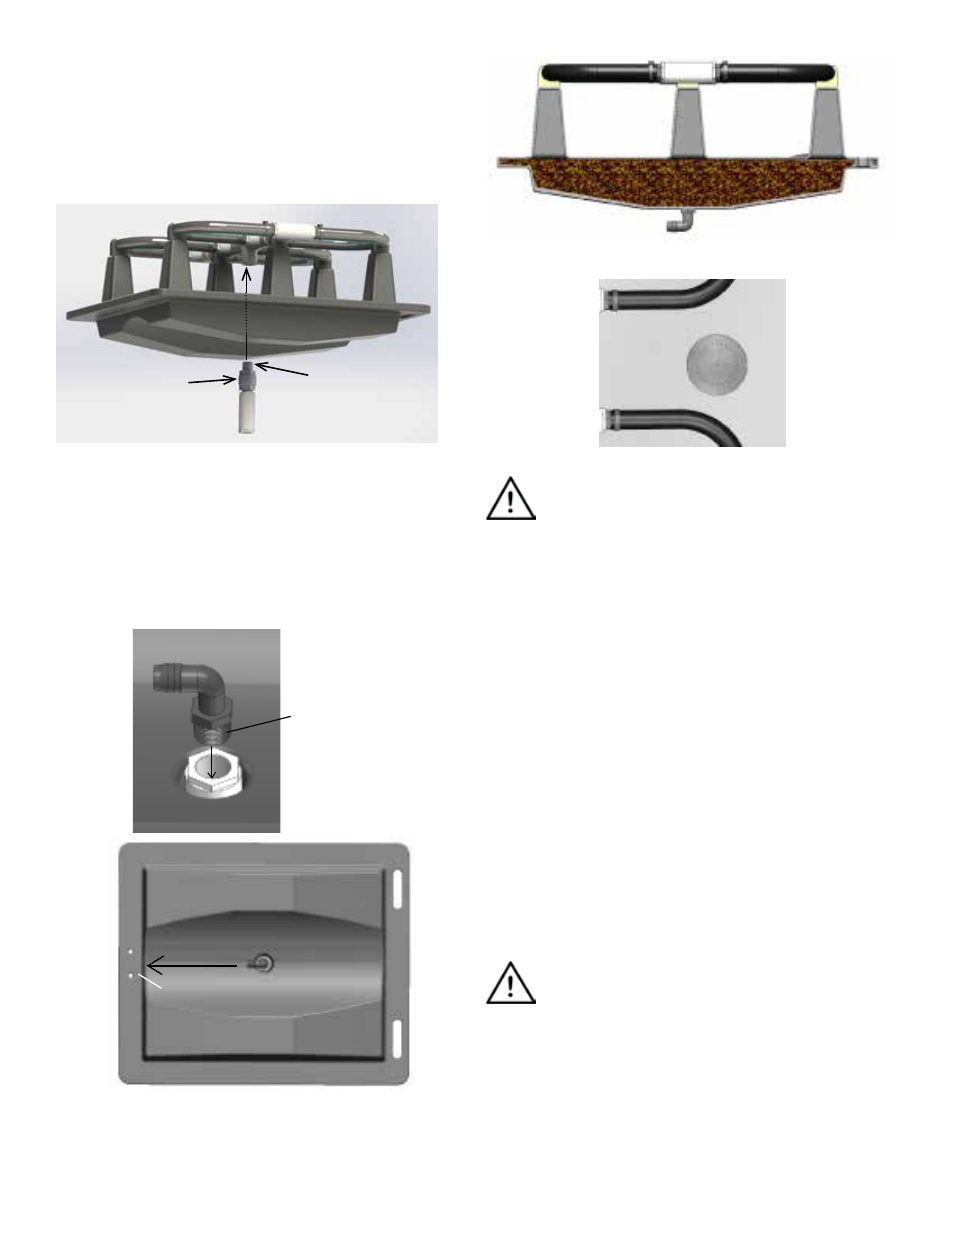
On Shore Preparation
1. Apply PTFE Thread Sealant to male threads on check
valve. Slide check valve inlet assembly through dif-
fuser base and into threaded port of the diffuser air
distribution assembly. Install hand tight only. Do not
overtighten.
Check valve
PTFE
Thread
Sealant
2. Install appropriate elbow fitting into inlet port
located on the bottom side center of the diffuser
assembly. Install until hand tight. Continue
turning using 7/8” open end wrench until barbed
portion of the fitting is pointing towards the edge
of the diffuser assembly with the strain relief
holes.
PTFE thread
sealant
Orientation of Fitting
Strain relief holes
3. Fill diffuser base with pea gravel to allow it to
flow easily into the base.
4. Install vent plug once base is completely full.
CAUTION: Once the diffuser base has been
filled with gravel, do not lift assembly by diffuser hose
or PVC structure. Use outer edges of base to pick up
assembly.
If a boat is being used for diffuser placement, load the
boat with weighted diffuser assembly and remaining
parts kit. Do not use boats that tip easily for installa-
tion, such as a canoe.
Diffuser Assembly Installation
The effectiveness of the Robust-Aire
®
Diffuser is
greatly dependant on where the diffusers are located in
the pond. Therefore, proper placement is key. Space
the Robust-Aire
®
Diffusers equally from each other in
a depth that embodies the majority of the pond. Please
contact Kasco Marine if there are any questions on
placement.
CAUTION: Do not use boats that tip easily for
installation, such as a canoe, and follow all boating safety
rules and regulations, including wearing a PFD. (Personal
Flotation Device)
5. It is recommended to place a buoy for each diffuser to
mark the area that it is to be placed.
6. Unroll the SureSink™ Aeration Tubing on shore to
remove any twists or knots. The performance will