Drill point splitting – Darex XT-3000A User Manual
Page 16
14
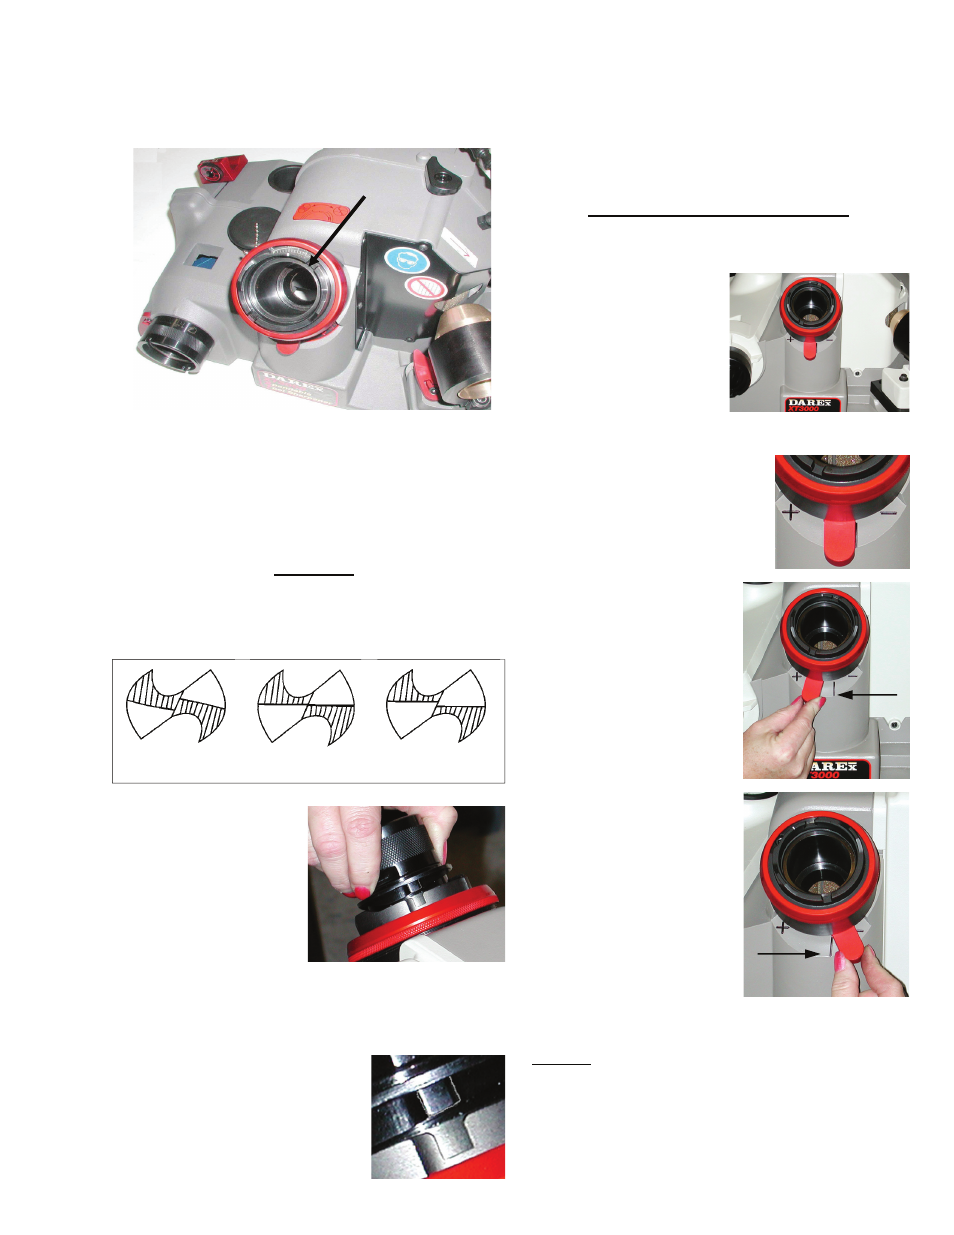
The Point Splitting Port is located in the center
of the machine.
Approximately 3-7° rake is created, producing a
drill with a self-centering point. Its advantages
are the ability to reduce thrust and eliminate
walking at the drill point. This is a distinct
advantage where drill bushings/fixtures are not
used.
Splitting
Upon completion of
the sharpening
procedure, Do Not
loosen the drill in the
chuck. Insert the
chuck into the point
splitting port. Align the
cam dogs with the
slots on the point split
tube. Let the weight of the chuck ease the drill
down and onto the grinding wheel. With slight
pressure, be sure the chuck stays seated in the
point splitter.
When the grinding noise is
reduced to near silence pull the
chuck out about 1/2 way and
rotate it 180 degrees to split
the opposite side of the drill
point.
NOTE: Do not force the chuck into the grinding
wheel or damage to the drill or wheel may
occur.
Adjusting the Depth of Split
The depth of split can vary from drill
manufacturer to drill manufacturer. The point
split depth adjustment
feature designed on the
XT-3000 makes it easy to
mimic multiple split
styles. The point split
depth adjustment lever is
attached to the point
split chuck tube. As you
move the lever, it backs the chuck tube away
from the wheel or moves it
closer into it.
1.
Located on the underside
of the point splitter is the
point split depth
adjustment lever.
2.
To increase the
depth of split, push
lever to the left
toward the + sign.
This will allow the
drill to travel deeper
into the wheel,
increasing the depth
of split.
3.
To decrease the
depth of split, push
the lever to the right
toward the – sign.
This will back the
drill away from the
wheel.
NOTE: To correct a drill that has been split
deeper than desired, you will have to regrind the
drill beyond the over split portion before splitting
again.
Drill Point Splitting
POINT SPLIT DIAGRAMS
DEPTH OF SPLIT DIAGRAM
Past Center
To Center
Below Center