PASCO ME-8930 SMART TIMER User Manual
Page 37
012–06734A
Smart Timer
33
Note: The following experiment is in copy-ready form in the manual for the
Time of Flight Accessory (manual number 012-05088)
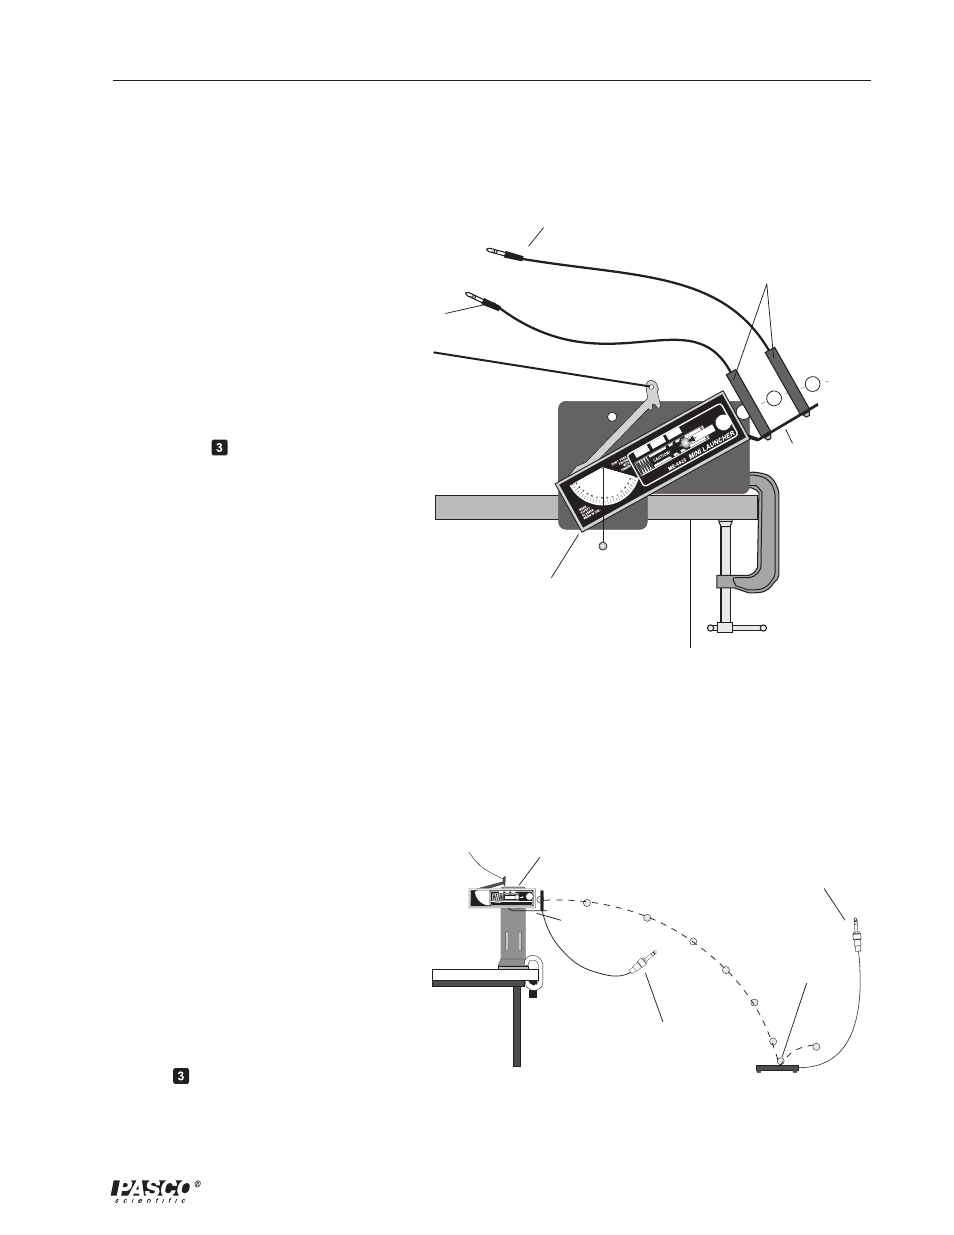
• Time of Flight and Initial
Velocity ( Experiment 1):
Use the Smart Timer instead of a
Photogate Timer, and set the
Smart Timer to measure Time,
Two Gates. Be sure the plug
from the Photogate is connected
to channel 1 of the Smart Timer
and the plug from the Time of
Flight Accessory is connected to
channel 2 (see Figure 9.1). Press
to activate the Smart Timer
and fire the launcher.
Note: The following experiment is in copy-ready form in the manuals for the
Mini Launcher (manual number 012-05479) and the Ballistic Pendulum/
Projectile Launcher (manual number 012-05375)
• Projectile Motion Using
Photogates ( Experiment 2):
Use the Smart Timer instead of a
computer and IDS Timer
software, and set the experiment
up as directed in the experiment.
Plug the photogates into the
Smart Timer as shown in Figure
8.1, and set up the Smart Timer
to measure Time, Two Gates.
Press
to activate the Smart
Timer and fire the launcher.
Calculate the initial velocity
using the time required for the
ball to pass through the
photogates.
ME-6800
SHORT RANGE
PROJECTILE LAUNCHER
WEAR
SAFETY
GLASSES –
WHEN IN USE.
CAUTION!
DO NOT LOOK
DOWN BARREL!
CAUTION!
DO NOT LOOK
DOWN BARREL!
Projectile
Launcher
Photogate
Mounting Bracket
To Smart Timer
channel 1
To Smart Timer
channel 2
Time of Flight
Accessory
Figure 9.1
Setup for the
Timer of Flight and Initial Velocity Experiment
Photogates
To Smart Timer
channel 2
To Smart Timer
channel 1
ME-6825 Mini Launcher
(or ME-6800 Projectile
Launcher)
Figure 8.1
Setup for the
Projectile Motion Using Photogates Experiment
Photogate
Mounting
Bracket