Experiment (continued), Figure 4: experiment setup, Tube clamp – PASCO TD-8579A COMPUTER-BASED THERMAL EXPANSION APPARATUS User Manual
Page 9
Computer-based Thermal Expansion Apparatus
012-07599C
®
6
LOW WATER
ON
OFF
117VAC
STEAM
GENERATOR
MODEL TD-8556A
5
4
3
2
1
6
7
8
CAUTION: DO NOT IMMERSE IN WATER!
115 VAC 5A
220 VAC 2.5A
LOW
HIGH
scientific
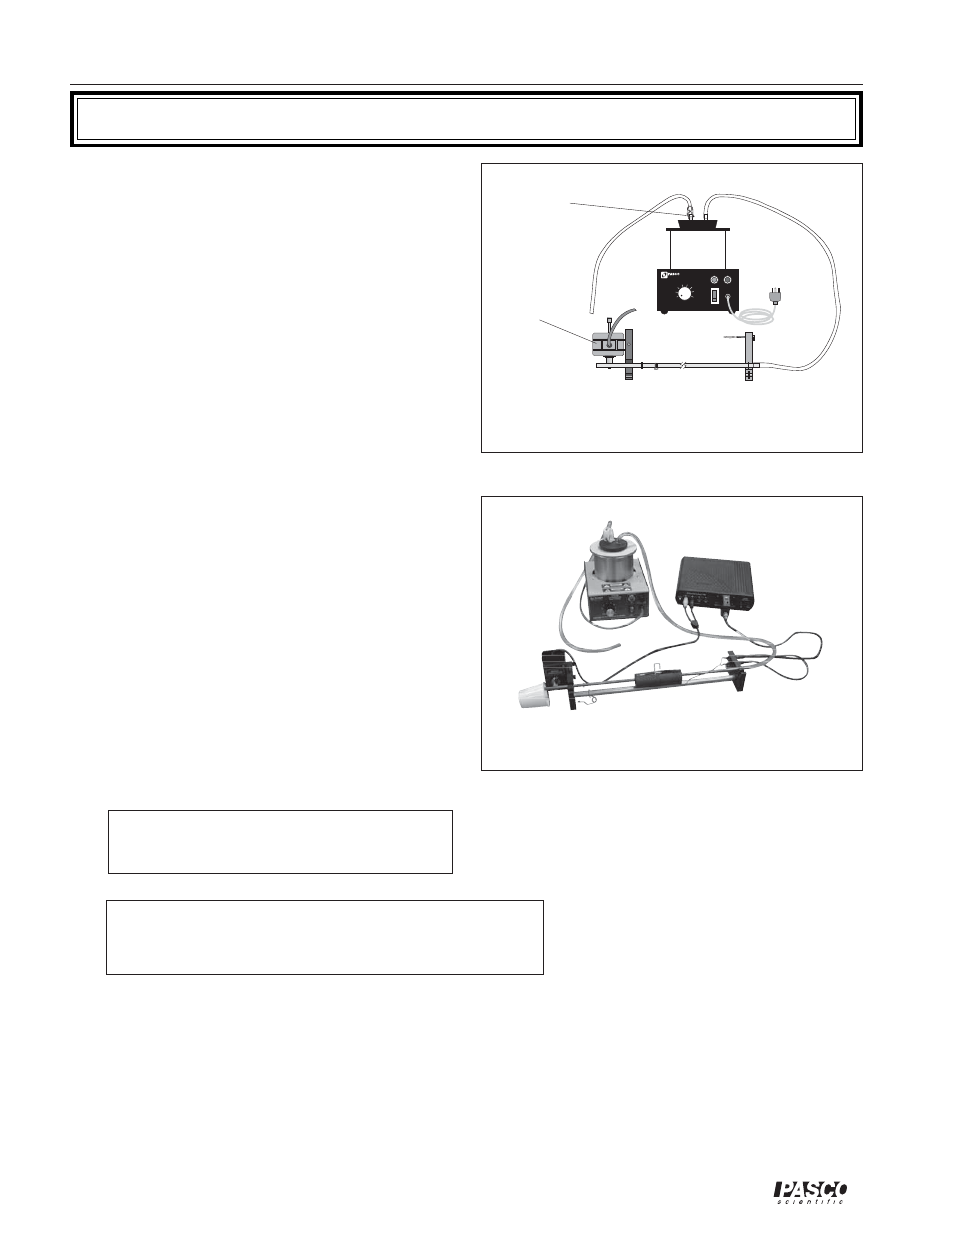
Figure 4: Experiment Setup
5.
Fill the Steam Generator half to three-
quarters full with water. Plug the Steam
Generator into a three-receptacle outlet.
[Do not use another outlet. Please refer to
the Steam Generator instruction sheet (012-
04696) for appropriate safety precautions
and settings.]
6.
Turn on the Steam Generator and wait for it
to warm up. When you first hear a gurgle
sound, (but before the steam travels through
the clear tubing), click the START button to
begin recording the temperature. Steam will
begin flowing through the rod shortly
thereafter. As steam begins to flow, watch
the temperature rise in the DataStudio Graph
display as the rod heats.
Figure 3: Connecting the tubing from the Steam
Generator to the Thermal Expansion Apparatus
4.
In DataStudio, load the provided setup
diskette. (For more information on software
setup, see page 4).
3.
Cut and place the plastic tubing over both
ports on top of the lid covering the Steam
Generator (See Figure 3). [Note: Cut the tubing
enough to allow it to reach the rod on the
apparatus, but keep the tubing as short as
possible, to prevent kinks and maximize rapid
heat transfer.] Plug one end off with a plastic
tube clamp. Connect the plastic tubing on the
other port to one end of the metal rod (the
labeled end block, away from the Rotary
Motion Sensor).
Note: Have a styrofoam cup or other basin available
to capture the steam running off the rod (the end
closest to the Rotary Motion Sensor.
tube
clamp
Experiment (Continued)
When the temperature reading stabilizes, record the temperature change
(∆
T) in Table 1. Also record
the expansion of the rod's length (
∆
L), as indicated by the position displacement (x in mm). [Note: If
you want to increase the precision of your measurements, click on the Calculator button. In the
Calculator dialog, click on Properties. Under Precision, enter the number to indicate the number of
decimal places to display.]
7.
In DataStudio, save your activity file for the aluminum rod. Repeat the experiment for the copper and
brass rods.
CAUTION: THE STEAM GENERATOR AND
METAL ROD WILL BE HOT. TO AVOID
BURNS, DO NOT TOUCH!
Rotary
Motion
Sensor