Apparatus calibration – PASCO AP-8214A Stress_Strain Apparatus User Manual
Page 6

®
S t r e s s / S t r a i n A p p a r a t u s
0 1 2 -1 3 2 8 2A
E q u i p m e n t S e t - u p
6
Apparatus Calibration
As you turn the crank during the experiment, force will be applied to the test coupon causing it to stretch. However,
this applied force will also cause the apparatus platform and the Force Sensor to bend slightly. The displacement
recorded by the RMS will be the combination of the coupon stretching and the rest of the apparatus bending.
Regardless of how much the coupon stretches, the deformation of the rest of the apparatus is constant for a given
force. You can measure this deformation directly by using the calibration bar (which does not stretch significantly) in
place of a coupon. In the resulting Displacement versus Force graph, the displacement is due only to bending of the
apparatus. Later, you will subtract this calibration plot from a similar plot made with a coupon, in which the displace-
ment results from both bending of the apparatus and stretching of the coupon. The difference will be a plot in which
the displacement is due only to stretching of the coupon.
Follow these steps to acquire calibration data:
1.
Install the Calibration Bar
•
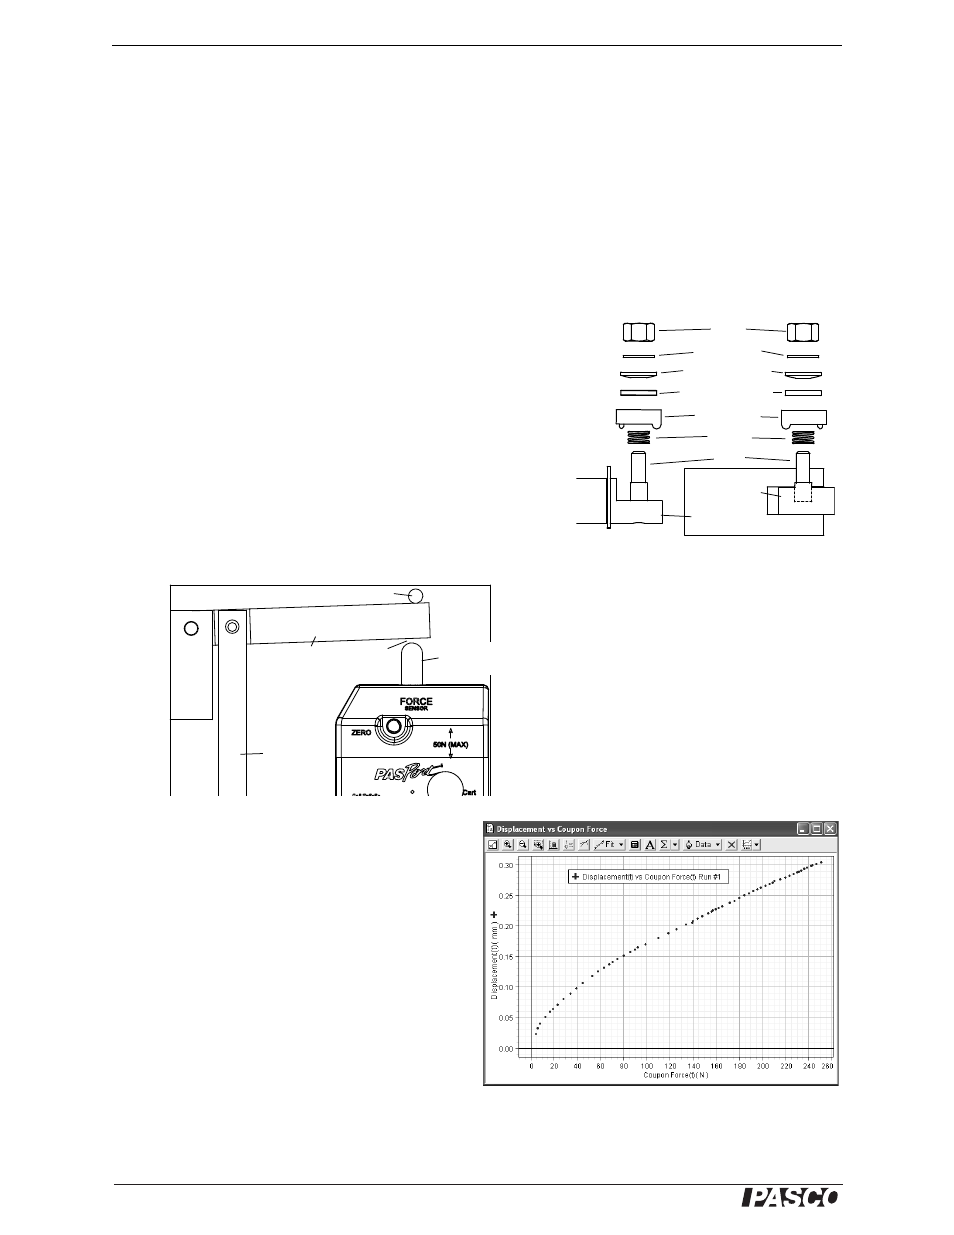
For each coupon clamp, remove the nut, washers, clamp top,
and spring from the bolt (Figure 10).
•
Turn the crank to adjust the position of the bolts if needed and
slip the calibration bar over the bolts. Do not replace the coupon
clamp parts when using the calibration bar.
2.
Place the lever arm in the starting position. Turn the crank
counter-clockwise and pull the lever arm away from the Force
Sensor (Figure 11).
3.
Collect Displacement versus Force Data.
•
Press the Tare or Zero button on the Force Sen-
sor.
•
Click the Start button.
•
Turn the crank clockwise. Starting just before
the lever arm comes into contact with the Force
Sensor attachment, turn the crank very slowly.
DataStudio will start recording when the force
applied to the coupon reaches 2.5 N, or 1% of
maximum (as shown in the “% Max Force” dig-
its display).
•
Continue to turn the crank until the force reaches
100% of maximum. At this point, DataStudio
will stop recording automatically.
Fig. 10: Remove clamps (side view)
nut
flat washer
convex washer
concave washer
clamp top
spring
bolt
lever arm
plunger
calibration
bar
lever arm
force sensor
attachment
Fig. 11
gap
lever arm stop
Fig. 12: Displacement(t) vs Coupling Force(t)
calibration data
