4 programming anti-pass back – DoorKing Remote Account Manager User Manual
Page 39
3.6.4
Programming Anti-pass Back
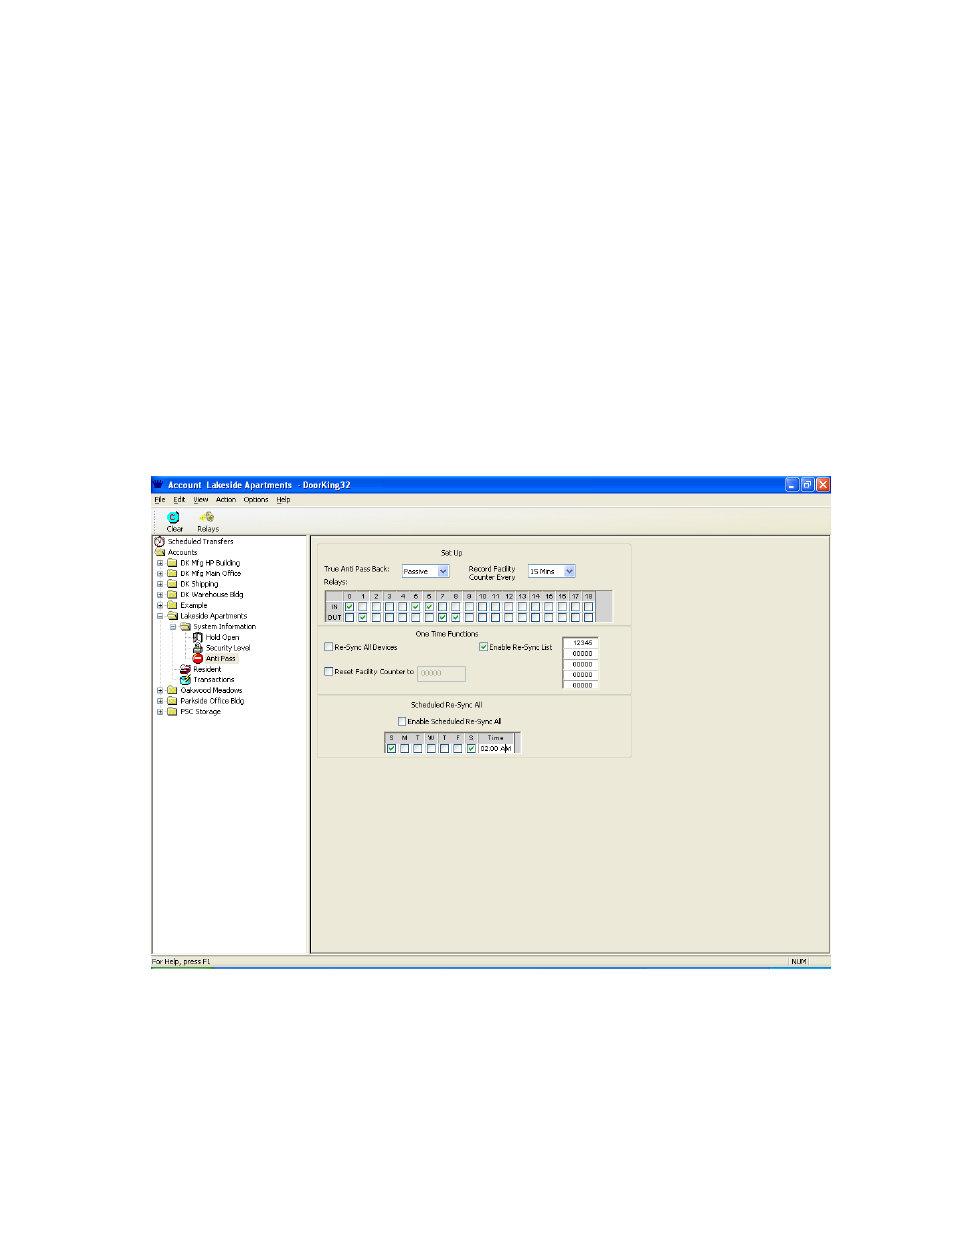
1. Click Anti-Pass under the System Information folder in the sidebar or click the Anti-Pass button in
the tool bar. The Anti-Pass Back window will appear.
2. Select PASSIVE, ACTIVE or TRAP anti-pass back mode from the pull-down menu.
3. If the counter is going to be used, select the time interval from the pull-down menu, otherwise leave
the selection to OFF.
4. Select which relays are to be designated as IN, and which relays are to be designated as OUT.
You can click the RELAY button that will bring up the relay screen that was programmed in 3.2.1
and 3.2.2 to show how each of your relays are currently labeled.
5. One Time Functions – Selecting Re-Sync All Devices will cause all devices to be re-synced at the
next download. Selecting Enable Re-Sync List will cause only the card number(s) entered in the
list to be re-synced at the next download. Up to five (5) card numbers can be entered on this list.
6. Check the Reset Facility Counter button and enter the number of cards currently in the facility. If
the facility counter is not used, leave this blank.
7. Click the Enable Scheduled Re-Sync All button to enable the re-sync schedule. The system will
automatically re-sync all card codes at the time and dates specified in the schedule.
8. Click OK to save the Anti-Pass Back setup and return to the SYSTEM INFORMATION window.
Figure 32
1835-066-N-7-13
Page
39